
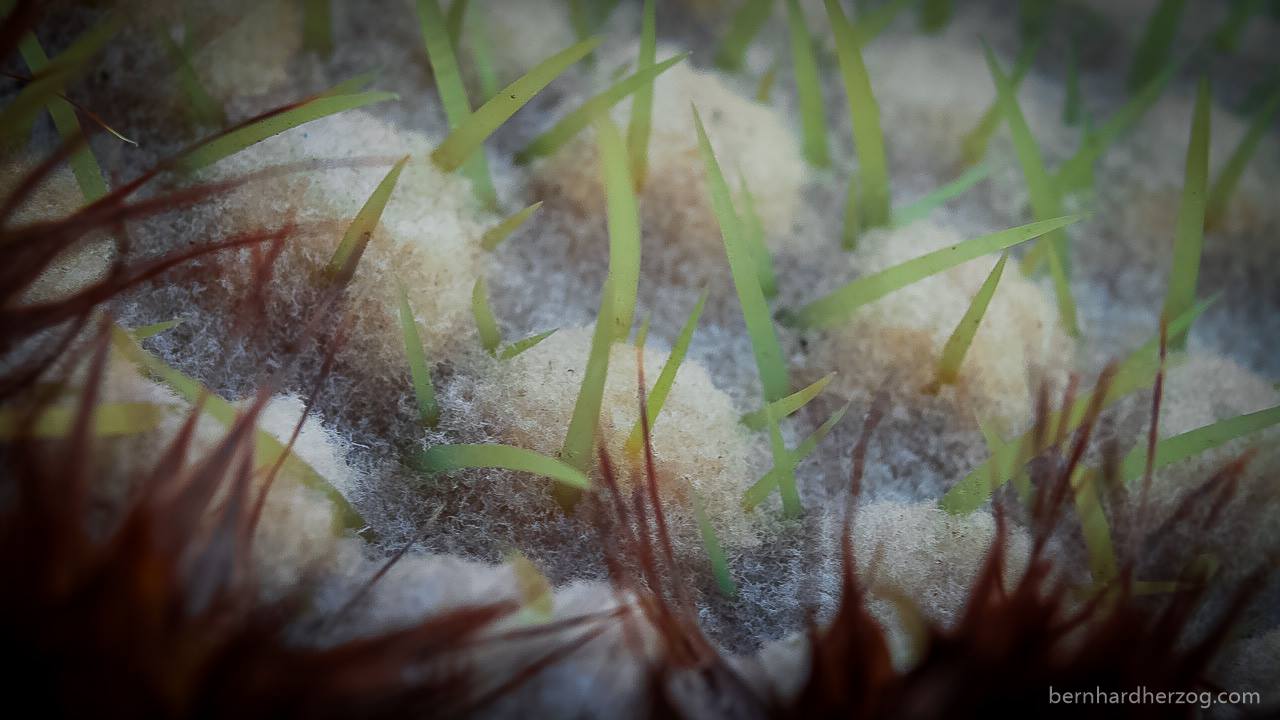
Macro-Photography opens a whole new world. I want to show you how you can do it for cheap. Read on to see my top tips.
YouTube-Video
Macro Lenses vs. Extension Tubes
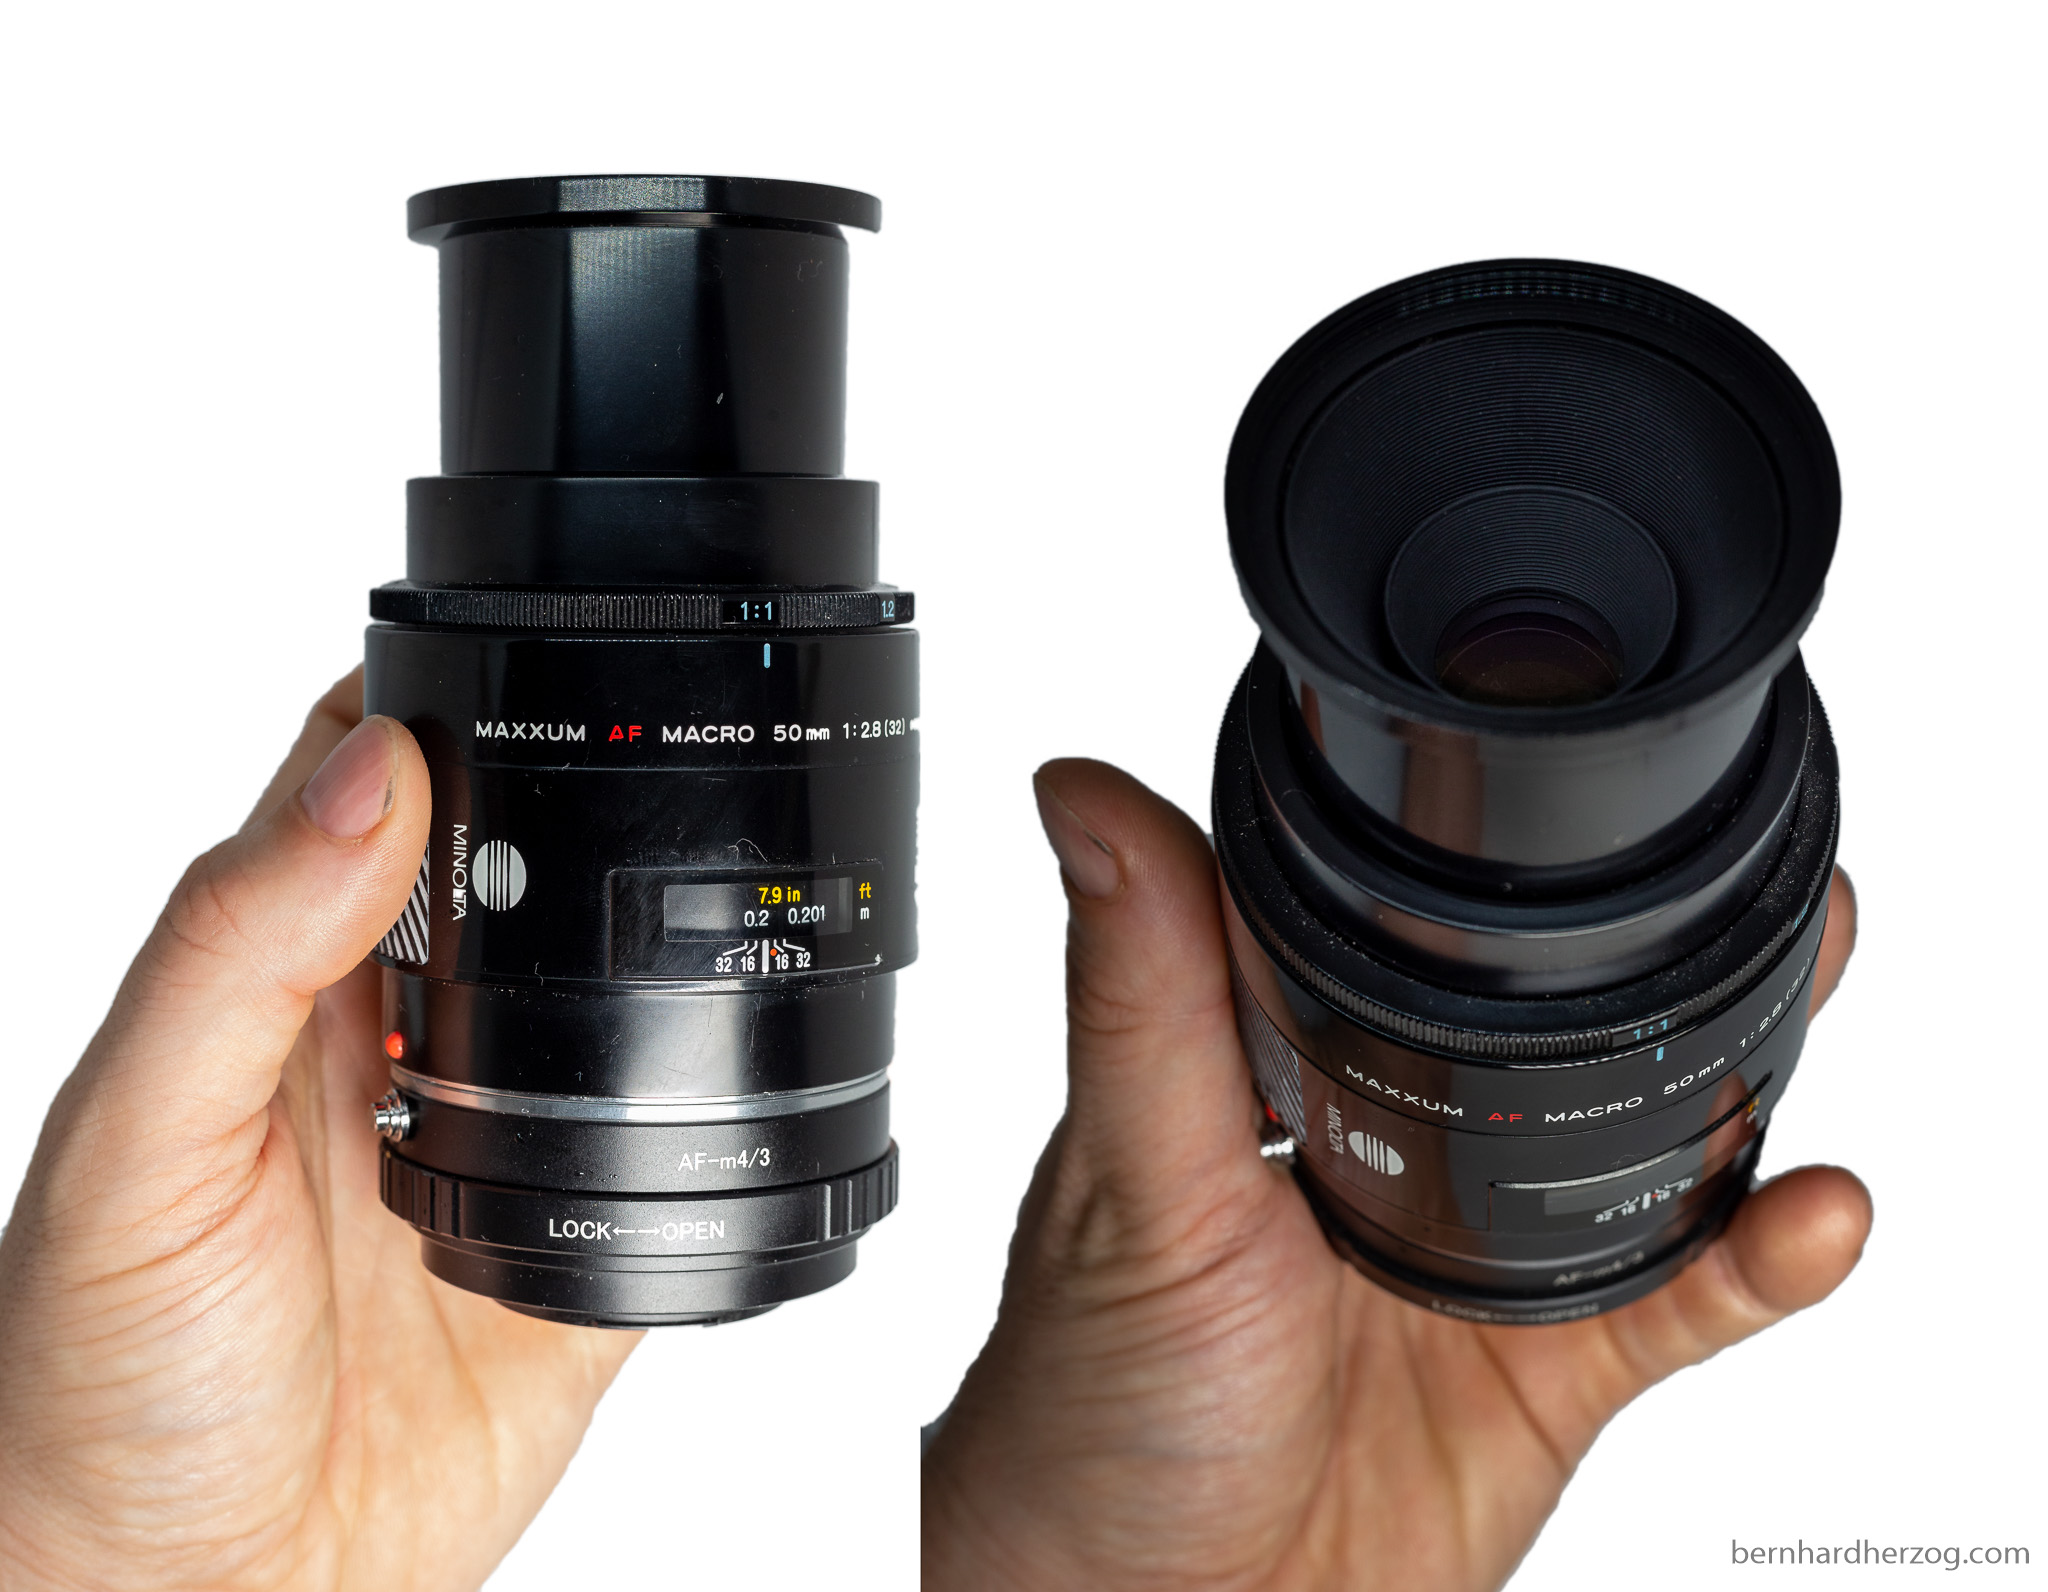
Dedicated macro lenses are quite expensive. One option is to buy a vintage macro lens and use an adapter to put it on your camera.
Another option is to use extension tubes that you put between the camera and the lens. This reduces the minimum focus distance and you can get more close to your subject.

The disadvantage of using extension tubes is that you have to get really close like 1-2cms. Also the pictures will not be as sharp as using a macro lens, because the lens you are extending is usually not built for that resolution.
The advantage of using extension tubes is that they are very cheap and also lightweight. You can use them for travel and don’t need to carry another heavy lens just for macro photography.


But – macro lenses are of very good use for portrait photography. With extension tubes you are basically limited to the macro distance. But you can always remove them and use the lens as originally intended.
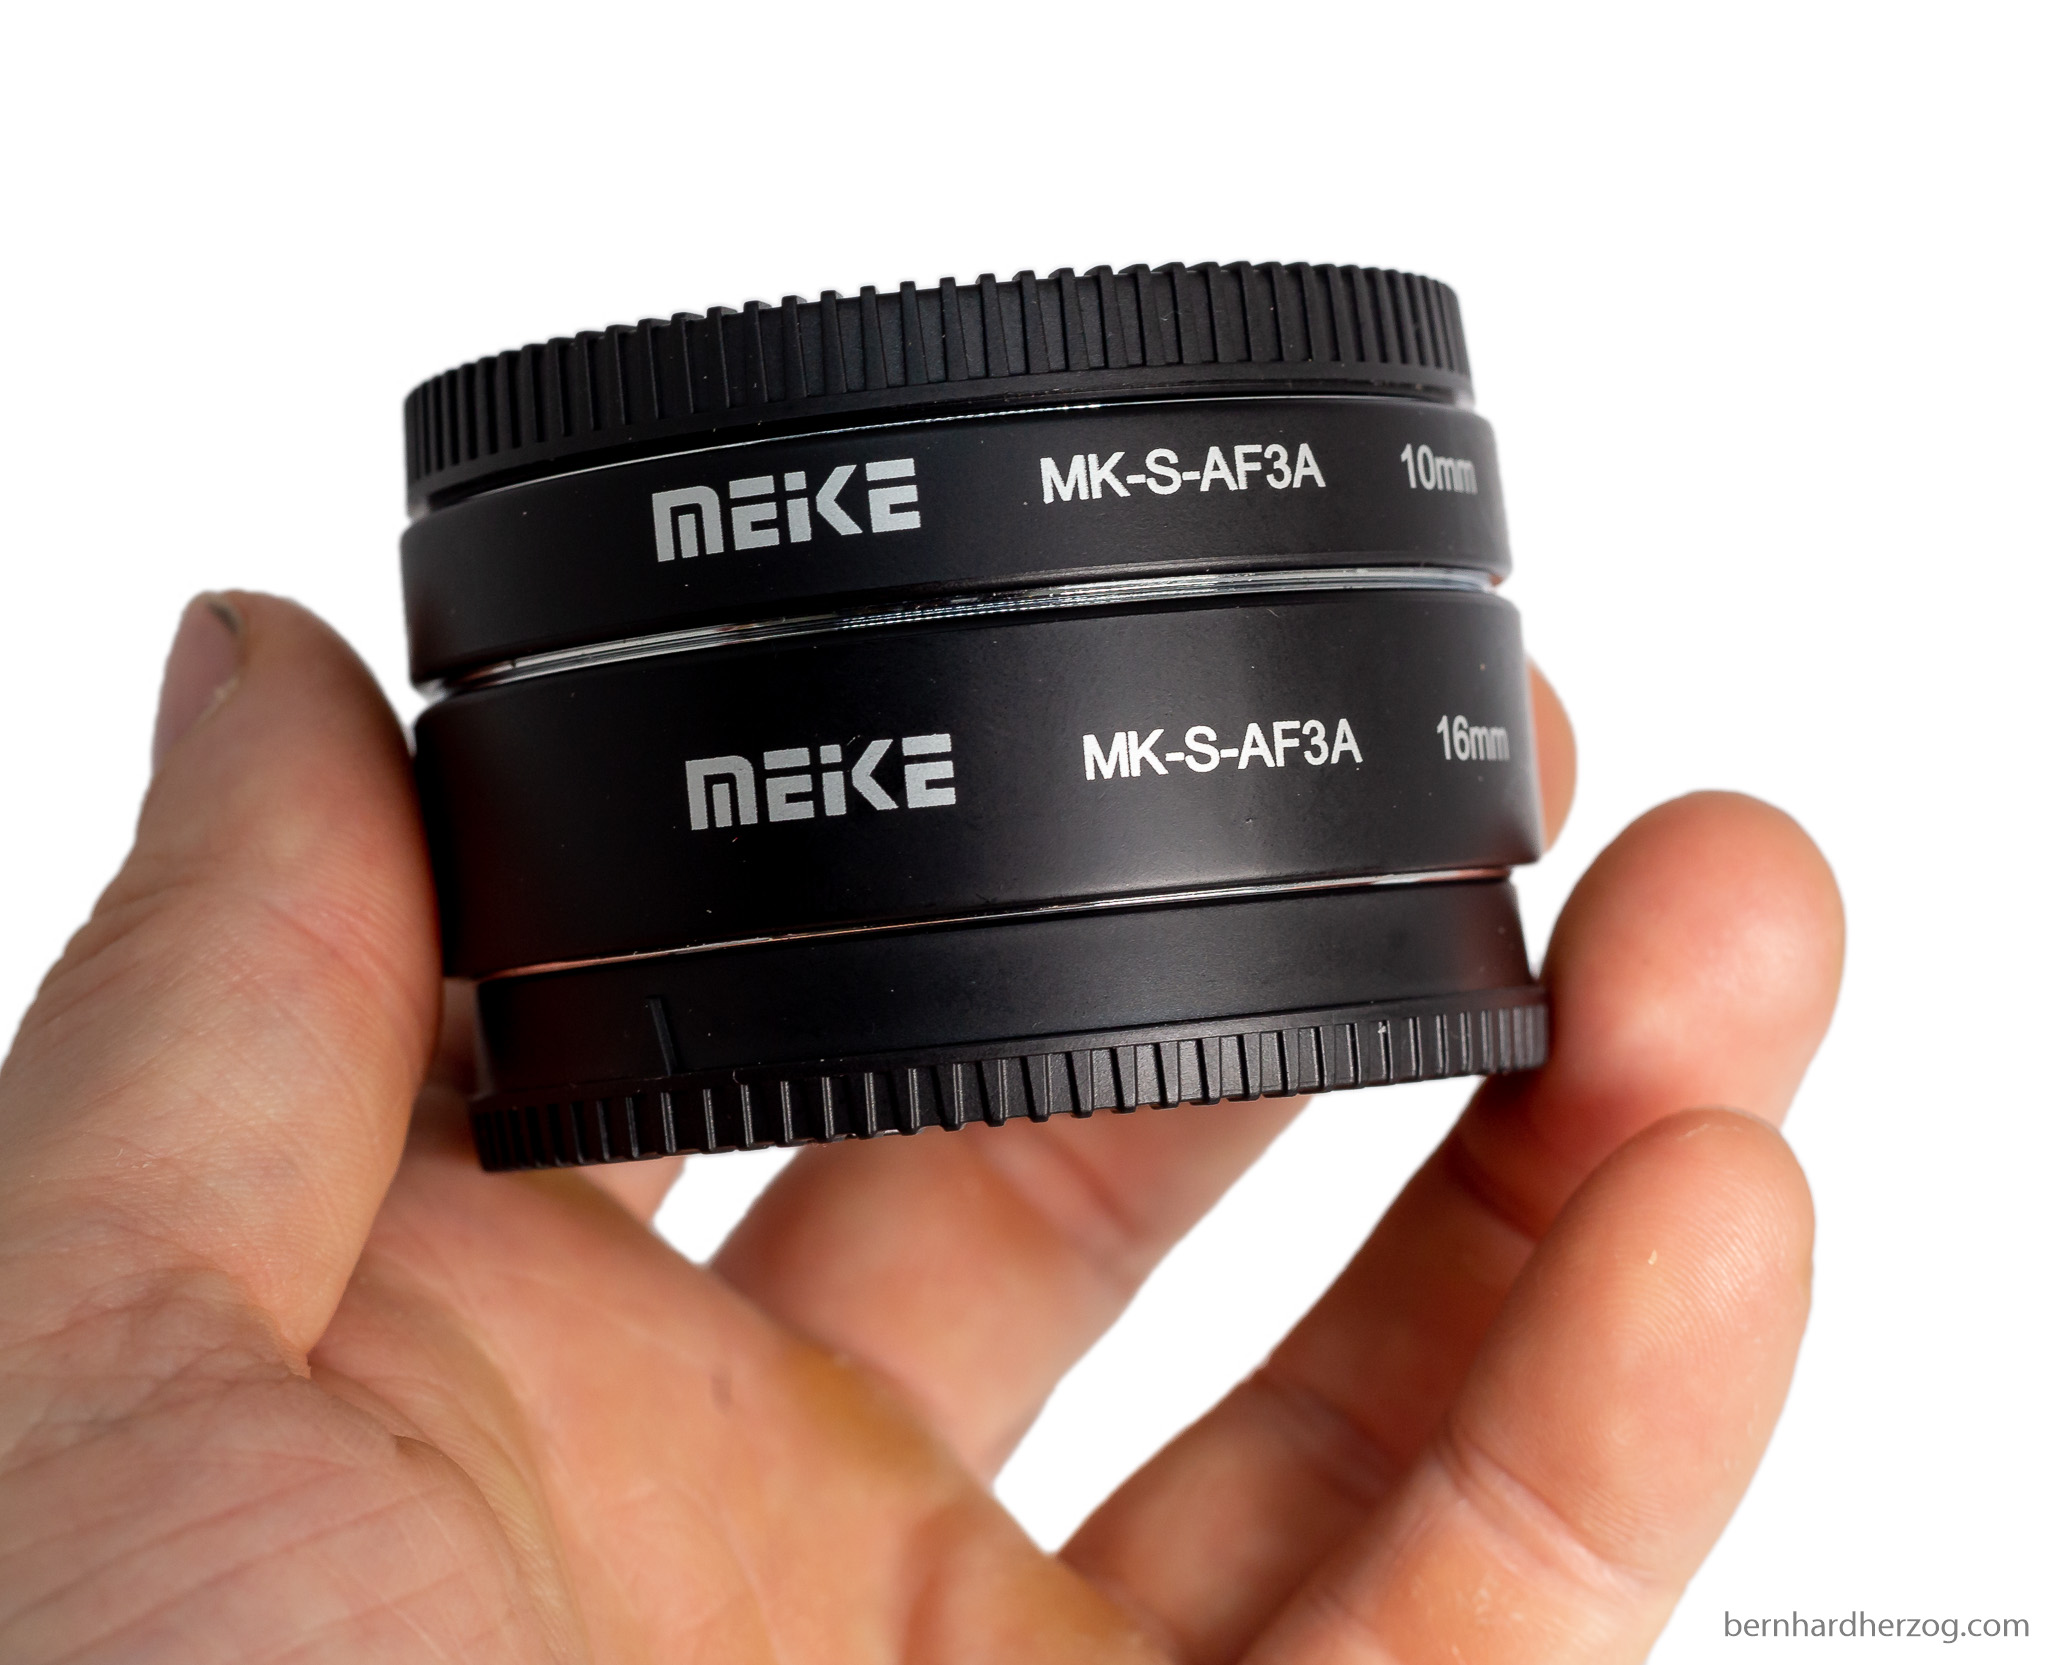
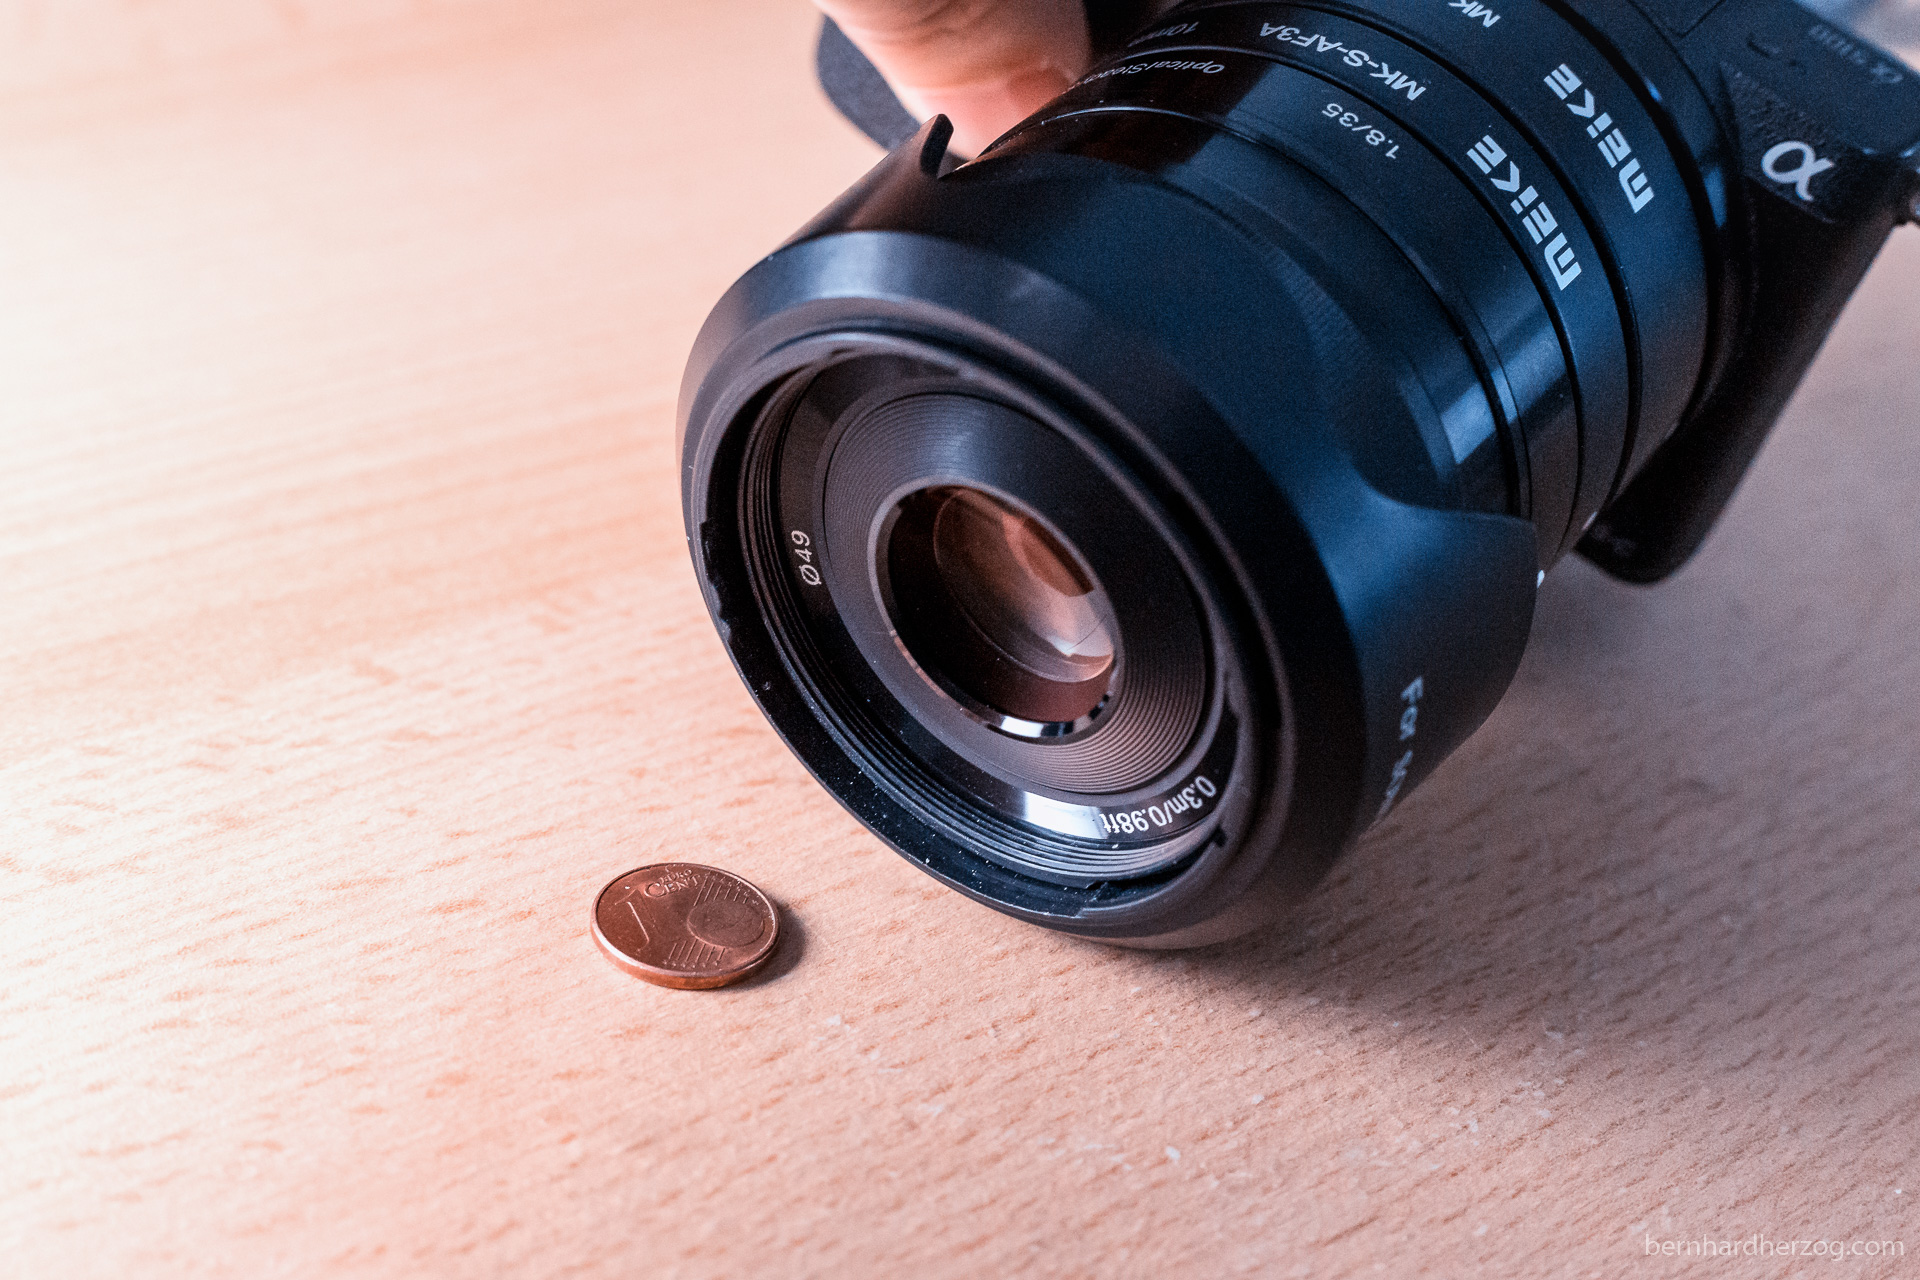
Meike MK-S-AF3A for Sony E-Mount
For my Sony camera I chose the Meike MK-S-AF3A. Those extension tubes have metal mounts.
Buy Meike Extension Tubes @ amazon.de
Buy Meike Extension Tubes @ amazon.com
Buy Meike Extension Tubes @ amazon.co.uk
Buy Meike Extension Tubes @ amazon.fr
Buy Extension Tubes @ amazon.ca (from Neewer)
Those tubes are more durable. There is also a plastic version which is cheaper, the Meike MK-S-AF3B.
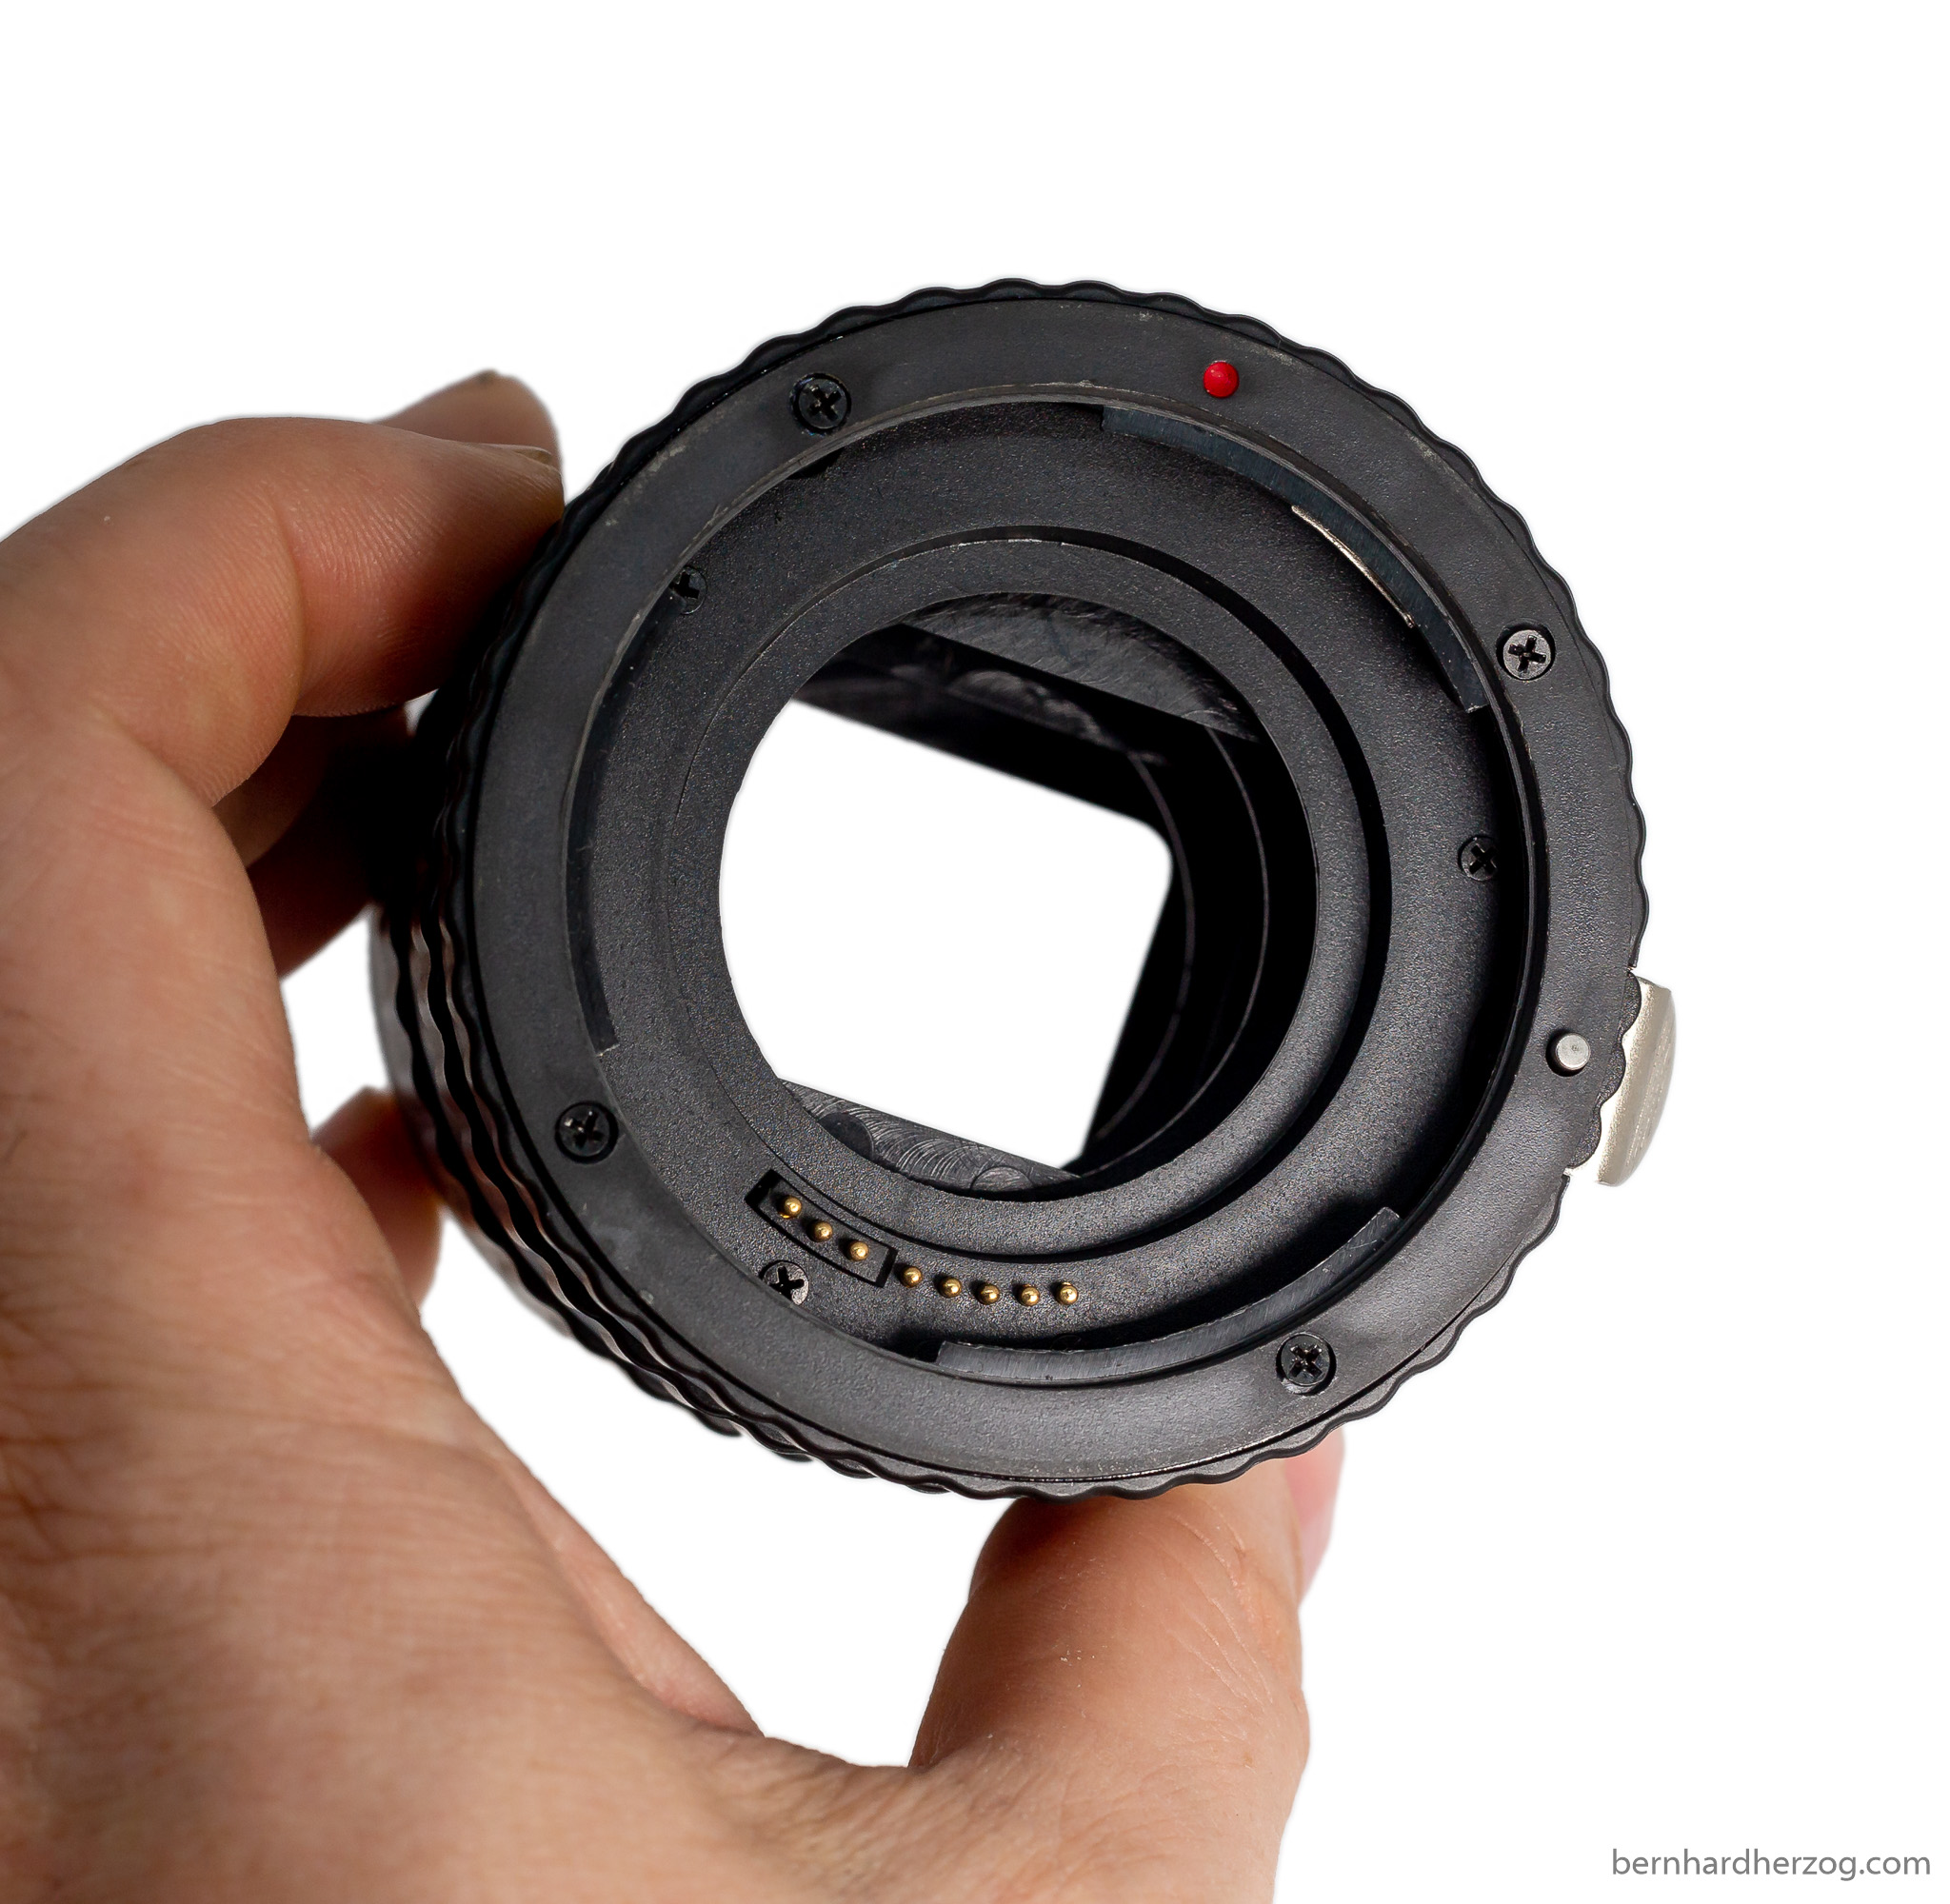
The tubes don’t contain any optics.
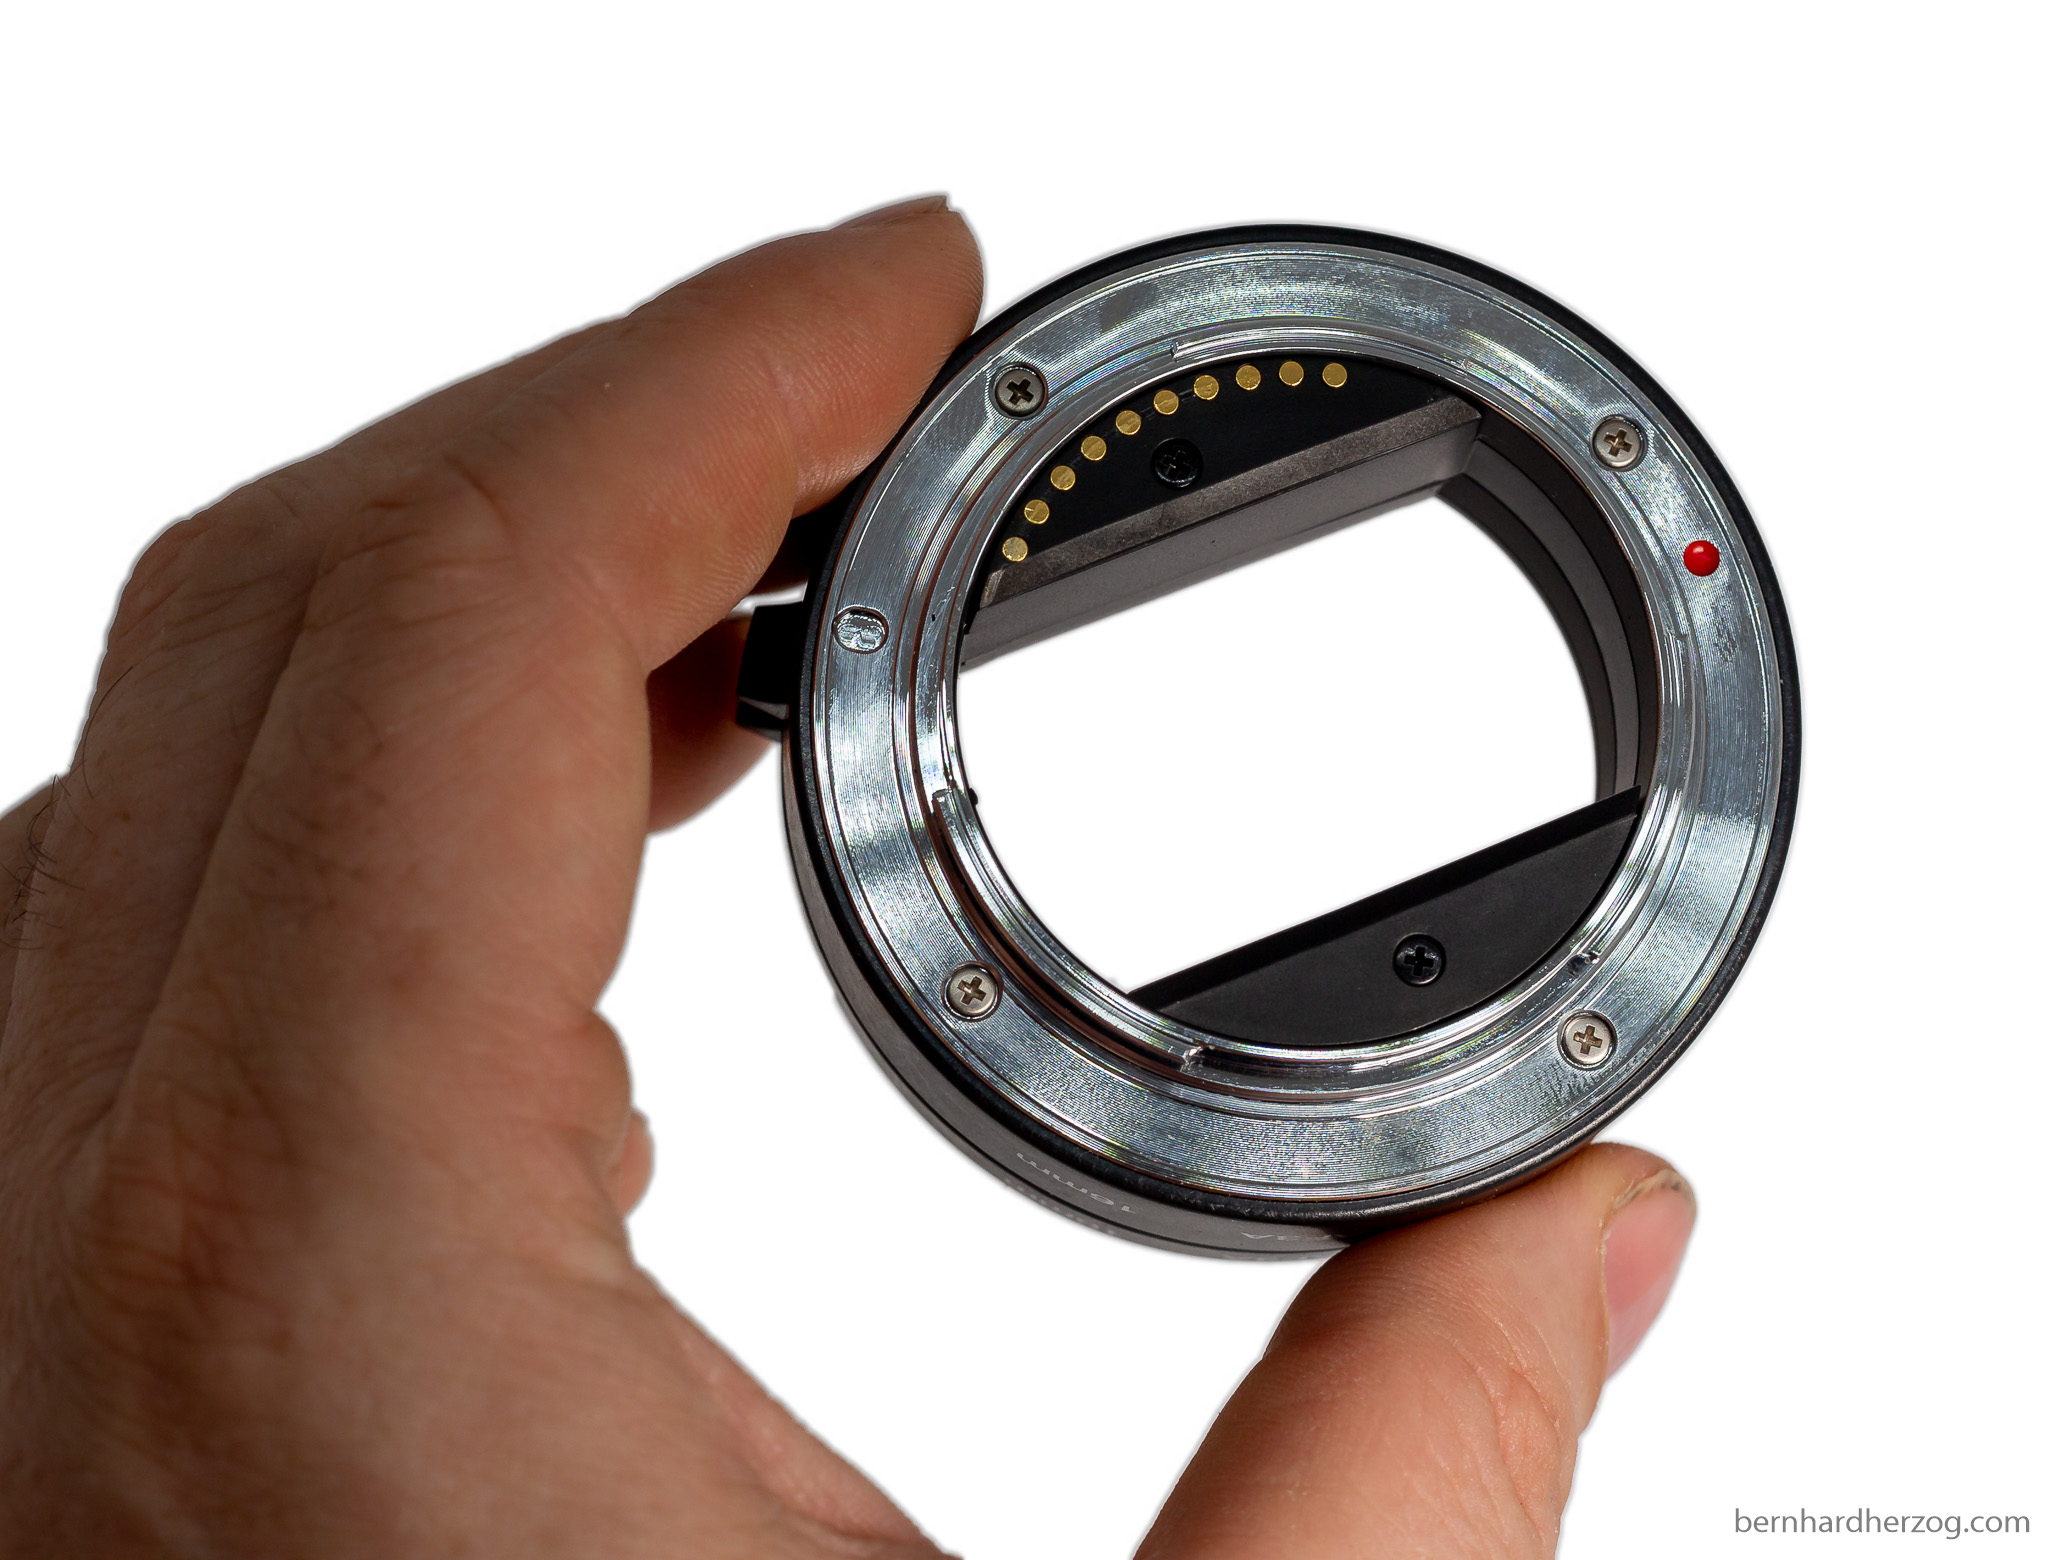
But they have electronic contacts which is important for aperture control.
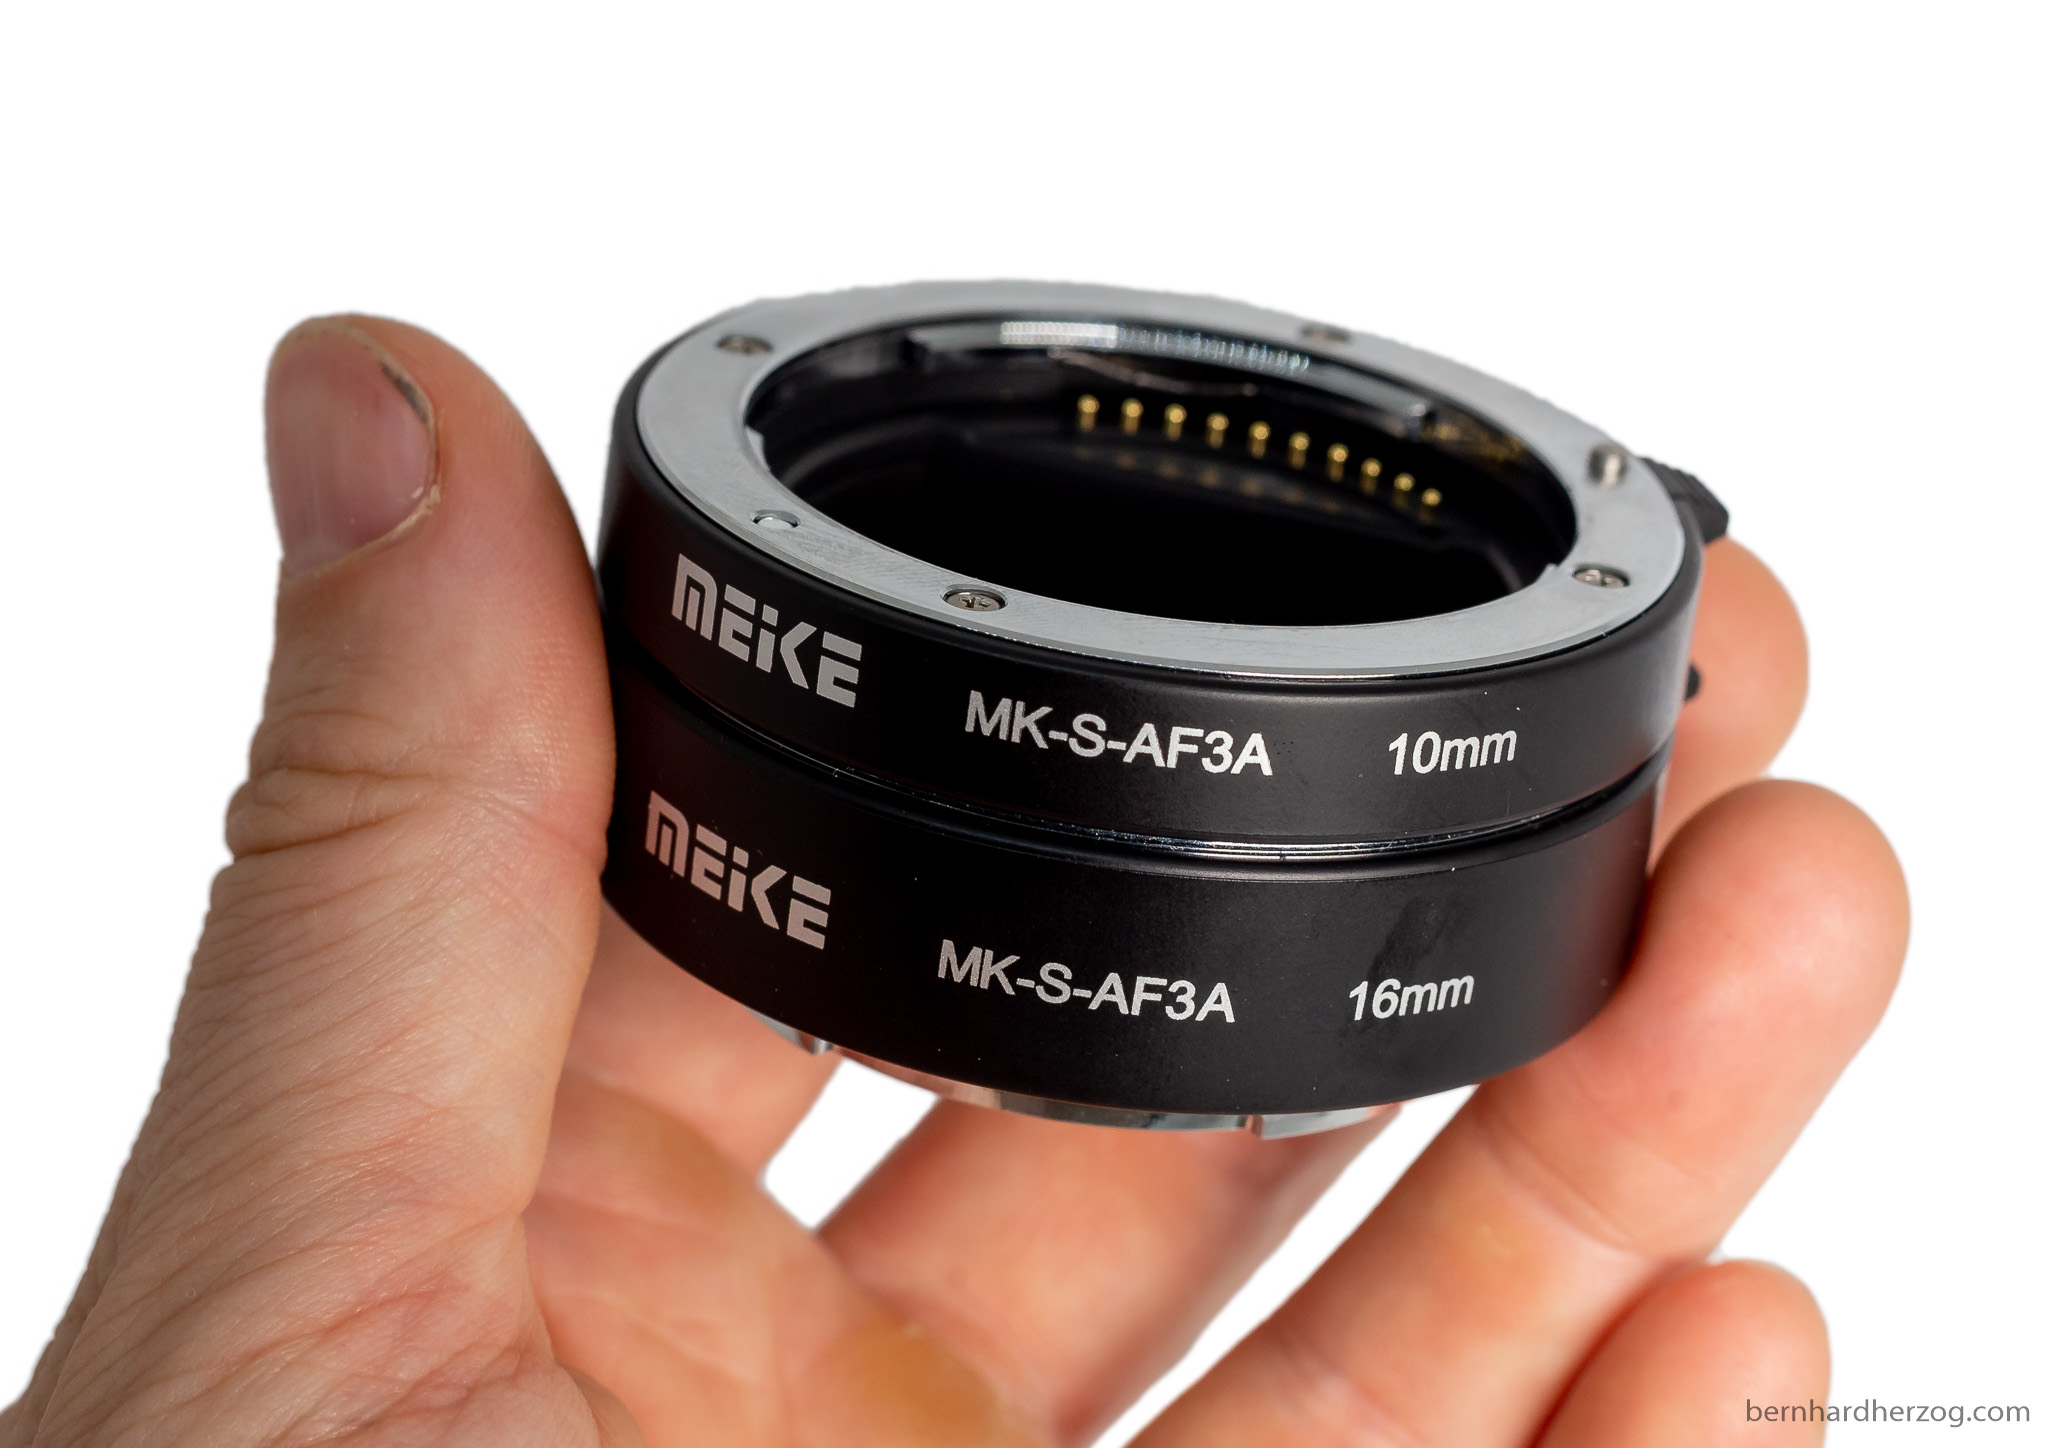
Autofocus is not so important for macro photography but it is nice that it is also working.
They are of very high quality and I am happy with them.
Plastic tubes for Canon AF Mount
I have another set of tubes for my Canon full-frame camera.
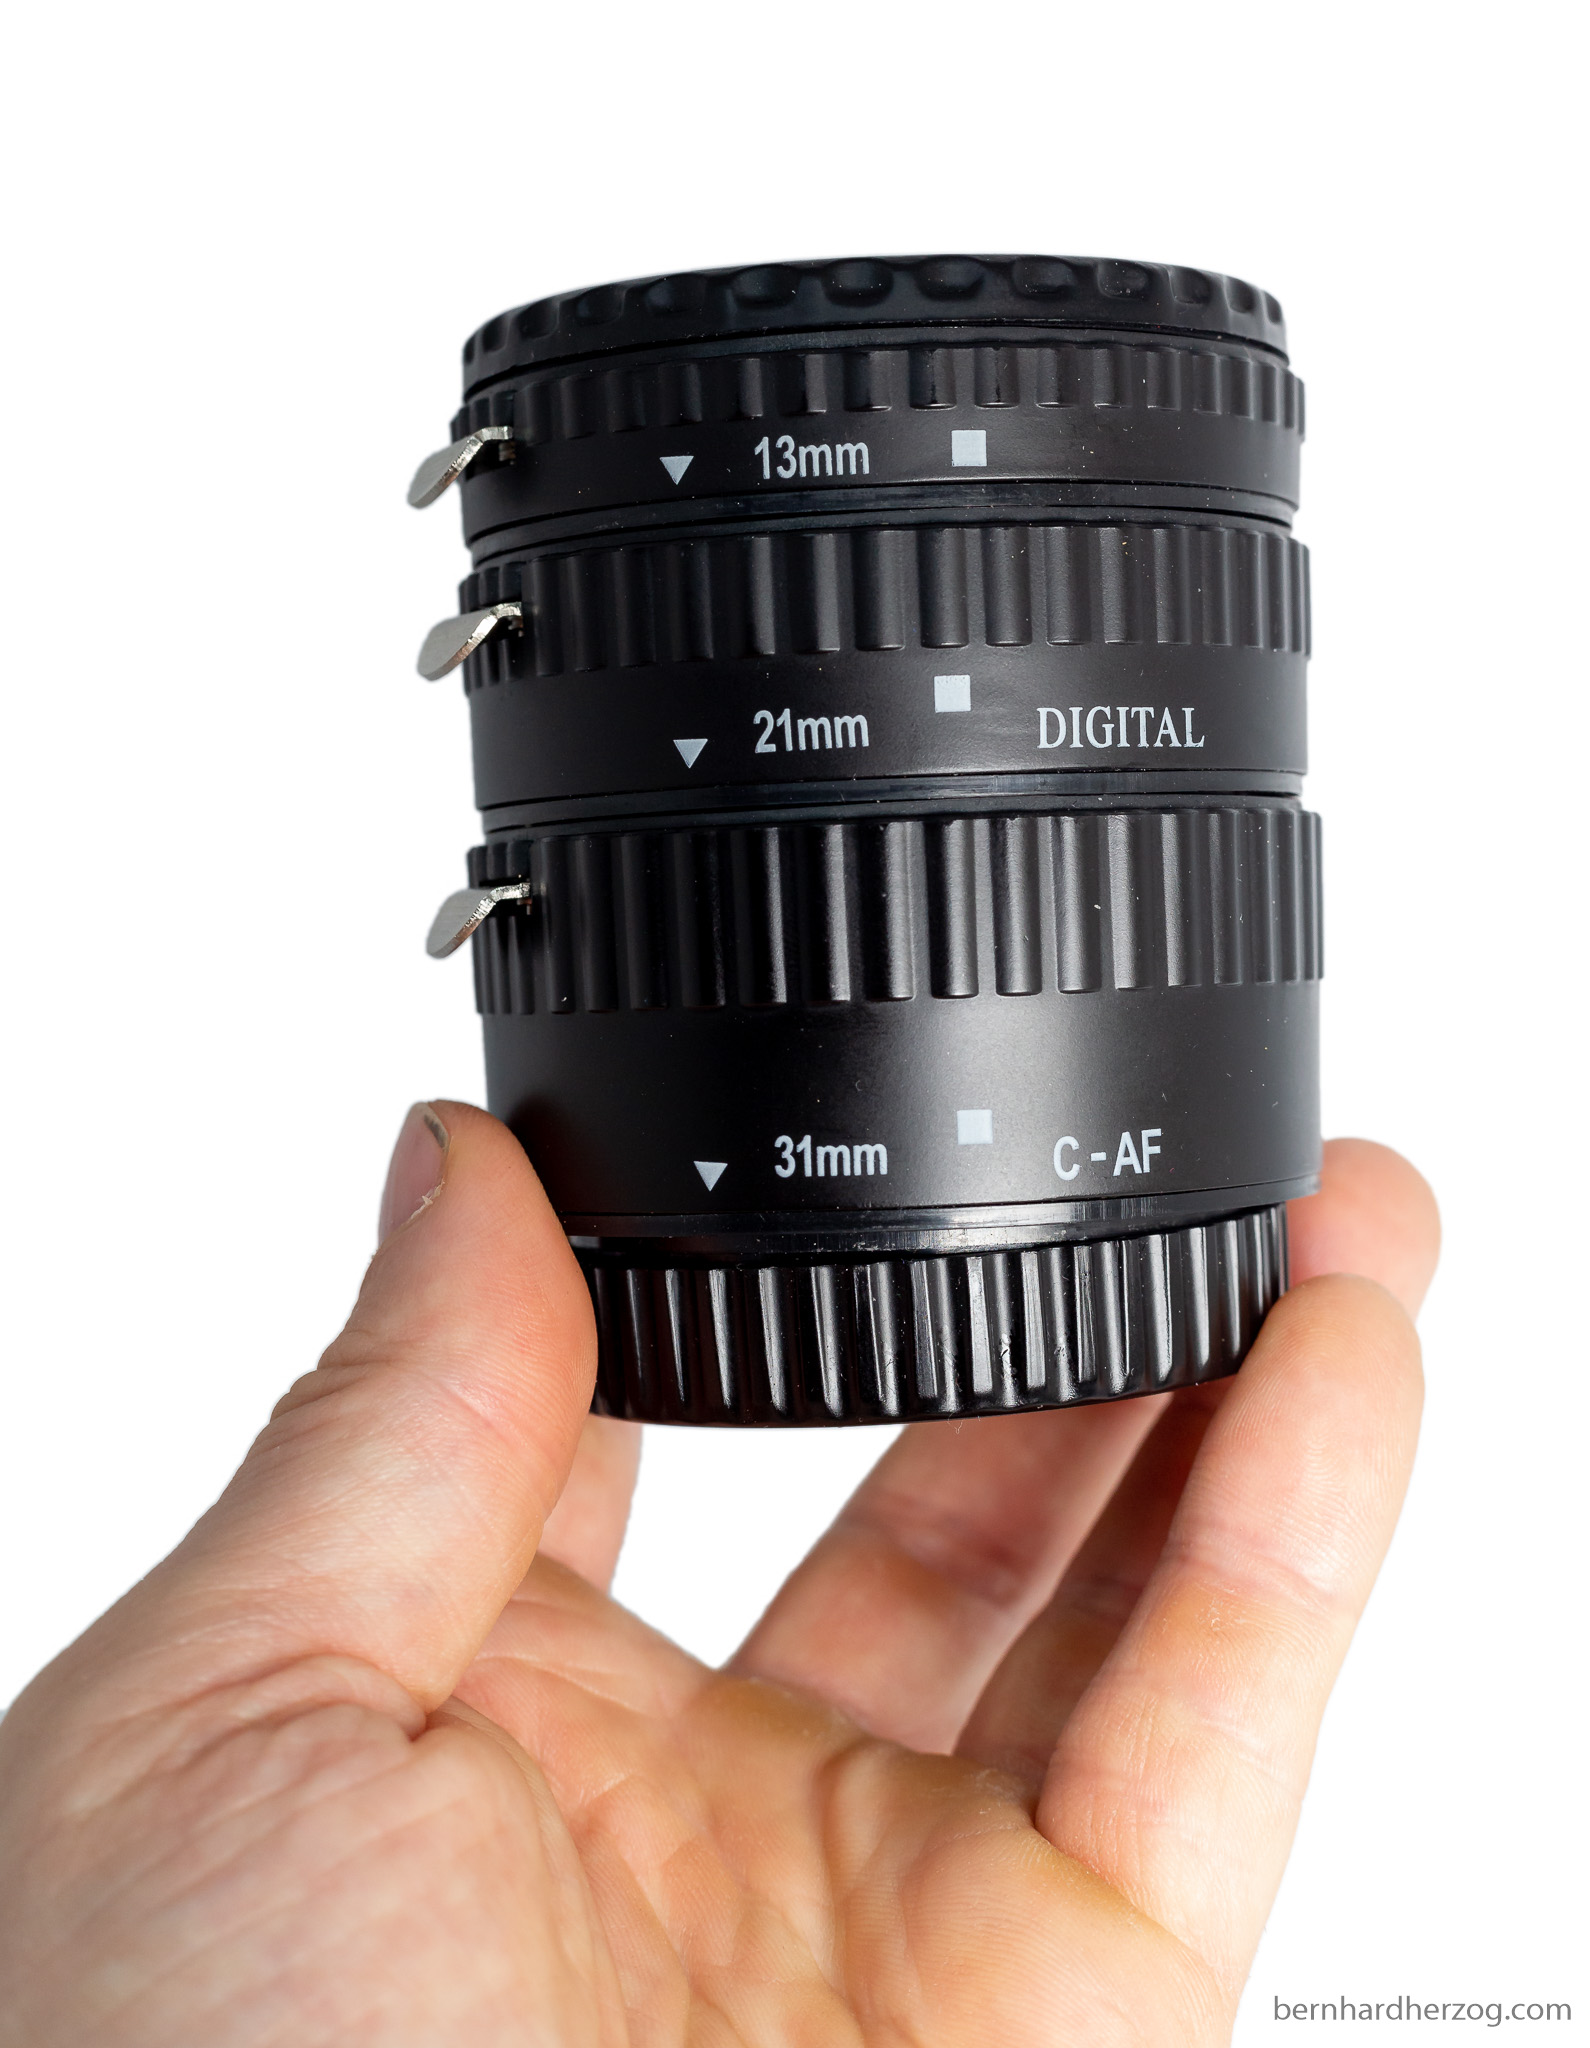
They also have contacts for the electronics but are made of pure plastic.
They work fine but I would not recommend buying those if you want to use them often because the plastic is not very robust. Then I recommend buying tubes of which the mounting part is metal.
10 tips for macro photography
1. Use a Tripod
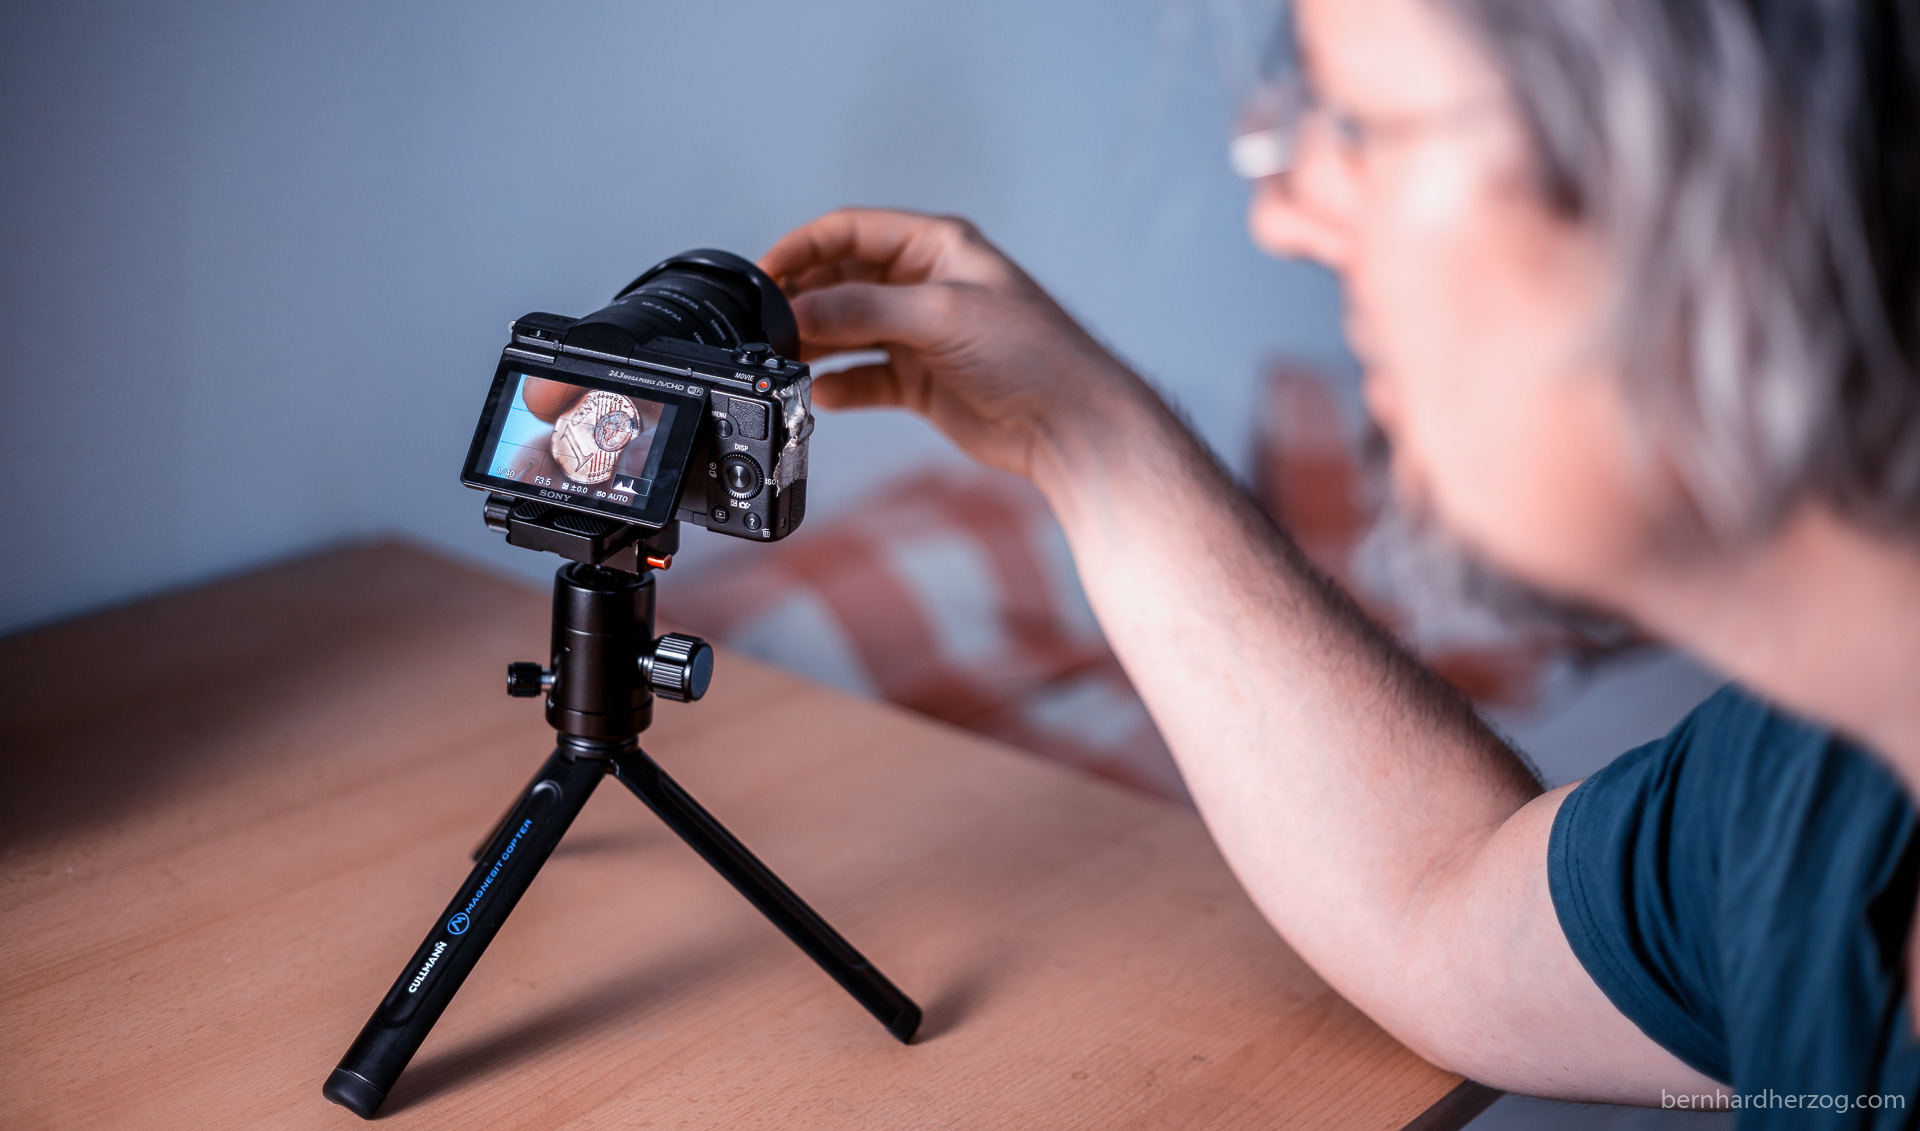
With macro photography the depth of field is very narrow. Small movements forward and backward with the camera to change the focus are more efficient than changing the focus on the camera. Activate manual focus and put the camera on a tripod. You can change the focus by moving the tripod forward and backward.
There are also macro rails to put on the tripod so you can move the camera ever so slightly by turning a knob and the tripod stays stationary.
Using the tripod only works for stationary subjects.
2. Stabilize the lens on the floor
Another technique for handheld shooting is that you put the front of the lens on the floor. This stabilizes the lens and you can slide it forward and backwards to get the subject into focus.
This is important for extension tubes, because you usually have to get very close to your subject and there is often not enough space to put a tripod. Also a minimal shake can blur the image and this technique helps in reducing the shake.
3. Use a photo/video light
Because you have to get very close to your subject and the depth of field is so small you will want to shoot at smaller apertures like F8 to get as much in focus as possible. But for this you will need a lot of light or your ISO will increase. Esp. with extension tubes the image will not be as sharp as with dedicated macro lenses and adding a high ISO to the equation results in bad quality pictures.
The solution for this is to shoot outside in bright sunlight or to use an LED light. You can buy a ring light or ring flash that wraps around your lens or use any small LED light (or even the LED of your phone). I recently tested the Neewer 176 Photo Studio light which should work well for this purpose.
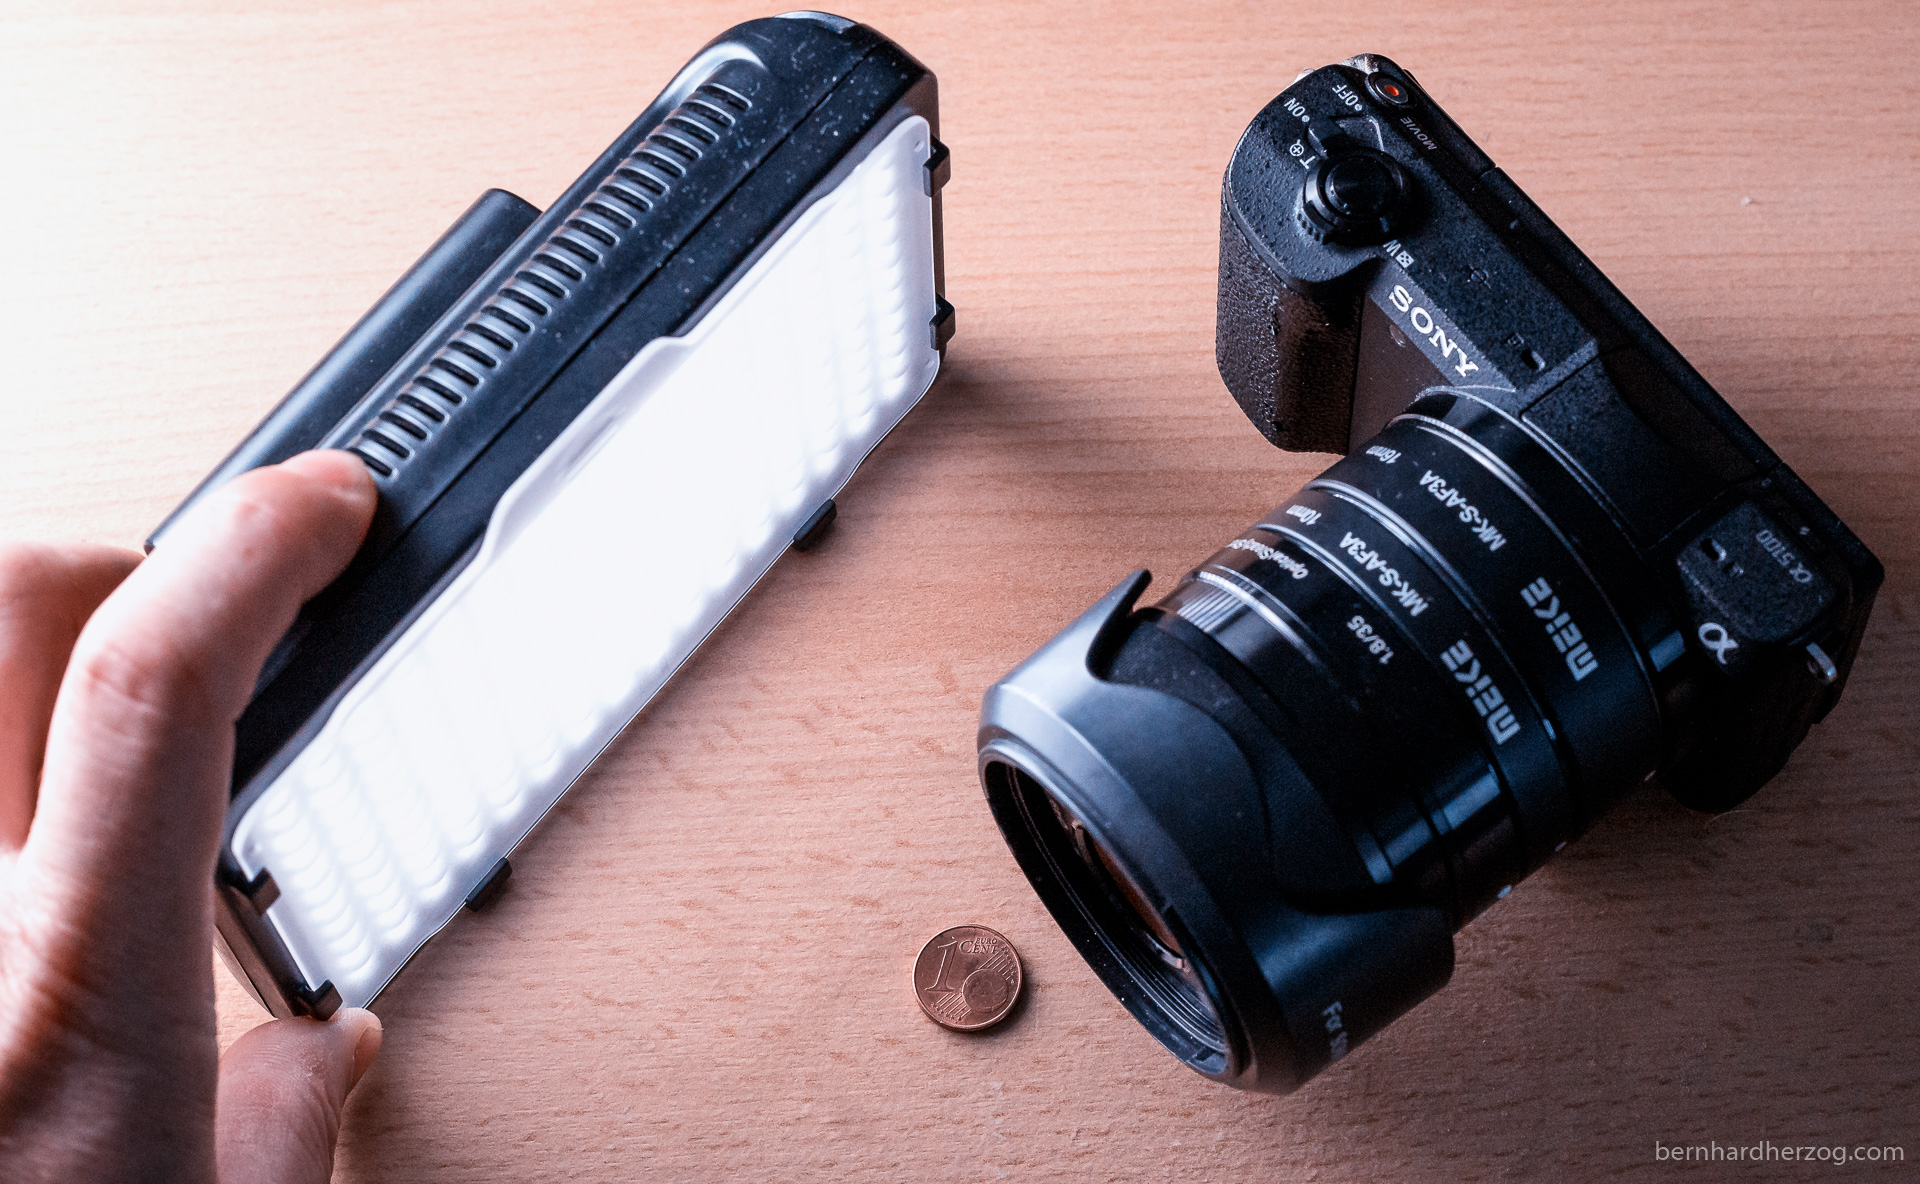
You can also use a small reflector to reflect the sunlight onto your subject.
4. Use burst on your camera
When you have moving subjects like small insects and maybe even the wind is moving the leaves they are sitting on, then you will have to make many pictures and only a few will be in focus or with the animal looking in your direction. You can use the burst mode of your camera to make a sequence of pictures and choose the best (sharpest) one later.

5. Use focus peeking
Most mirrorless cameras offer focus peeking, where you can see which area of the picture is in focus. I have selected a red color and the edges of the area in focus are highlighted in this color.
6. Use your smartphone to frame your shot
If you photograph on floor level it might be hard to see your LCD let alone look through the viewfinder to see if your subject is in focus. Many cameras can be operated from the smartphone and it might be easier to frame your shot that way.

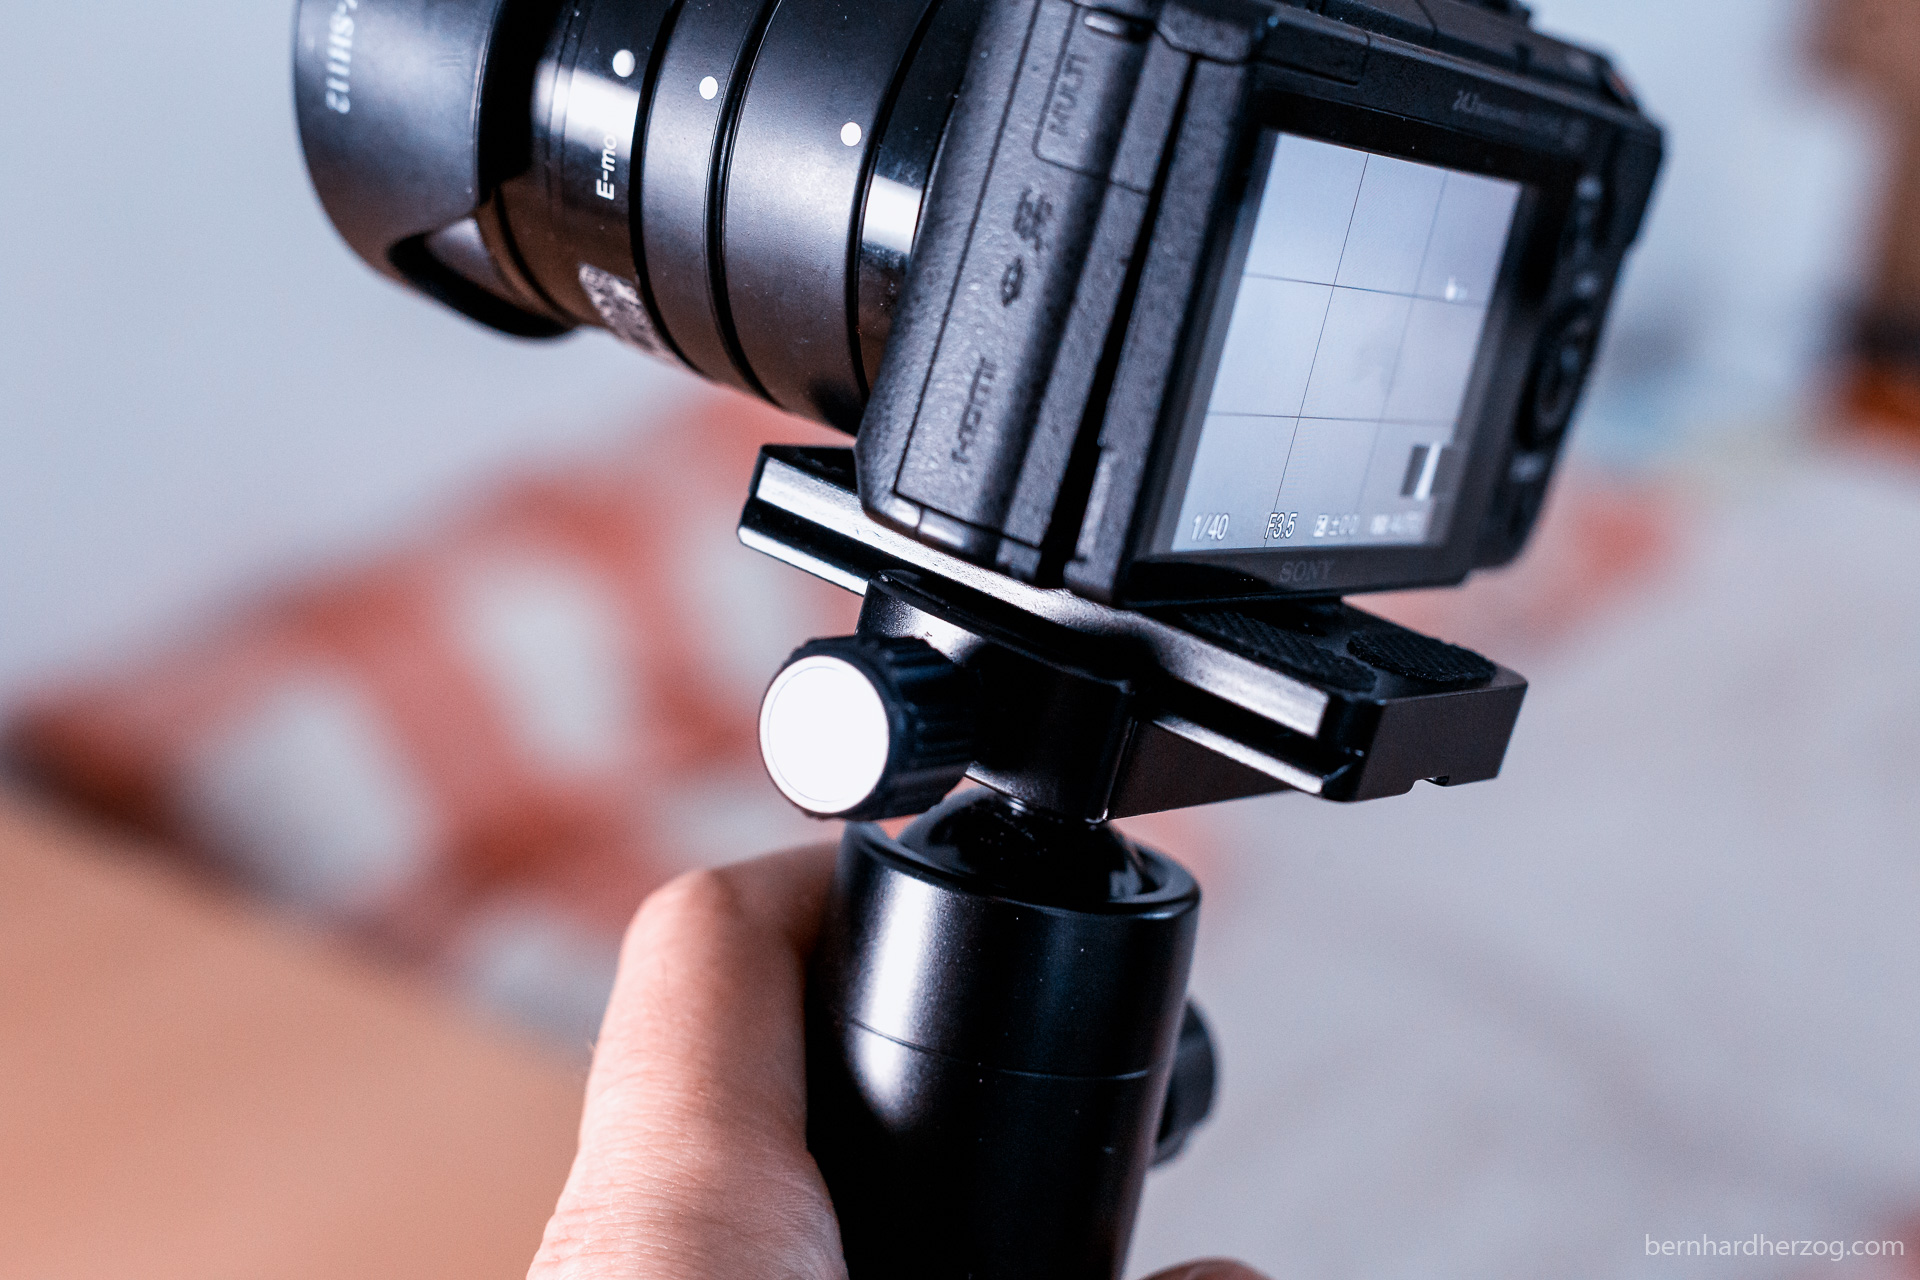
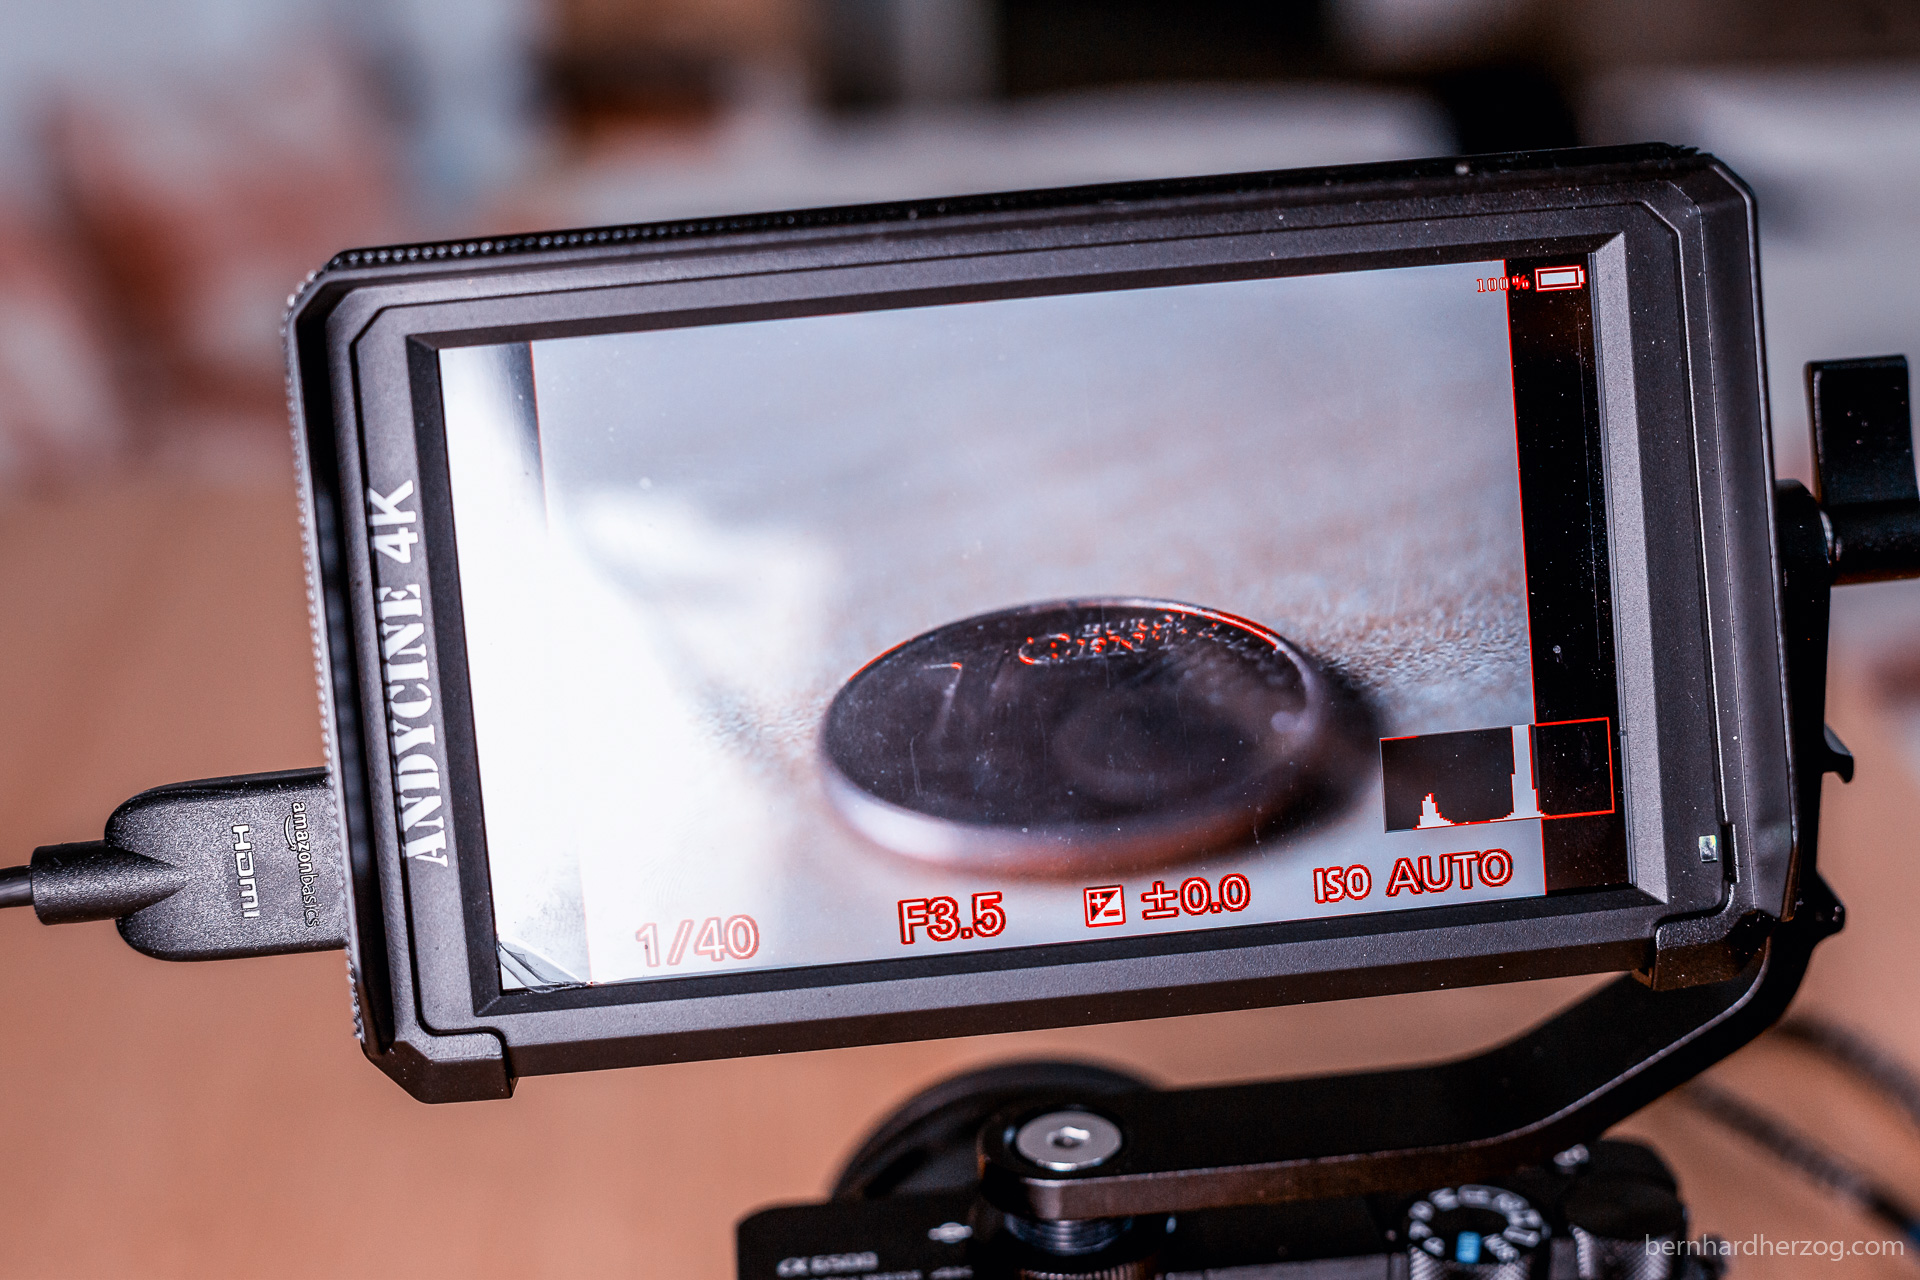
7. Use an external monitor
Well you saved a lot of money buying extension tubes instead of a macro lens and now want to buy an external monitor? Go ahead! Because the picture on your camera’s LCD is so small it is much easier to see everything by connecting an external field monitor using the HDMI port of your camera. Those monitors usually offer focus peeking as well so focusing that way will be a breeze!
Pro Tip: You can use your TV or PC monitor to connect your camera via HDMI. Works only if you are shooting at home of course.
8. Use focus stacking
We talked about the problem that only a small area of your subject will be in focus. If your subject is not moving you could make several pictures with different parts in focus and later use your picture editing application to combine those pictures into one where everything is in focus.
The problem with this is that you should not move your camera so you need something in the camera that automatically takes the pictures while moving the focal plane. Unfortunately only a few cameras offer this feature like the Fuji XT-2 in the latest firmware update.

If your camera does not offer focus stacking you can still try to do it manually by putting the camera on a tripod and changing the focus manually (go into manual focus first).
9. Use clear image zoom for video on Sony cameras
Sony cameras offer “Clear Image Zoom” where you can zoom in while taking a video without much loss in quality. So if you already use extension tubes you can get even closer for your video. This will be very difficult for following something that is moving without creating a very shaky footage but why not put the camera on a tripod and show something that you hold between your fingers?
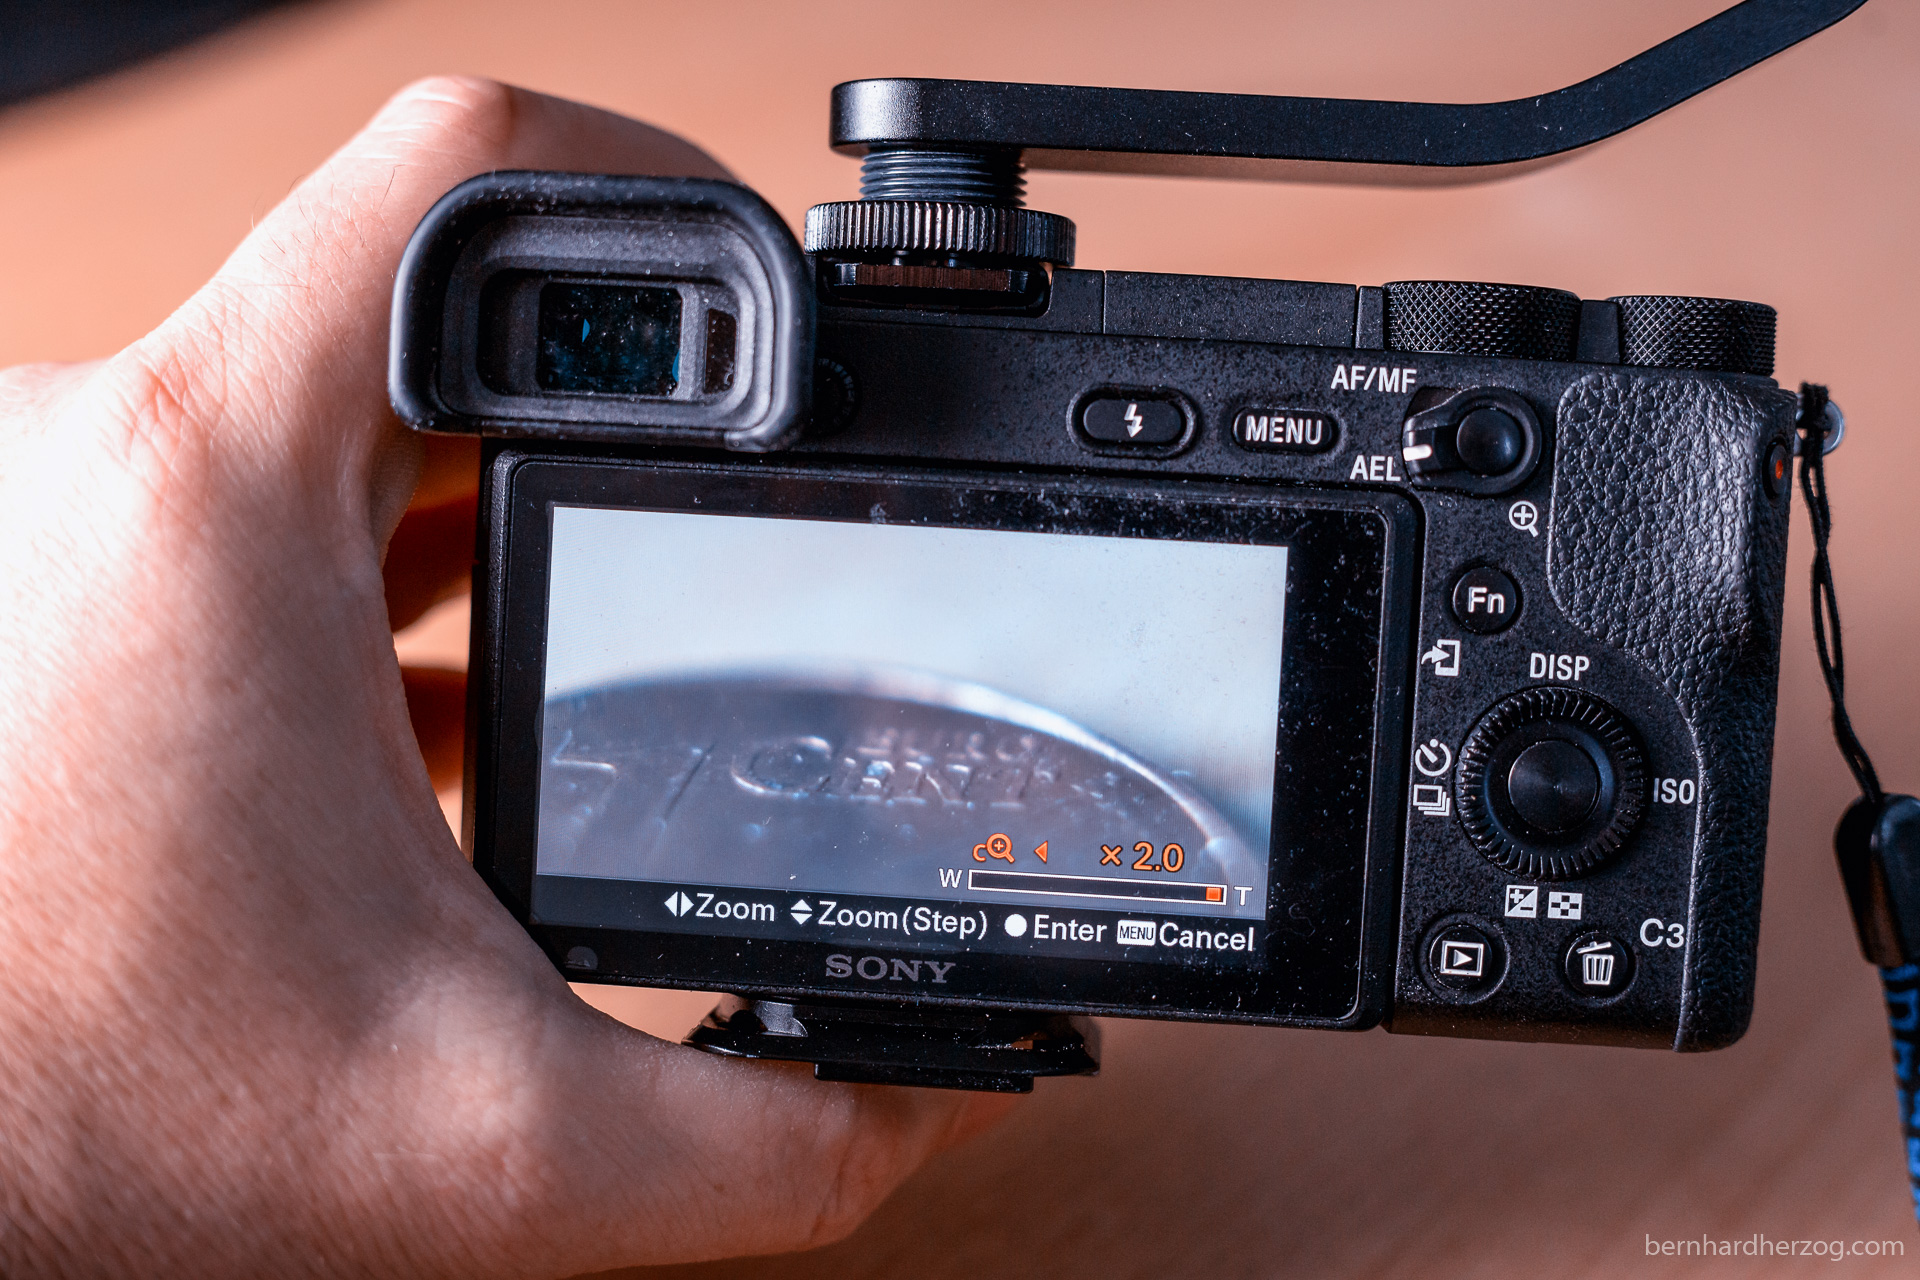
If you use Clear Image Zoom you might actually not need to use extension tubes or a macro lens at all.
10. Film in 4k or slow motion
If your camera supports higher resolutions you can use it of course to show even more details of your subject. For moving subjects it is better to use higher frame rates like 60 or 120 frames per second. This is because usually the subject will not be in perfect focus all the time and with higher framerates you can slow the footage down later and just use those parts.
Conclusion
I hope my tips are helpful. I think extension tubes are a good way to get started in macro photography and produce decent results already without having to carry a dedicated lens.
I would recommend to preferably use the center of the lens for your subject because that is where the lens is usually the sharpest.
If you have any question or other tips for macro photography to share please comment below I appreciate it. If you want to buy the extension tubes please use the following link. I will receive a small kickback for my efforts from anything you buy from this link without additional costs for you. Thank you!
Buy Meike Extension Tubes @ amazon.de (metal version)
Buy Meike Extension Tubes @ amazon.de (plastic version)
Buy Meike Extension Tubes @ amazon.com
Buy Meike Extension Tubes @ amazon.co.uk
Buy Meike Extension Tubes @ amazon.fr
Buy Extension Tubes @ amazon.ca (from Neewer)
Recommended camera equipment for photo, video & travelling (AMAZON):
Sony a6600
Sony a6400 (cheaper)
Sony a6100 (Budget-Option for 4K)
Sigma 16mm 1.4
Sony 35mm 1.8
Samyang 12mm 2.0
Feelworld Master MA7
Smaller monitor
Rode VideoMicro
Rode Wiress Go II
Mini Tripod
Travel Tripod
Small LED-Light
Light #1 (powerful)
Light #2 (Bi-Color)
Softbox for this light
Light tent/box
DJI Osmo Action
GoPro 9
GoPro MAX
Invisible Selfie Stick
Mavic Mini 2 drone
Mavic Air 2
for photo and video:
Fuji XT-4
Fuji Telezoom
Entry level camera (Canon)
Leave a Reply to schwimmlehrer Cancel reply