

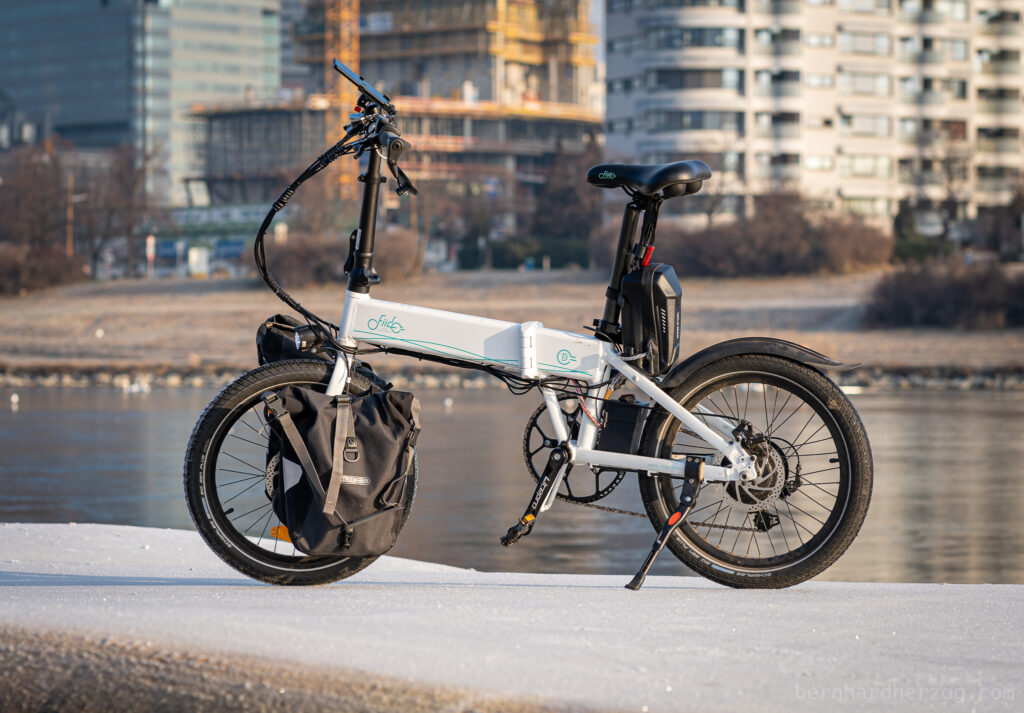
I ordered 4 batteries from China to attach them to my e-bike (Fiido D4S). I want to put them in parallel to get more range for longer trips or use them separate and change them when one is empty. When I commute to work one extra battery is enough (like for emergency when the internal battery is empty). Or when you do bike delivery for Uber Eats etc., then you will go through a lot of batteries anyways. Please read on to see how I did it! (Es gibt diesen Artikel auch auf deutsch 🇩🇪!)
Video
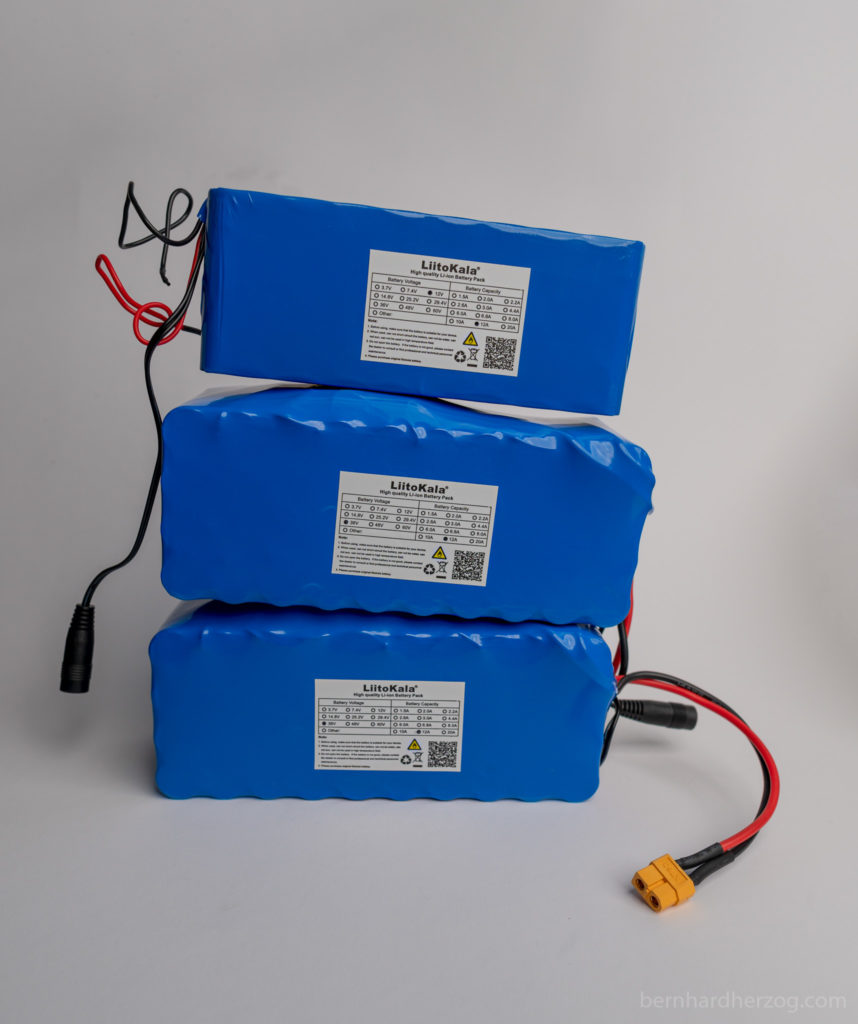
My batteries
These are the batteries:
At first I wanted to put the 12V and the 36V in series to achieve 48V. But I was strongly advised not to do this. That’s why I also bought a 48V battery:
36V 12Ah Battery @ aliexpress 48V 10Ah Battery
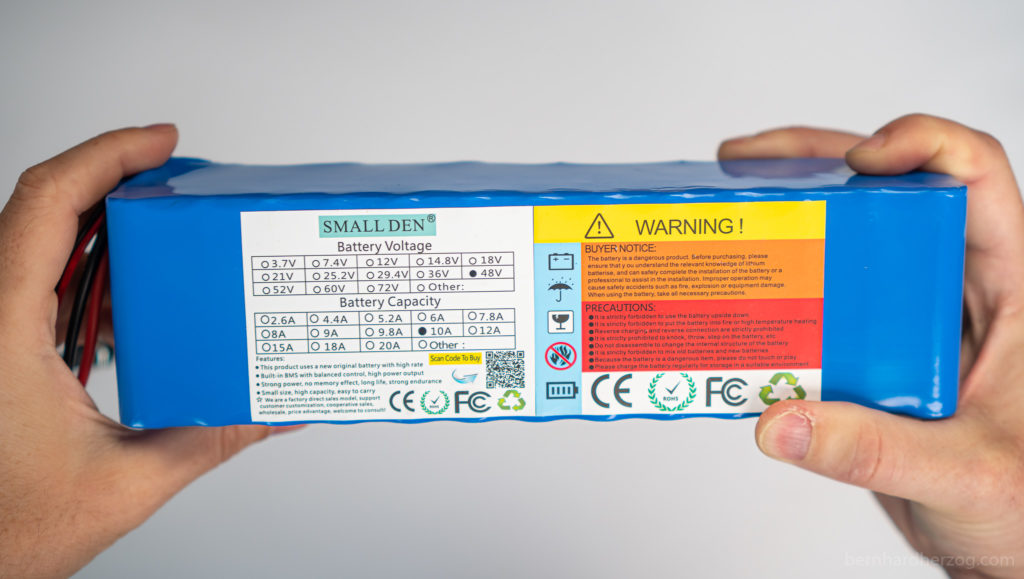
LiitoKala vs. Small Den
In the future I will only buy batteries from Small Den, they give a more honest capacity, have factory direct sales, customer customization and good reviews.

And they have 21700 which I have not seen yet:
36V 13.6A (10s4p 18650) –> same size as D4S battery!!! 36V 10A (10s3p 18650) –> incl. fuse!!! 36V 15A (18650) 48V 10A (13s3p 18650) 48V 9.6A (13s2p 21700) –>21700 48V 15A (13s5p 18650) 48V 20A (13S6p 18650)
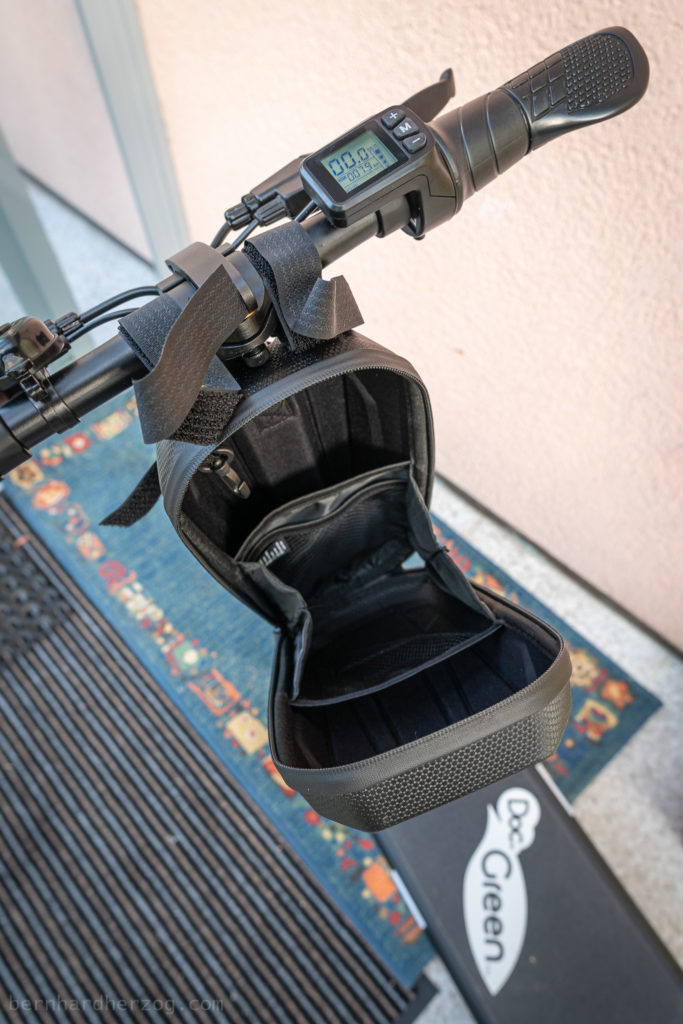
Bag
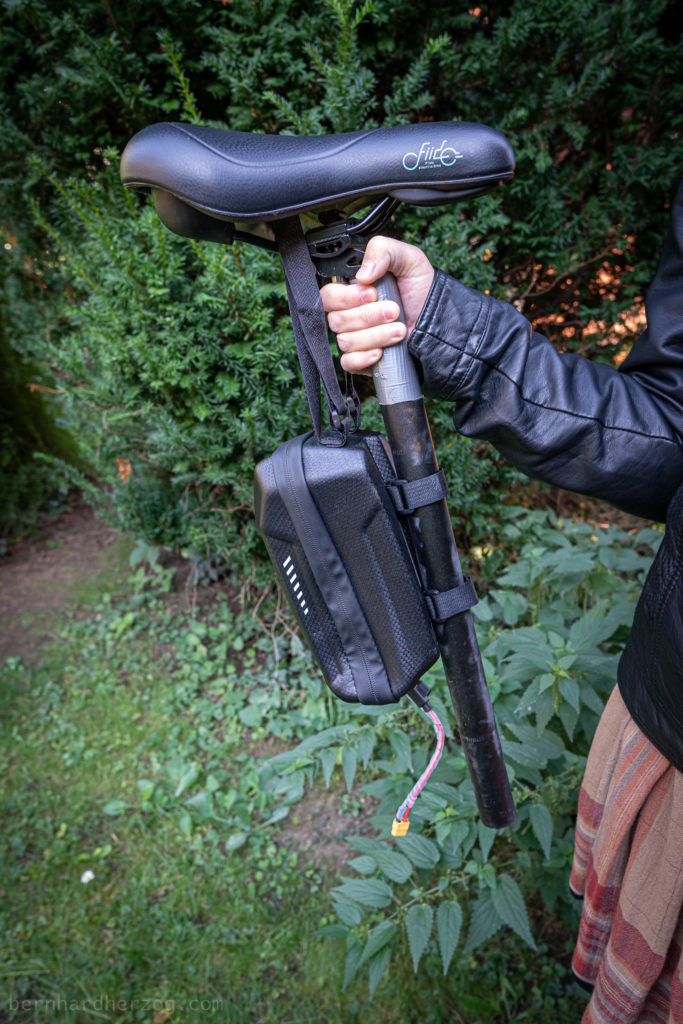
You can put the battery in this bag for example on the seatpost (or the handlebar of the scooter or below the handlebar), or you put it on the luggage rack:
(check out thingiverse.com for 3d printable adapters)
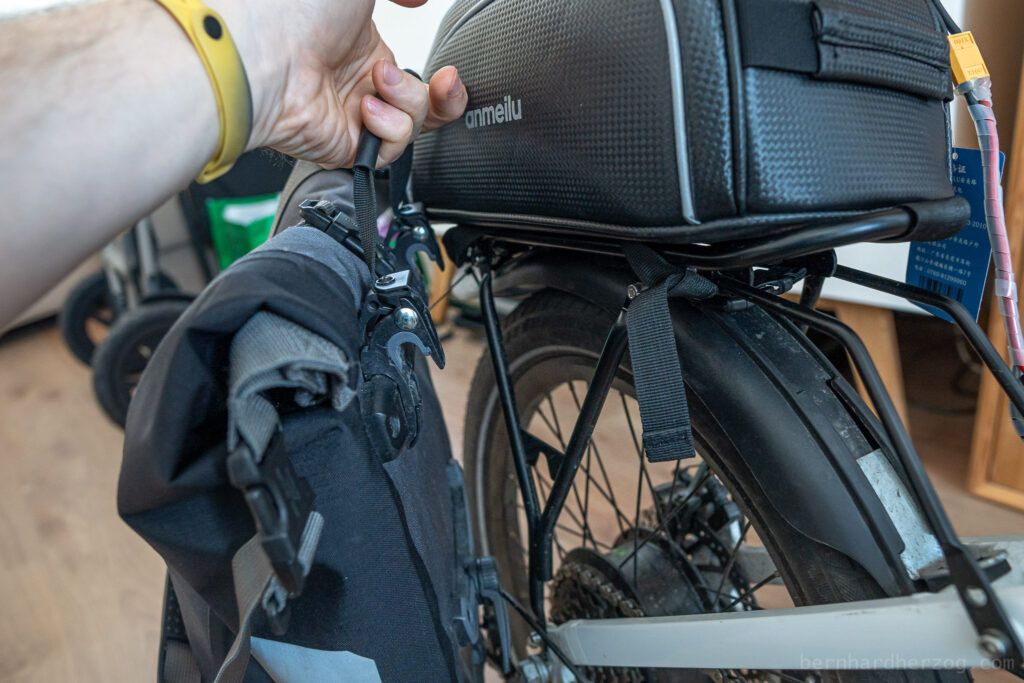
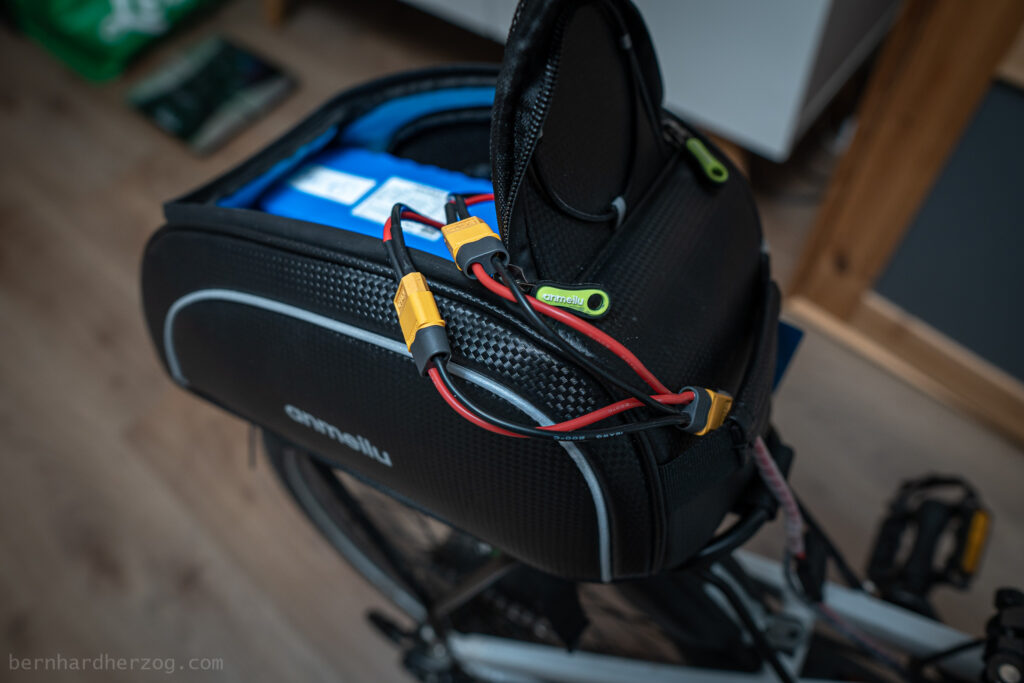
For the rear rack (=version 3 of my update, i.e. when I want to put several batteries in parallel) I also bought this trunk bag:
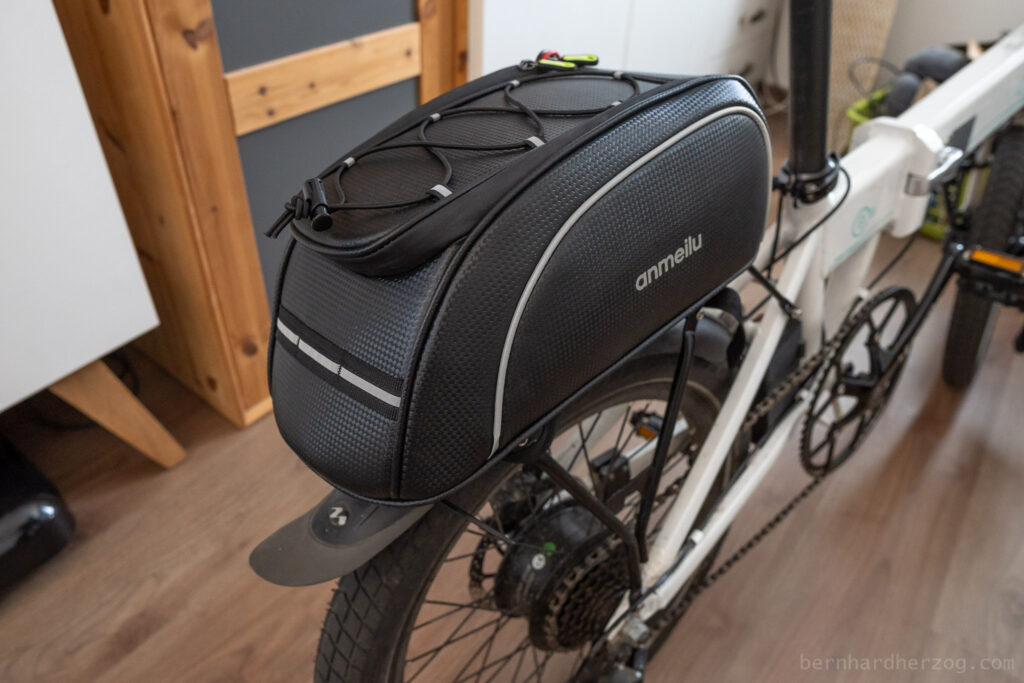
(2 batteries in parallel last longer than when I use 2 batteries separate)
Disadvantage of this trunk bag compared to the scooter bag is that it is not so easy to put my Ortlieb panniers anymore:
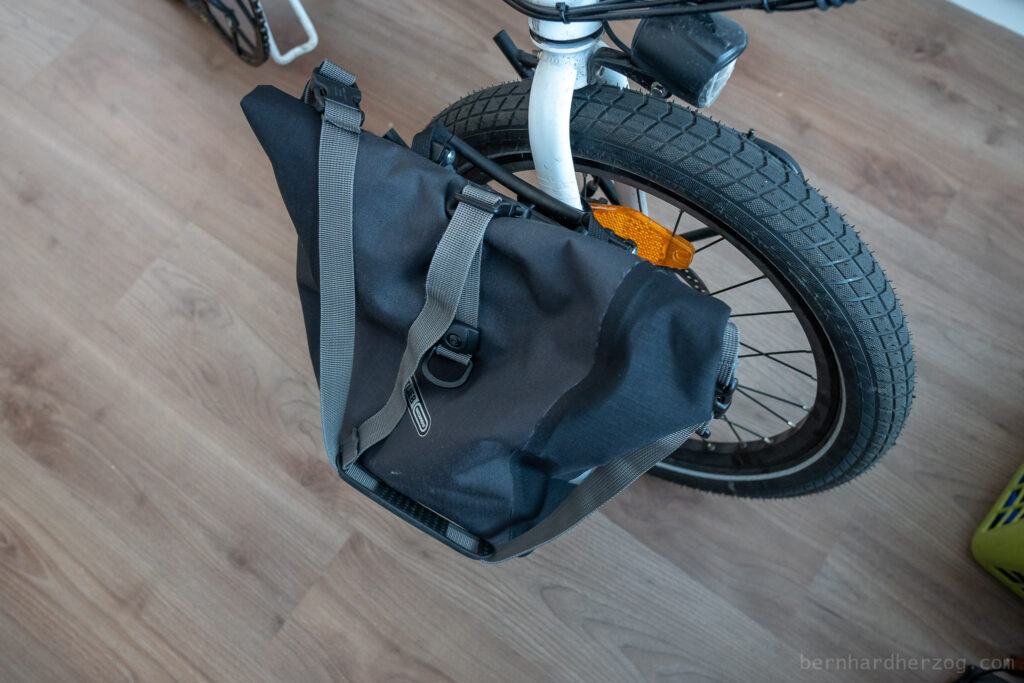

Both the 36V and the 48V battery fit into the 3l bag, but it flops around a little bit when driving:
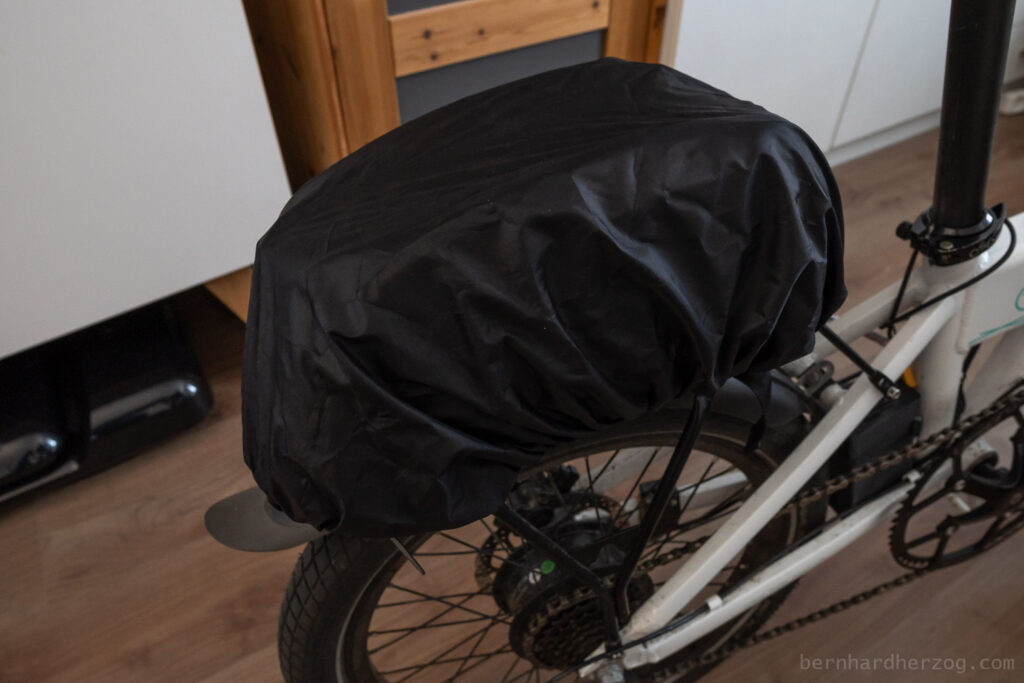
(no problem with the 2l bag or you put it on the rear rack)
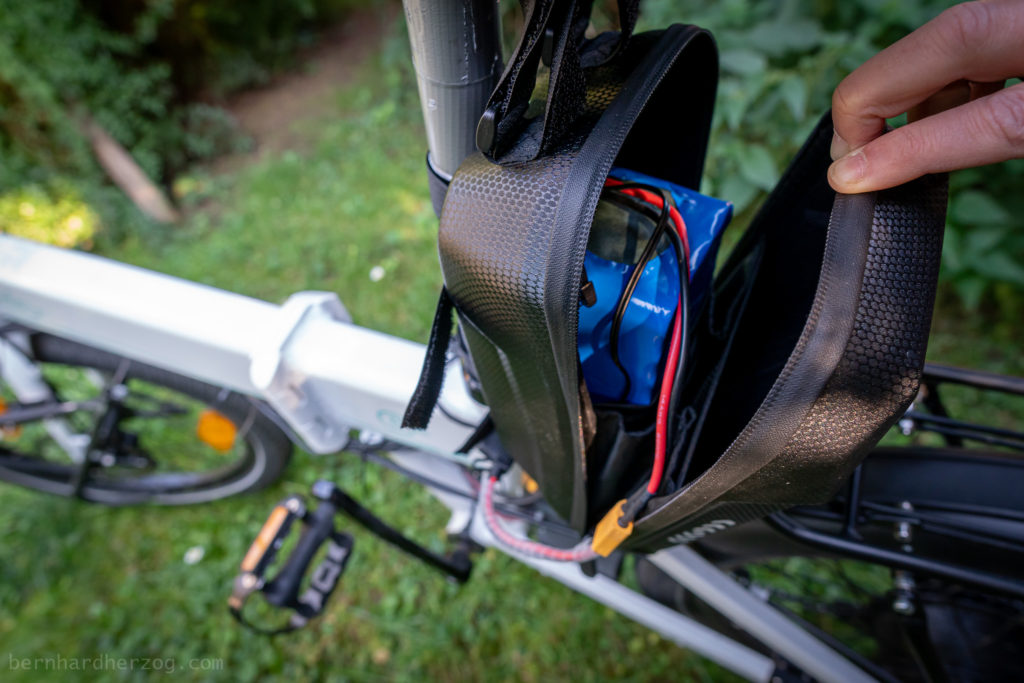
Only the 36V fits into the 2l bag and it is a snug fit… which may be a good things because it does not move at all while driving:

As you can see I bought the “old” version with Velcros (the new version has a click-in system):
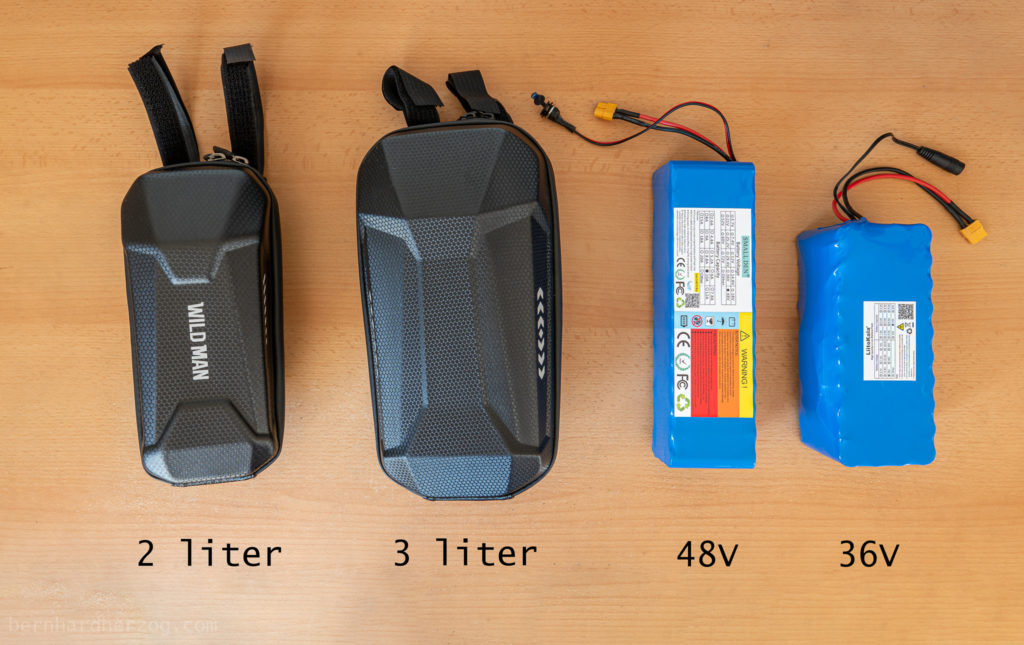
I think the “old” version is more secure when fixing with the velcros to the bike seat:
as a theft protection
This is the “new” version, if I would carry something more lightweight I would prefer it:

I suppose the plastic mount cannot hold a heavy battery
(but you could fix it using extra cable ties)
36V 12Ah @ aliexpress 12V 12Ah 48V 10Ah Battery Bag @ Amazon (old version) Bag @ aliexpress (old version) Bag @ Amazon (new version) Bag @ aliexpress (new version) anmeilu trunk bag @ Ali (I have the leather variant) anmeilu trunk bag @ amazon
About my 3 setups
I recommend you to go one step at a time and start with a simple setup for upgrading the battery. When everything is working you can advance to a more sophisticated one:
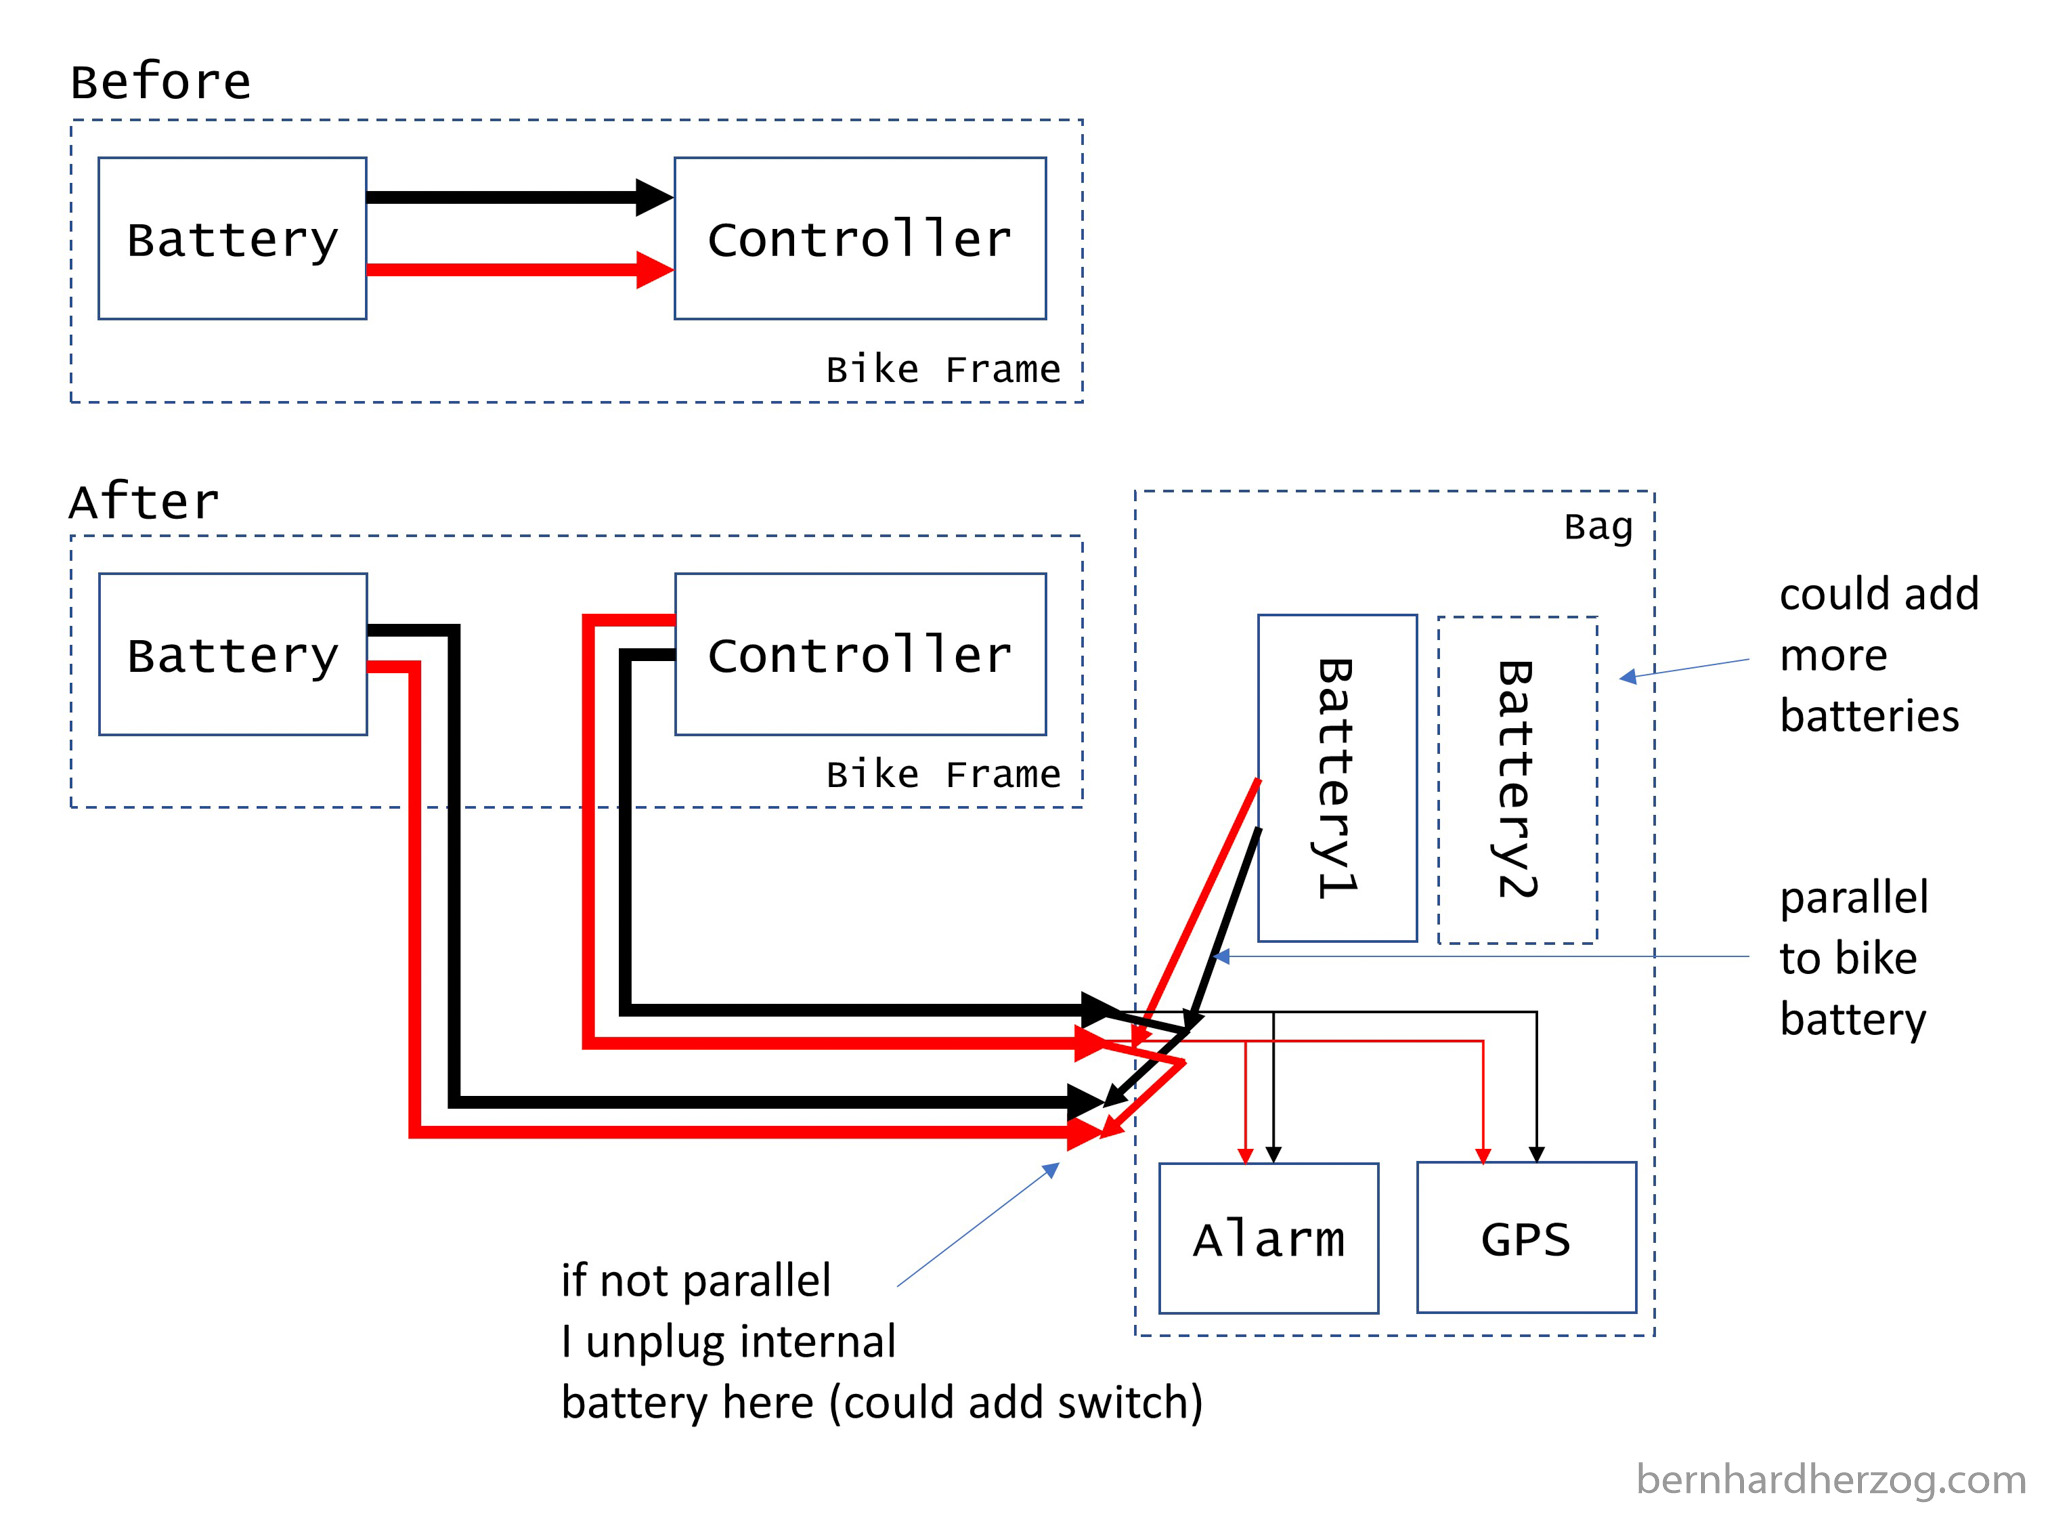
- First I just routed the cable from the interal battery and the cable from the controller outside of the bike. That way I can still use the internal battery when I connect both cables. Or I disconnect them and connect the controller to an external battery.
- Then for setup 2 I 3d printed a “black box” with a switch, so I can switch between the interal and external battery. This is the perfect setup for commuting.
- Last but not least in my third setup I use 2 external batteries in parlallel. This is the setup for longer bike trips (and delivery drivers like Uber Eats). The batteries are in a trunk bag. (I could also have put the external battery in parallel with the internal battery but more about this below…)
Setup 1: Connecting external batteries
To add the batteries I could splice an XT60 cable onto the E-Bike battery cable and add it in parallel like in this video:
But I want to be able to use just an external battery as well (or 2 external batteries in series). So I also followed the instructions in this video:
Because when adding a battery in parallel it has to be the same voltage (and maybe I don’t always want to drive around with 2 batteries…). I.e. I would have to charge both batteries at the same time (and if I have used only one charge them seperatly). And – very important – I also want to use an 48V battery in the future. I came up with this design:
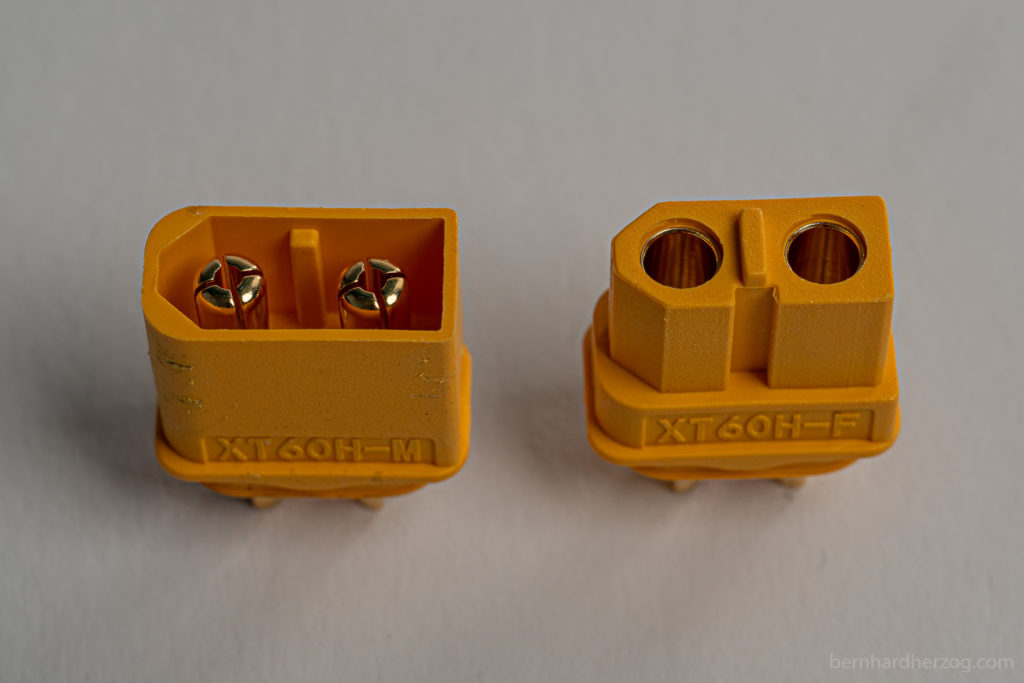
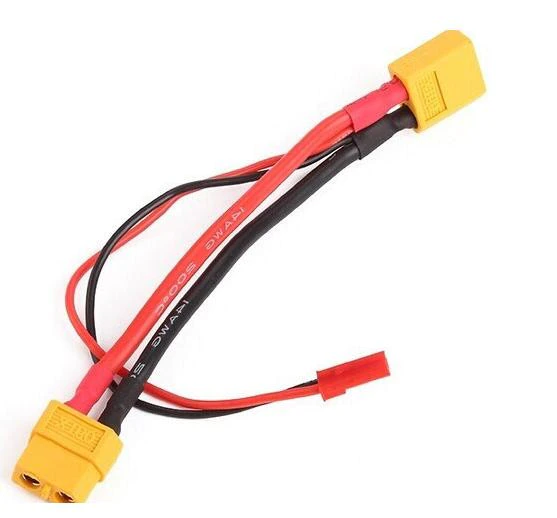
I created these two XT60 cable contraptions:
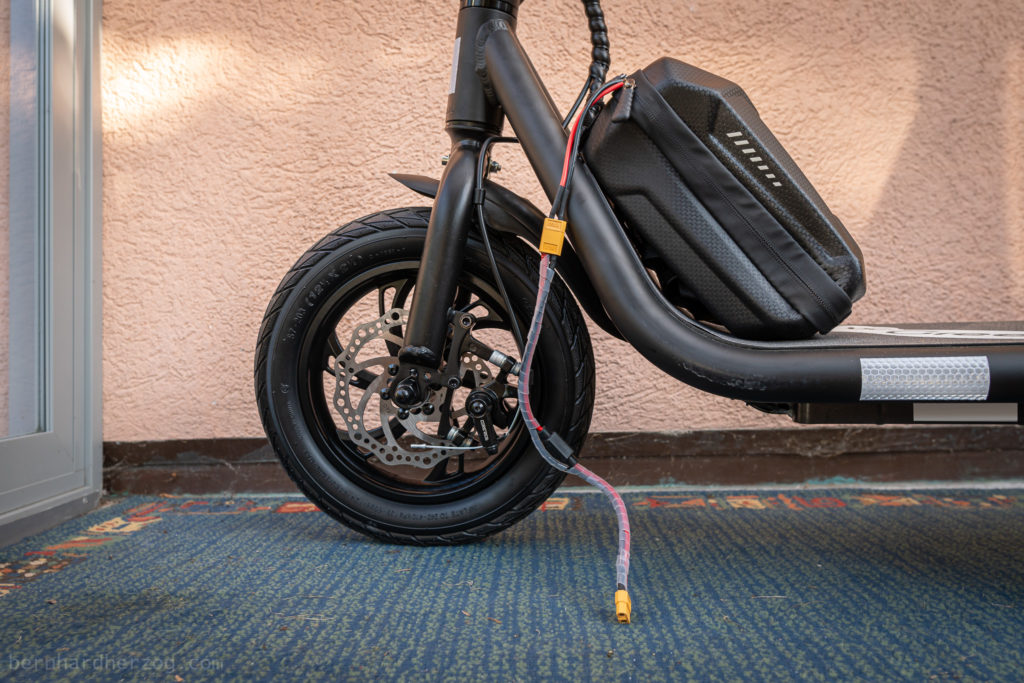
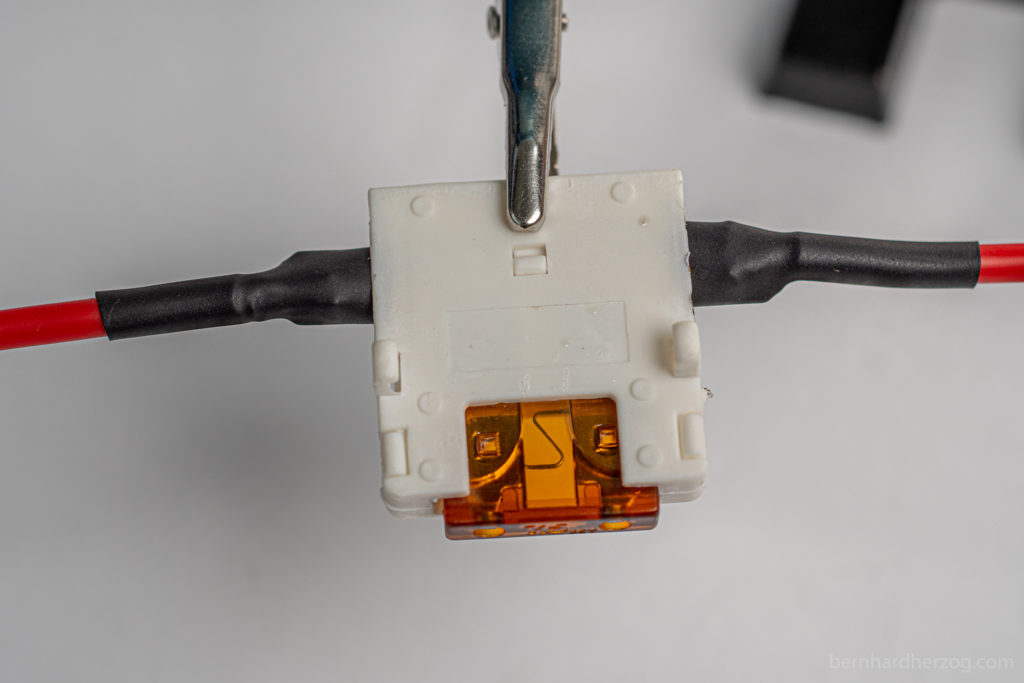
Note: I would not recommend using a car fuse like I did in this video. Now I am using small inline (and waterproof) fuses:
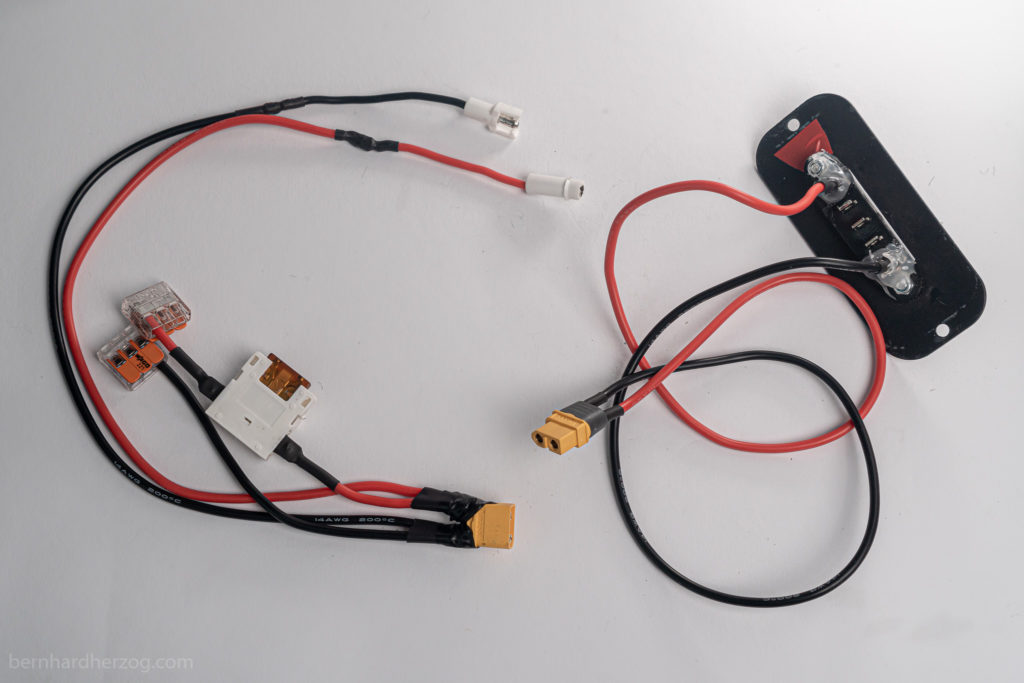
In the picture above the cable to the left is connected to the controller and the cable to the right is the connection to the internal battery.
Connecting both cables together uses the internal battery:
Using another XT60 Y-Cable I could connect an external battery in parallel (has to be the same voltage!!!) for more range. (Usually 2 batteries in parallel last longer than 2 separate ones!)
Or I disconnect the internal battery if I want to use the external battery only:
You will see in setup 2 I will add a switch because unplugging the XT60 is not always so smooth…
Parallel cables can be bought from Aliexpress (see setup 3 below) or I will make my own:
I also added two more cables so I can power other devices (bike lights, alarms, GPS, etc.). I should have used thinner cables but I had to work with what I have. I used a WAGO terminal so I can easily add devices:

You can buy a similar cable on Aliexpress and save yourself a lot of trouble:
I also added an automotive fuse. This is completely optional. But because with thinner cables and devices with less wattage, they could burn in case of a short circuit.

I soldered it but I really should have used crimps (or bought an inline fuse, which I did in setup 2). But the fuse was only 1 euro, so who I am to complain?
36V 12Ah Battery @ aliexpress 48V 10Ah Battery Wire Stripper (I recommend not to use automatic ones like I used because it will damage the wire) Heat Shrink Tubing Insulation Tape Wirecutter Voltmeter Hot Glue Gun Helping Hands Tabletop Loupe with LED Soldering Iron Fuse 14 AWG Silicone Wire 22 AWG Wire WAGO terminals XT60 connectors
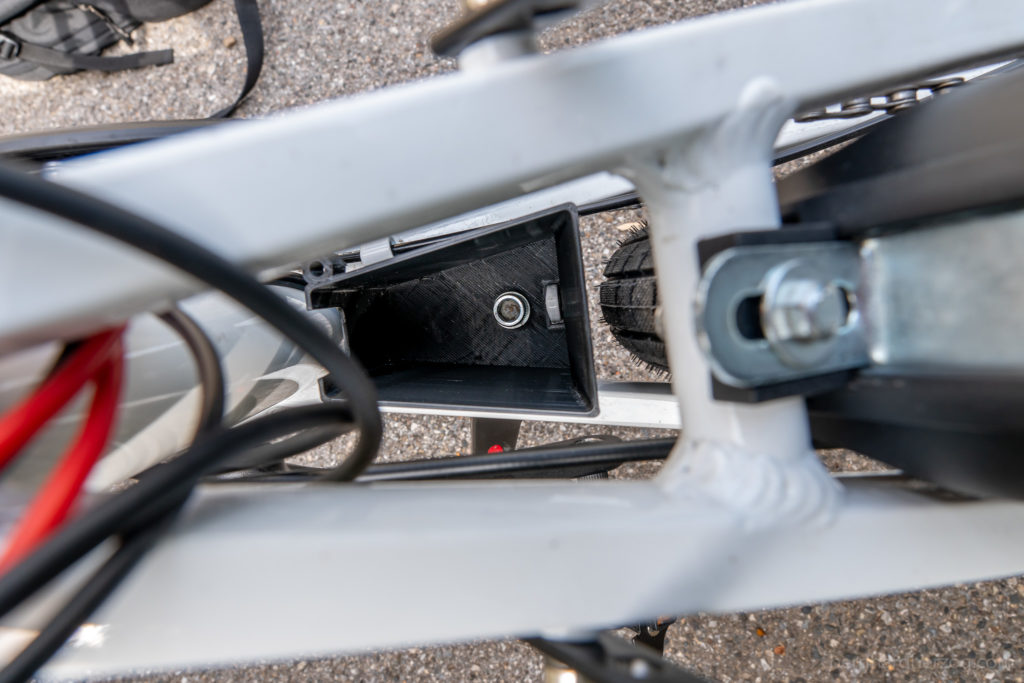
Black Box
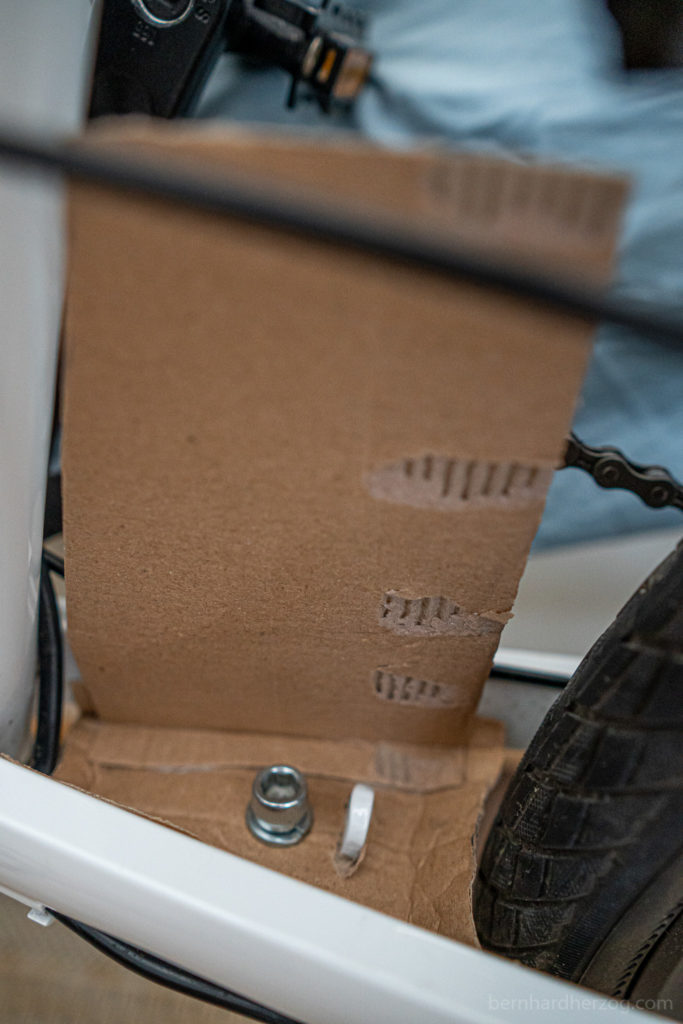
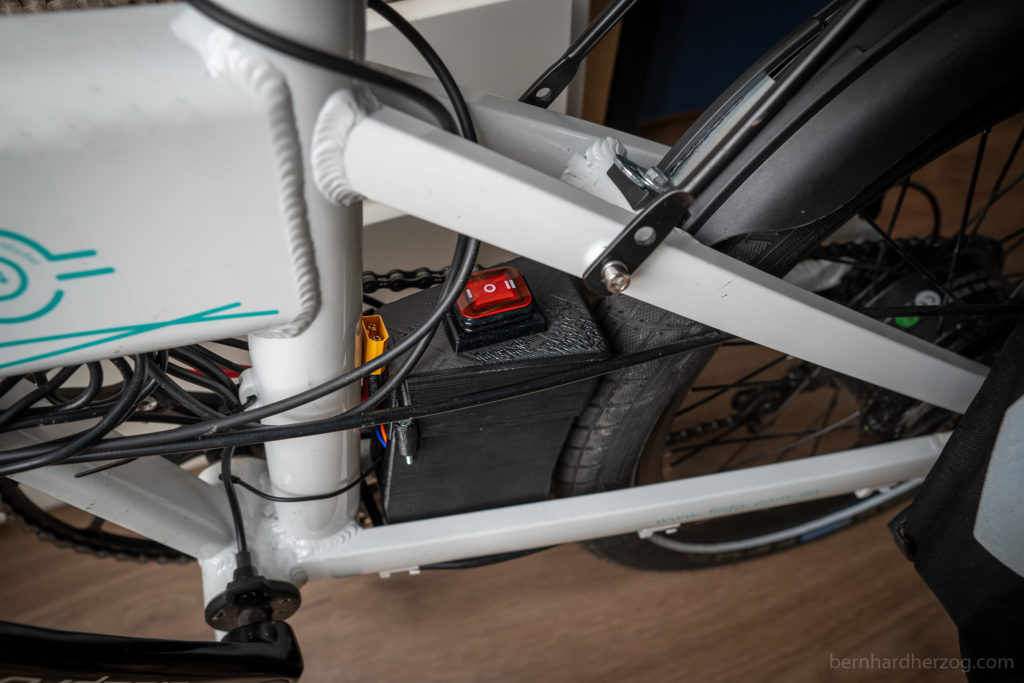
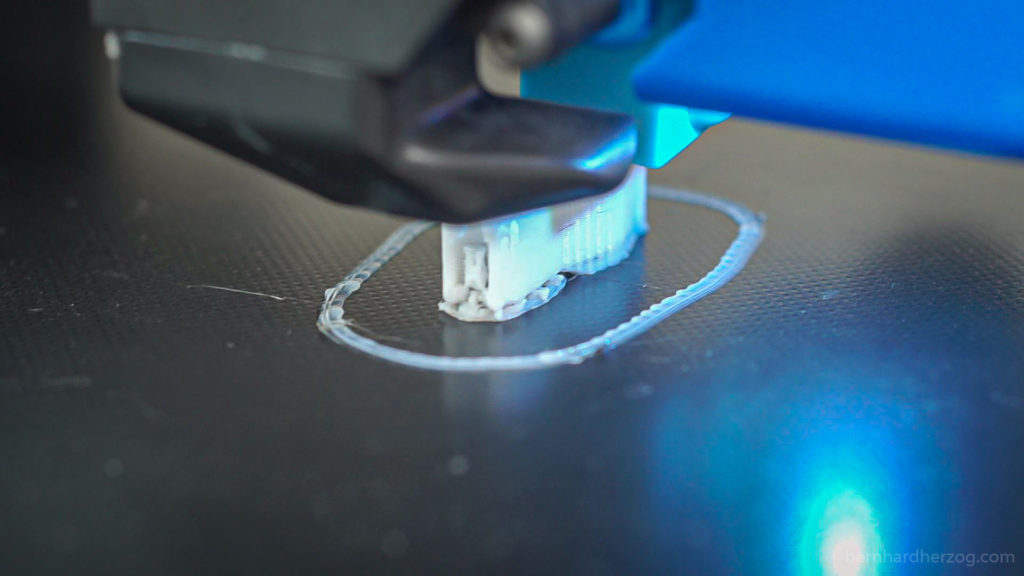
I put the fuse and all small devices like GPS, bike alarm and Samsung SmartTag Plus (it is similar to Apple AirTag) in a small 3d printed box (“black box”) in the triangle above the bike stand (if you don’t have a 3d printer you could buy a small waterproof bag instead or put everything into the external battery bag):
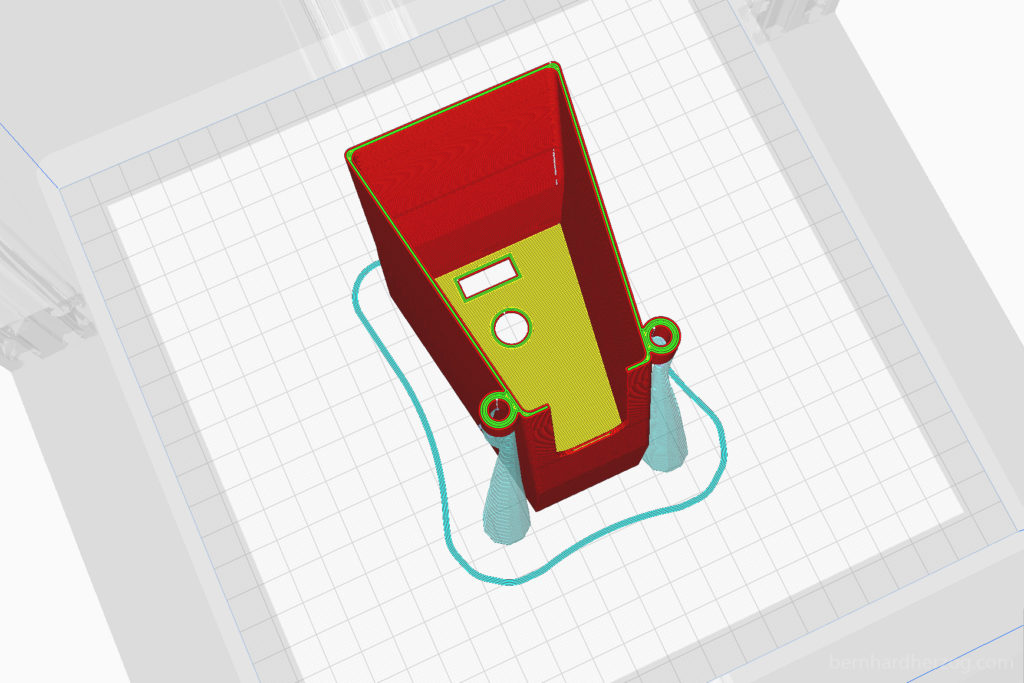
I used tree supports to print it:
This idea is heavily inspired by the design that Jonas Krug showed in the Fiido D4S facebook group.
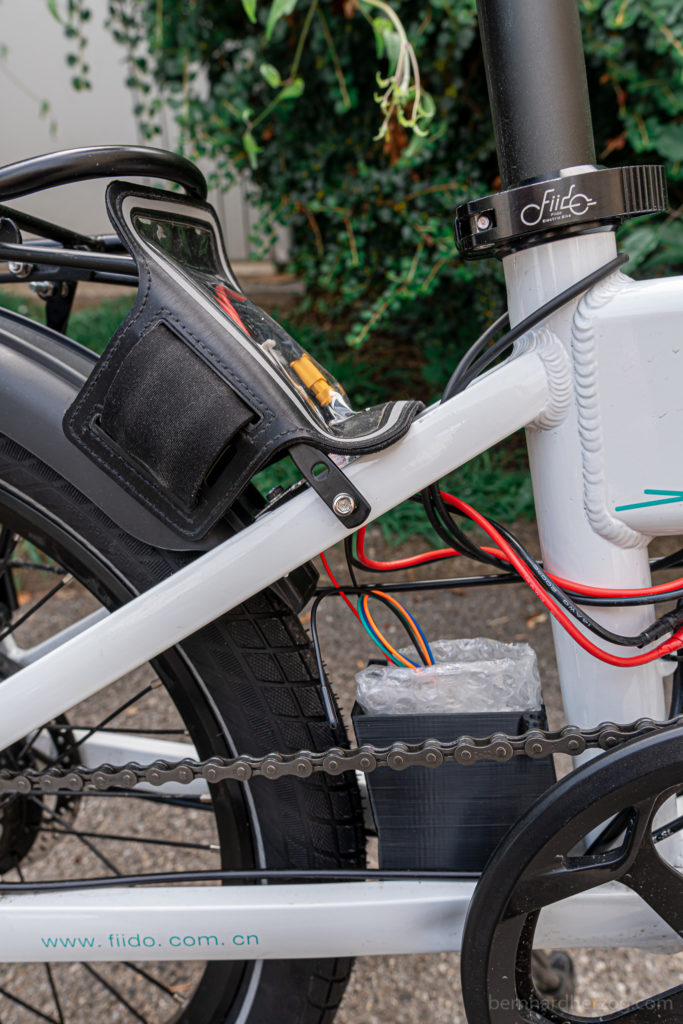
The battery will go into a bag attached to the seatpost.
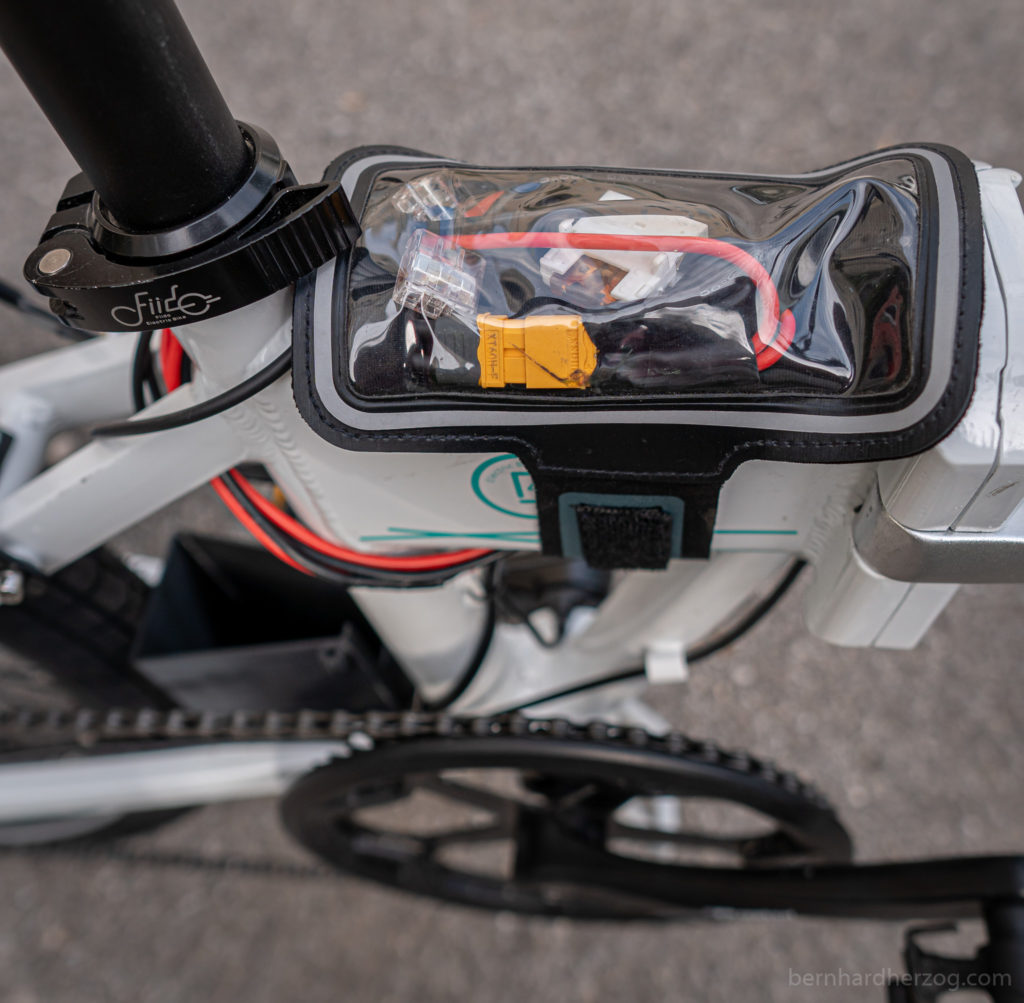
I also think this is genius:
Joe Fallkon basically used a neoprene smartphone armband to put a wattage meter inside. This is even waterproof and with a transparent window (where I can check my connection)!
Well I still plan to put the cables into the 3d printed box, but I still need to design a lid and that’s where I will put it!
My 3d Printer (Artillery Genius) @ banggood.com Artillery Sidewinder @ banggood.com (bigger but I did not have space)
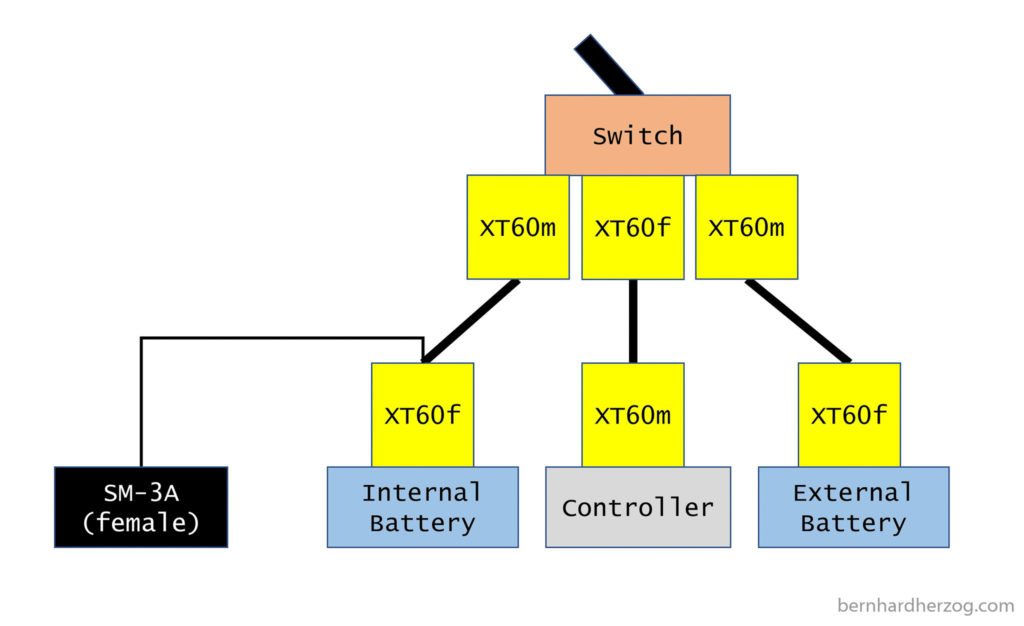
Setup 2: Adding a switch
Here are the main ideas for setup 2 of my external battery update:
- put a switch so I can select internal or external battery (and don’t have to unplug XT60 cables which is sometimes difficult)
- put inline fuses for the internal and external batteries (>20A)
- make a hole in the lid of the 3d printed box for XT60 (to quickly connect external battery) and switch (waterproof if possible)

This is the design of the switch:

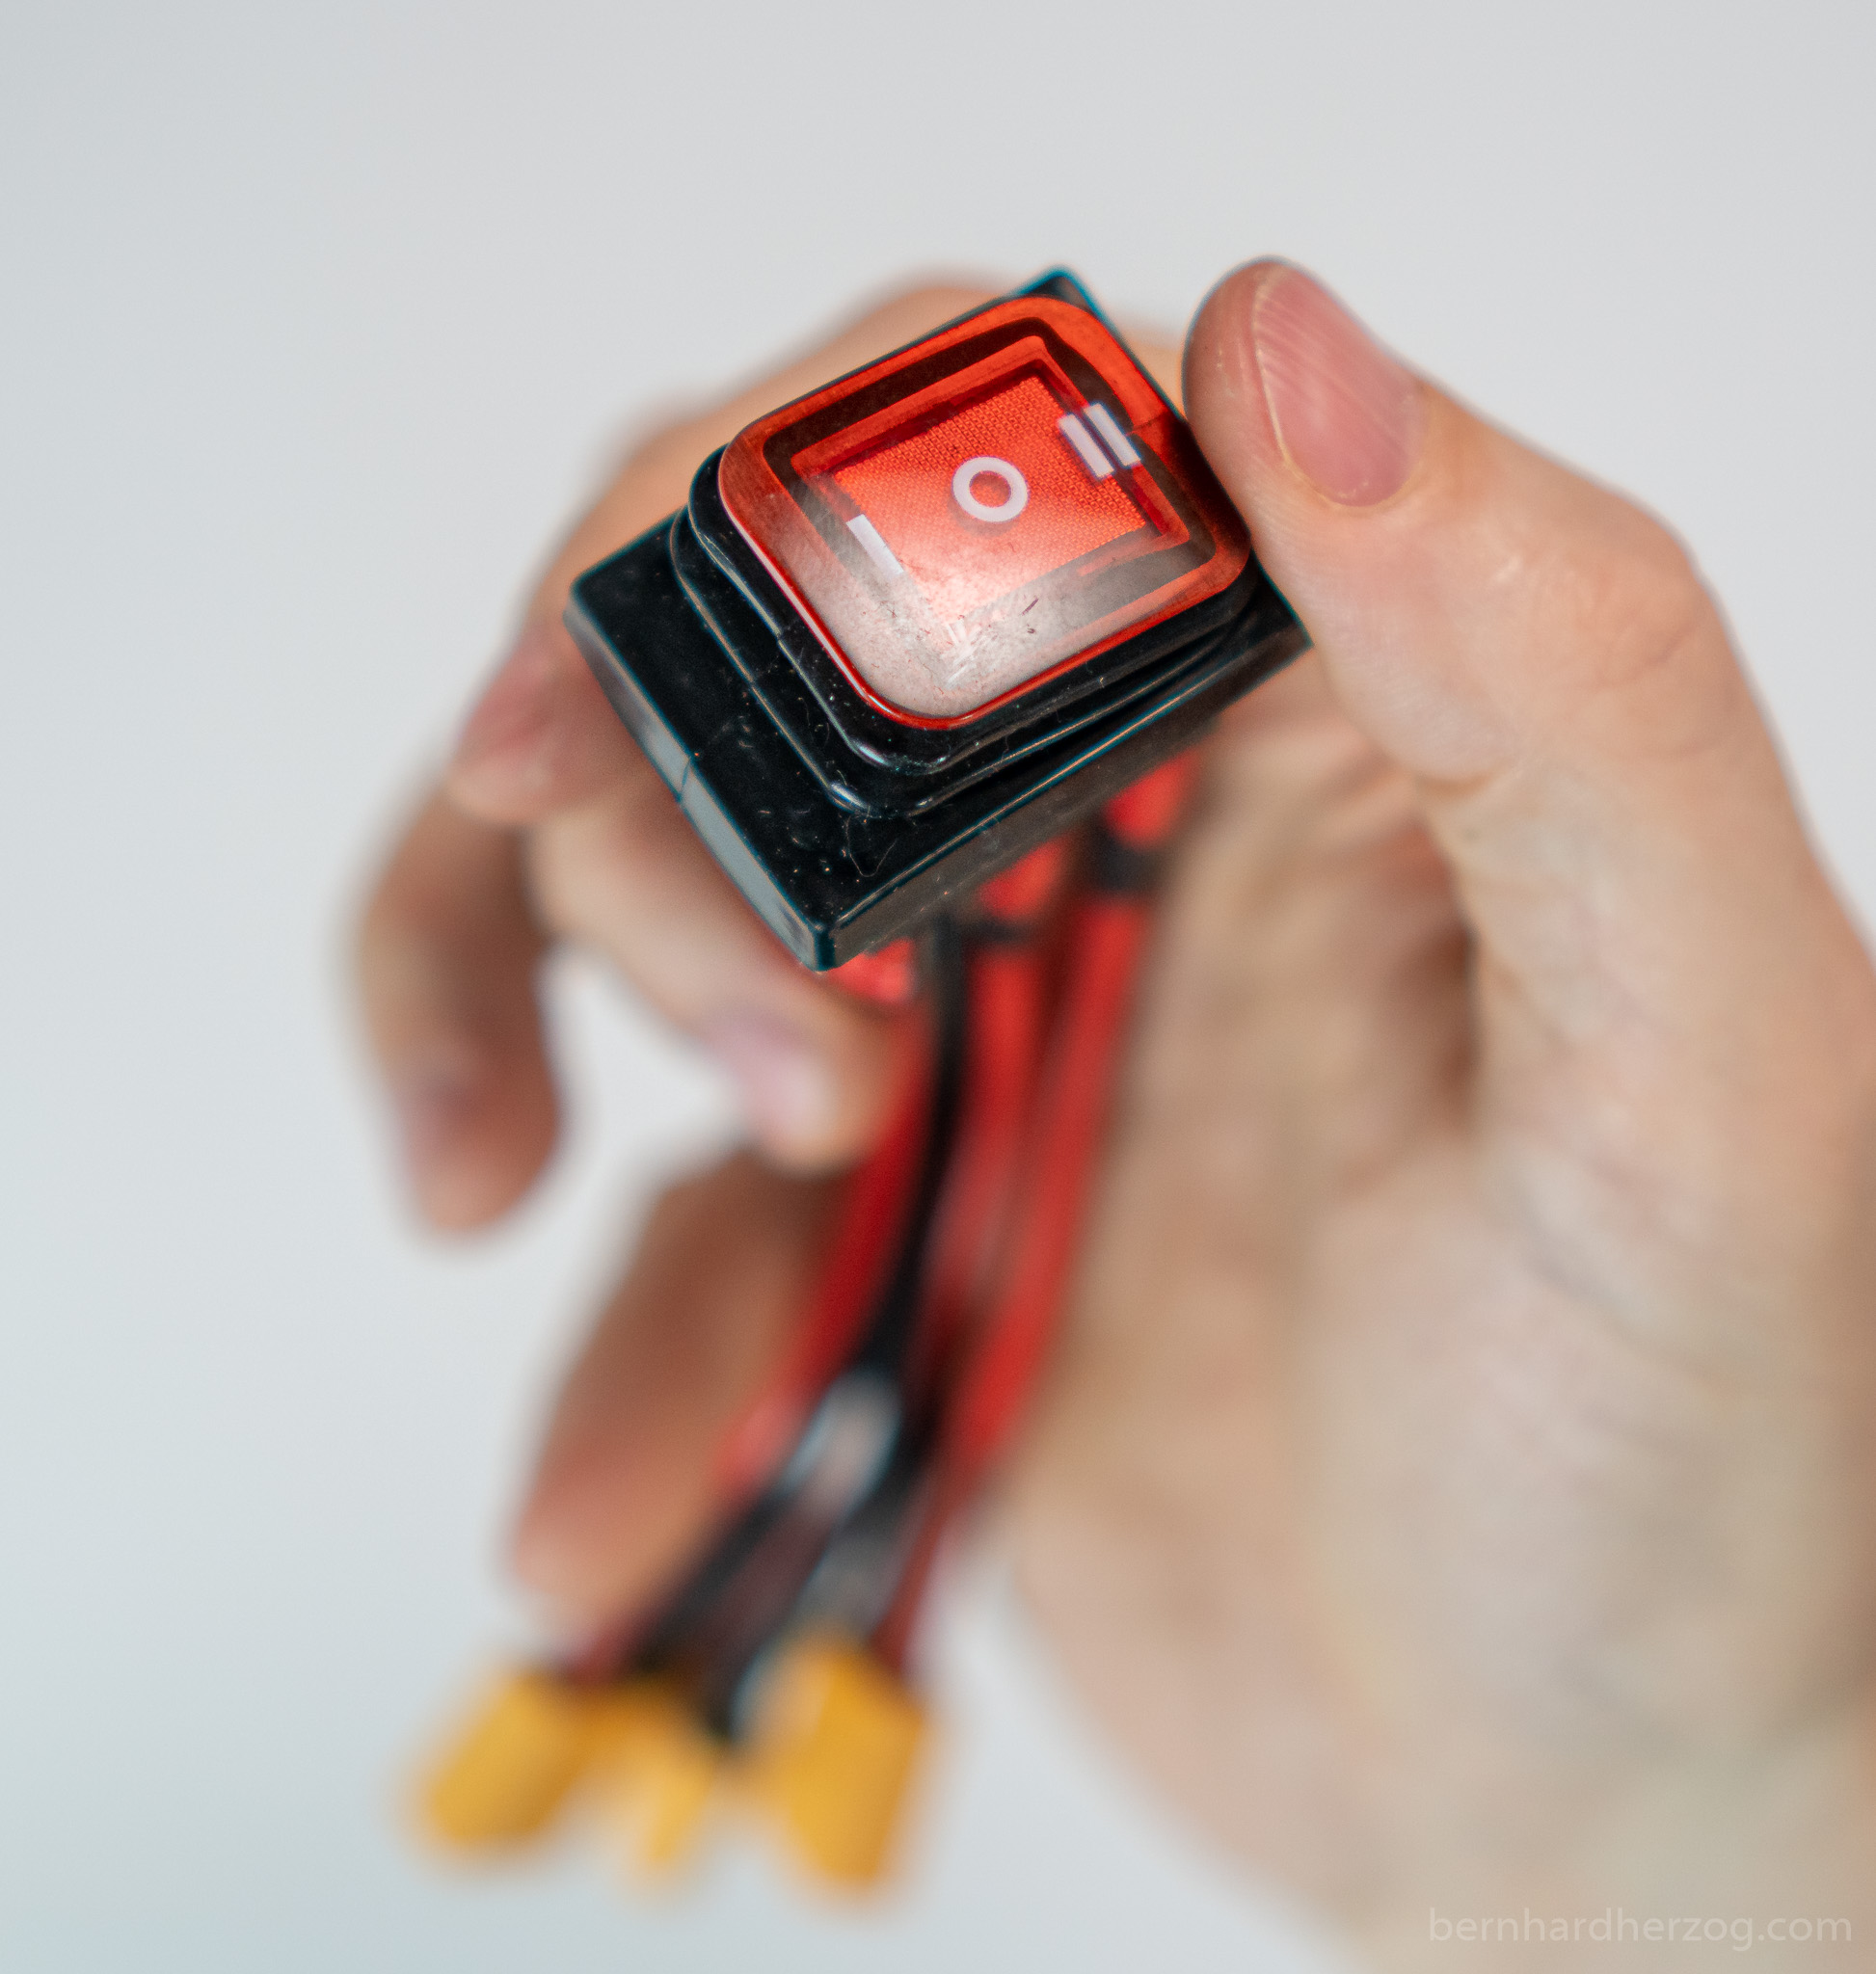

I use it a lot and until now nothing has exploded yet
Anyways I recommend to switch between the batteries only when the bike is turned of.
What I learned from Setup 2
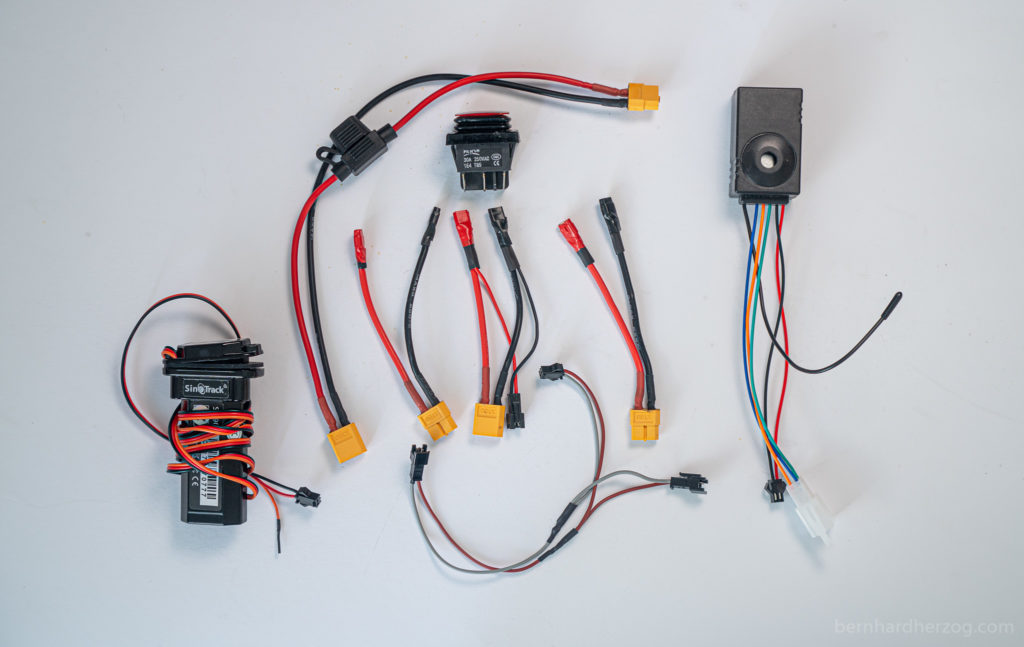
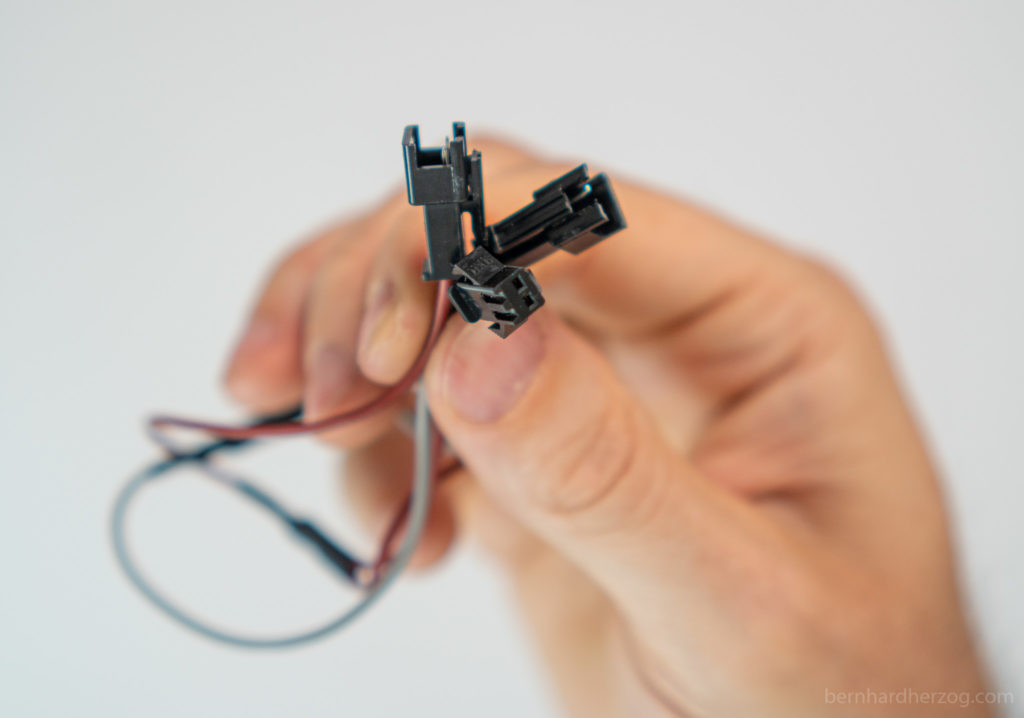
- I used spade connectors to connect the XT60 connectors to the switch. I am not completely happy with this, I think soldering can support more Amps. (I soldered the first switch and melted it inside…)
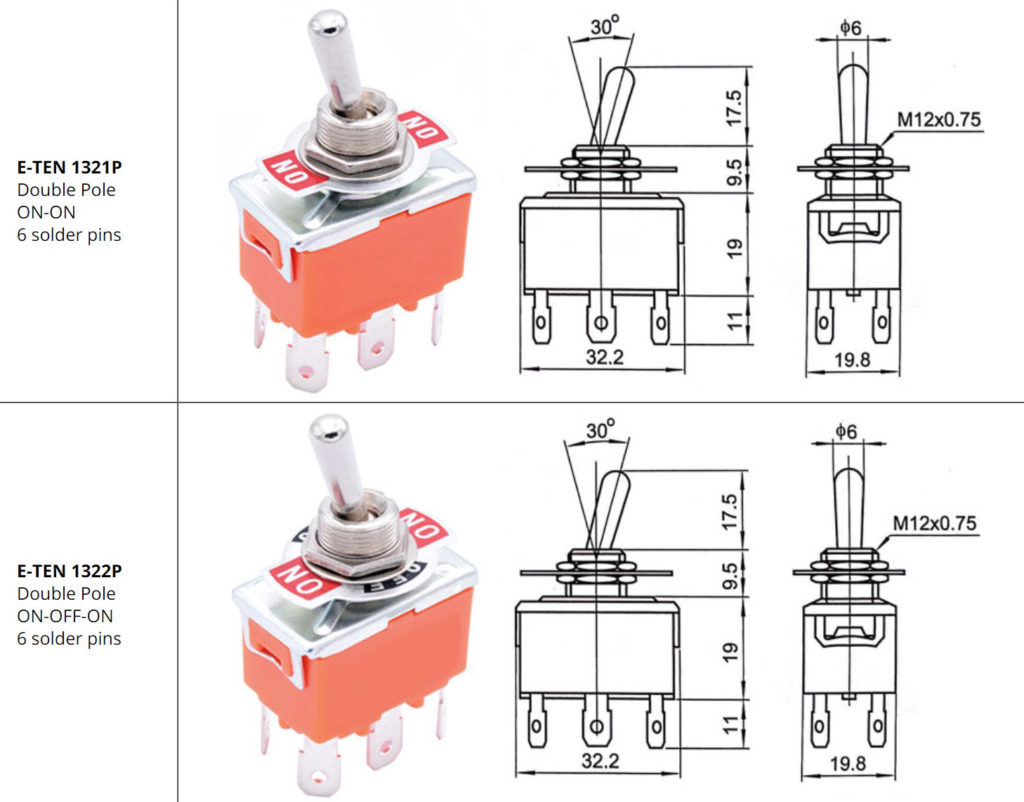
- The switch is not glowing, this is because I bought the 220V version by mistake. Next time I would probably just buy the black version (without LED).
- I bought a “mini” (inline) fuses to save space. The disadvantage of this is that you need a plier to remove it. (“Standard” sized fuses can be changed just using your fingers.) I used my 3d printer to print it:
DPDT Switch 30A/250V (Aliexpress) Retro Switch (DPDT, 6 soldering pins, On-Off-On, Latching, with waterproof cover) 3d printer (Banggood) Inline Fuse (Amazon) Spade Connectors XT60 connectors 14 AWG silicone wire 22 AWG silicone wire Crimping Tool for Spade Connectors JST SM connectors Crimping Tool for SM connectors Heat Shrink Tubing
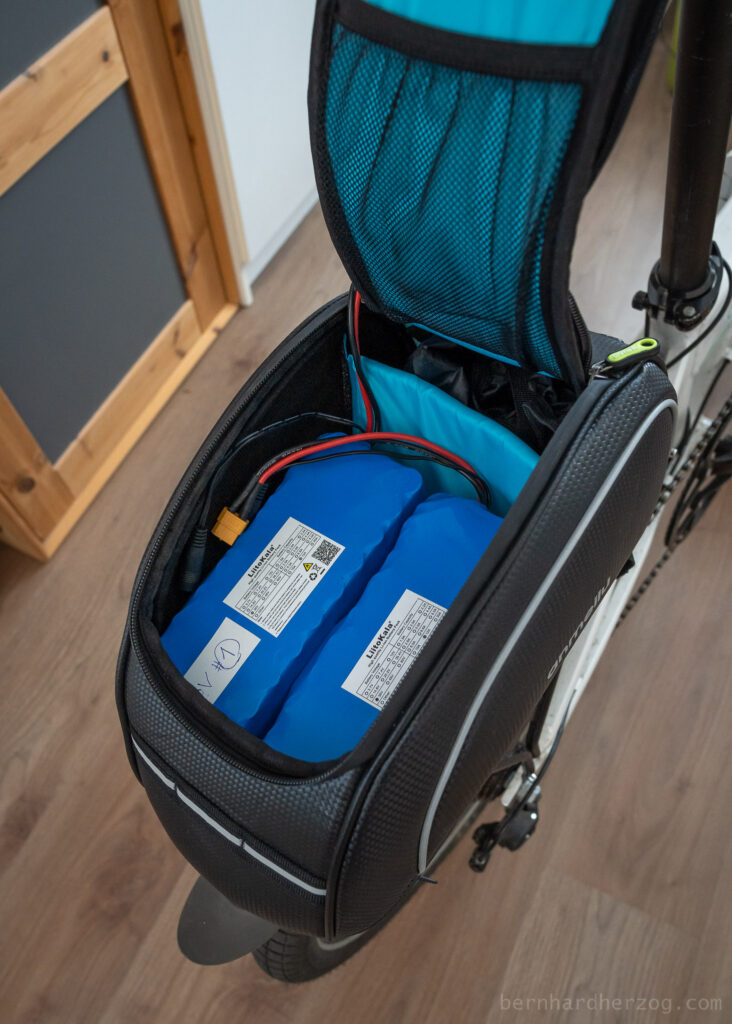
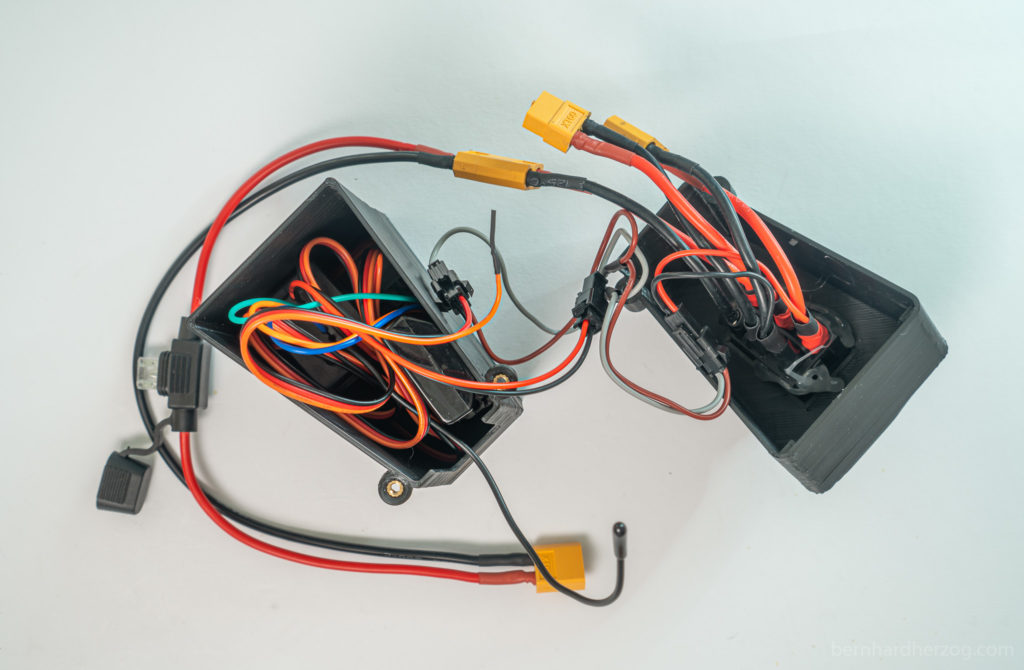
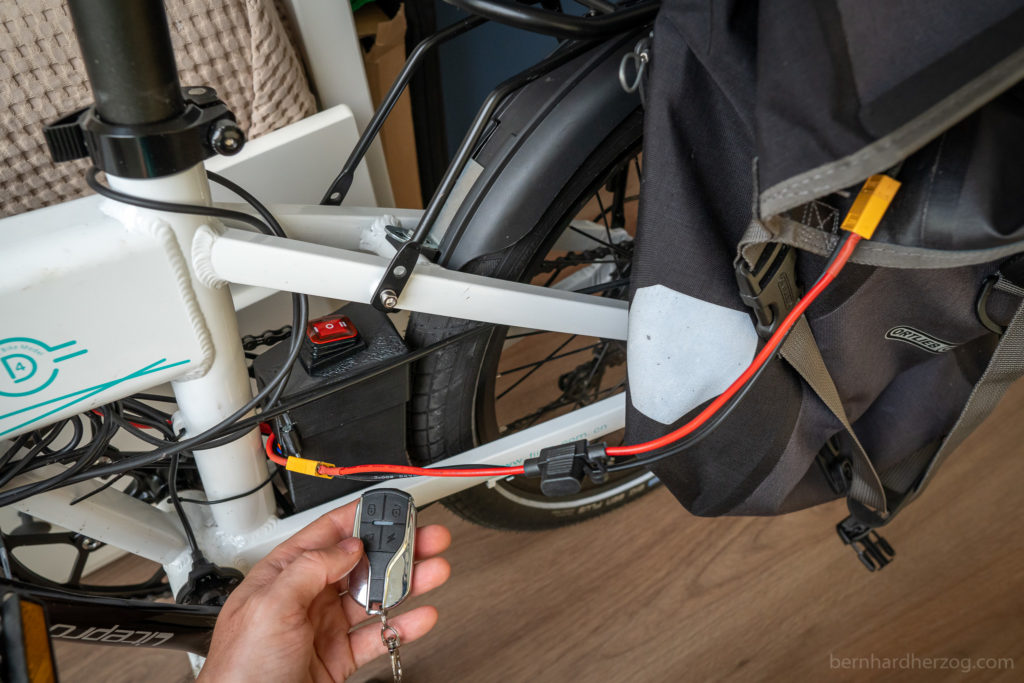
Setup 3: 2 batteries in parallel on the rear rack
Setup 2 is perfect for commuting. The external battery is for emergency only if the internal one fails (so I don’t show up late to work). I don’t need the rear rack and can save weight.
For longer bike trips I still wanted to use 2 batteries in parallel. That way I can cover more distance when compared to just using one battery after another. Also I had the problem that because of my stronger controller the single weak Liitokala battery turned off on the mountains. Two batteries in parallel can output more Amps.
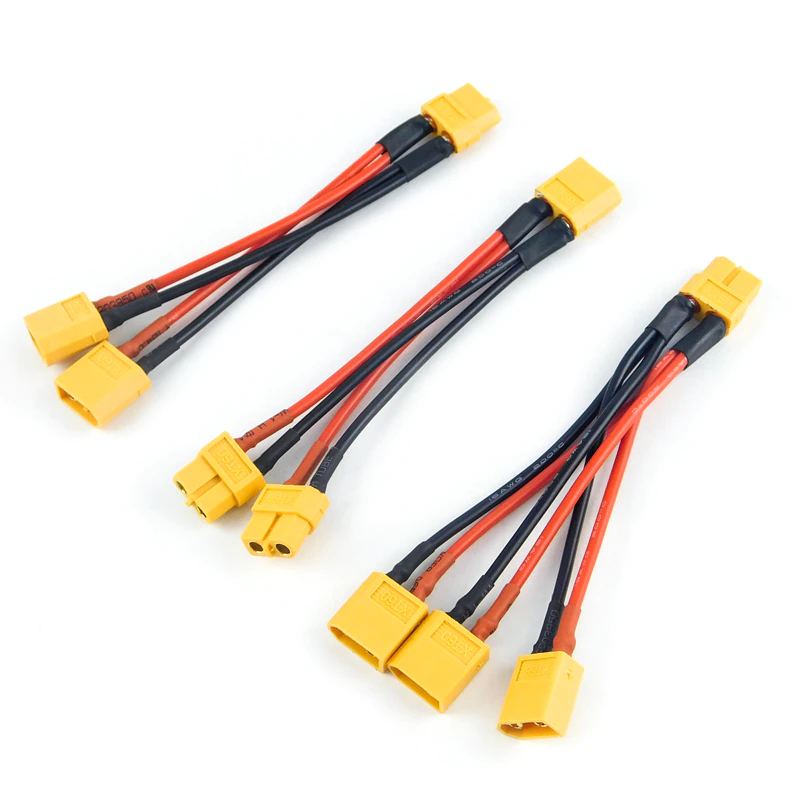
This time I was to lazy for soldering so I simply bought a parallel adapter off of Amazon:
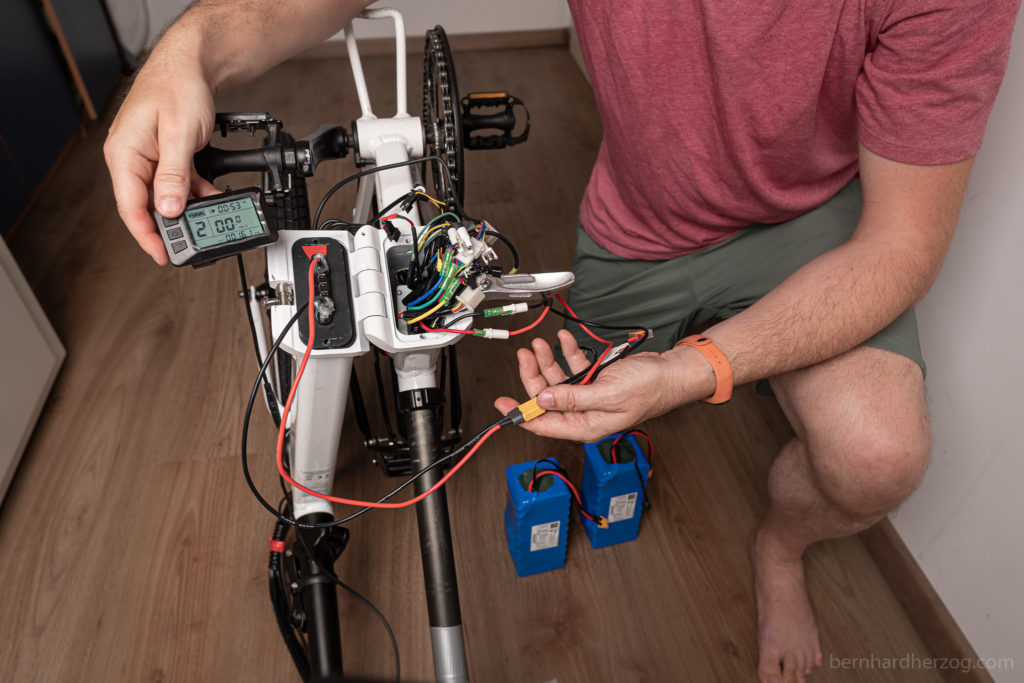
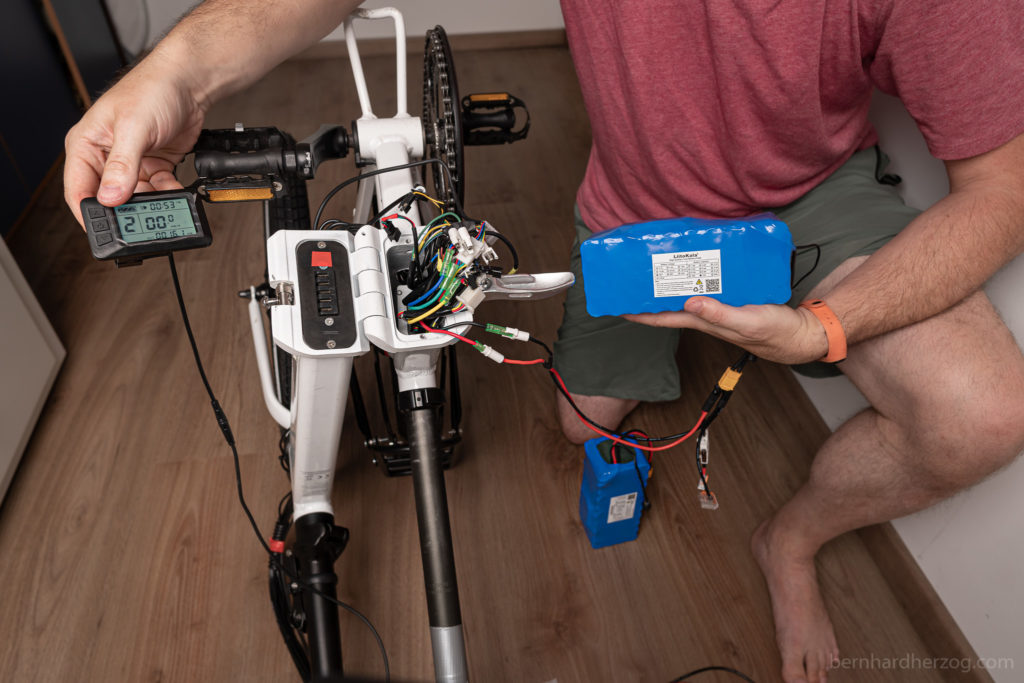
I had to charge the batteries sepearte so that they are on the same Voltage:
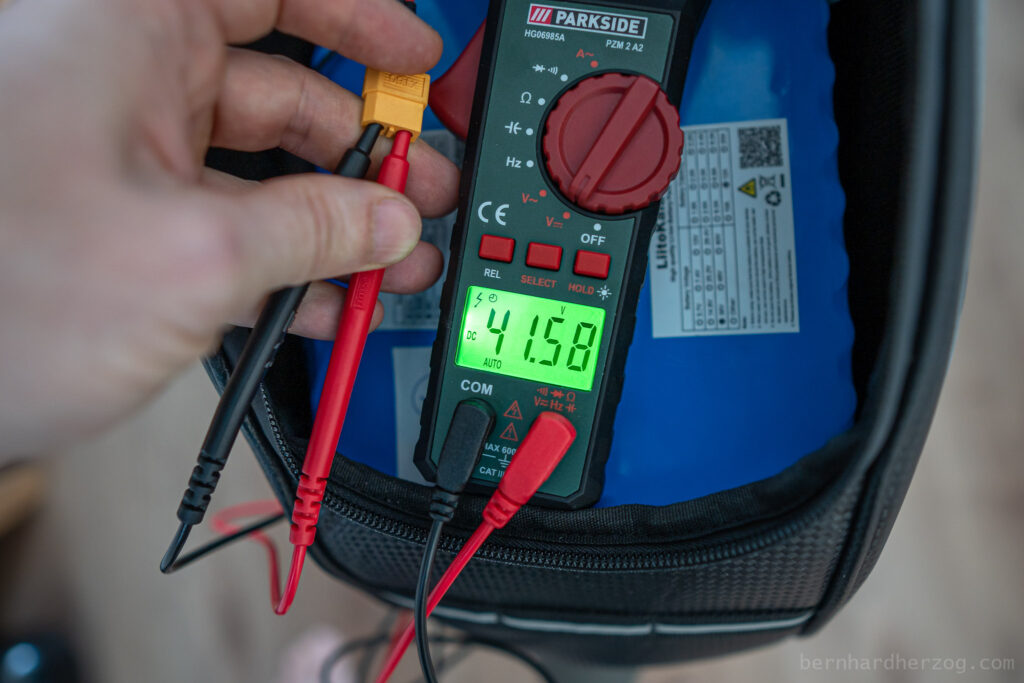
Theh difference should not be too high when using them in parallel because otherwise one battery will start to charge the other one. I measured 41.39 and 41.65 Volts which should be fine.
As I said in the beginning I do not plan to use the internal in parallel to the external battery/batteries (to conserve the internal battery). Right now this is actually impossible because of my design with the switch, I can only switch between the internal and the external battery.
About charging: I could charge both batteries in parallel. But for safety I plan to unplug the parallel connection and charge them separate. This is because when charging in parallel the second battery has now overvoltage protection (because it is charged through the discharge port). Also charging the batteries with 2 chargers is faster. 😉
Parallel Y-Cable XT60 @ amazon anmeilu trunk bag @ Ali (I have the leather one) anmeilu trunk bag @ amazon
Conclusion
I hope my tutorial was helpful for you. If you have any question please don’t hesitate to leave a comment. Then I see that my work is helping someone. Have fun!
Recommended camera equipment for photo, video & travelling (AMAZON):
Sony a6600
Sony a6400 (cheaper)
Sony a6100 (Budget-Option for 4K)
Sigma 16mm 1.4
Sony 35mm 1.8
Samyang 12mm 2.0
Feelworld Master MA7
Smaller monitor
Rode VideoMicro
Rode Wiress Go II
Mini Tripod
Travel Tripod
Small LED-Light
Light #1 (powerful)
Light #2 (Bi-Color)
Softbox for this light
Light tent/box
DJI Osmo Action
GoPro 9
GoPro MAX
Invisible Selfie Stick
Mavic Mini 2 drone
Mavic Air 2
for photo and video:
Fuji XT-4
Fuji Telezoom
Entry level camera (Canon)
*Affiliate Links. From everything you buy I will receive a small kickback that helps me maintain my channel. THANK YOU for your support!
This post is also available in Deutsch.
Leave a Reply